
1966 Volvo Amazon - Crazy hot rod and track car
-
blackskygtr
- Posts: 632
- Joined: Fri Oct 13, 2006 9:55 pm
- Location: Norwich,Norfolk
A long day..
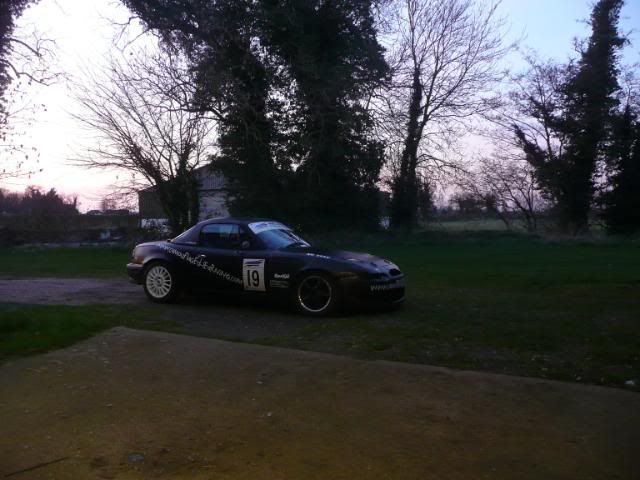
Spent quit a while at the workshop today, so will have to keep this update fairly short. Captain Muppets new roll cage almost done. Just 2 more brackets to make and weld in one evening in the week. Forgot to take any photos of the build up, but here is one of the car at the day, for those that liked it:
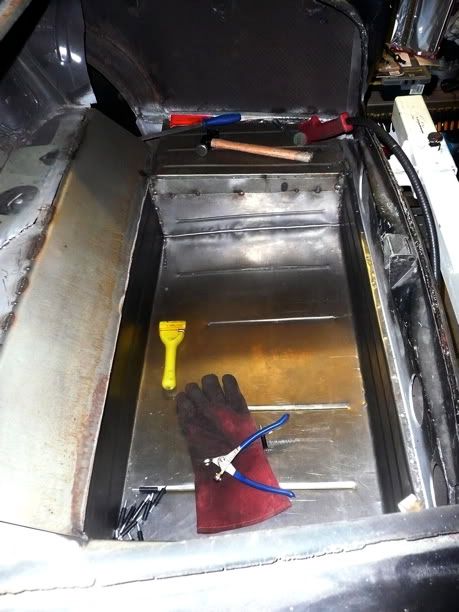
Whilst I got him to do a lot of the work on that, and just helped where needed I got a fair bit done on the transmission tunnel and bulkhead, until I ran out of time and steel. What was:
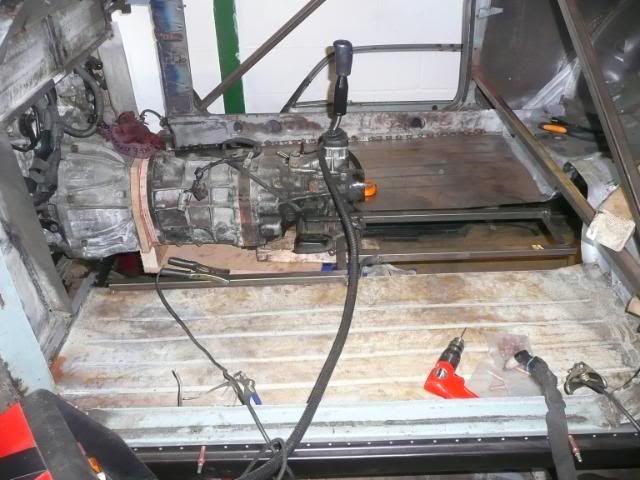
Became:
The bump with the heat marks in the bulkhead is clearance for the harness that goes around the back of that head. The engine is that far back. I got to use the sand bag and make a lot of noise so it was doubly rewarding
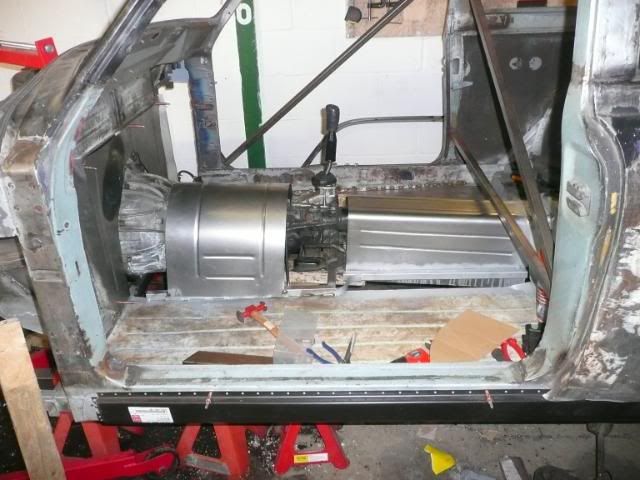
Whilst I got him to do a lot of the work on that, and just helped where needed I got a fair bit done on the transmission tunnel and bulkhead, until I ran out of time and steel. What was:
Became:
The bump with the heat marks in the bulkhead is clearance for the harness that goes around the back of that head. The engine is that far back. I got to use the sand bag and make a lot of noise so it was doubly rewarding


Bless you 
Looks like you had a very productive day.......did Dave like my paintjob?
Looks like you had a very productive day.......did Dave like my paintjob?
http://www.auto-genie.co.uk
07733 527430
stuart@auto-genie.co.uk
Valeting, detailing and undersealing
07733 527430
stuart@auto-genie.co.uk
Valeting, detailing and undersealing
mid week proress
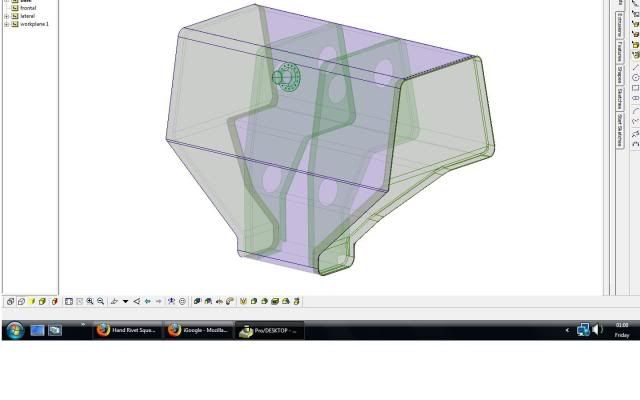
With insomnia this week I made use of the time and designed a fuel tank. I still cant afford a Tig welder, but had another idea. To make a feature of the tank it will be made from poilshed, riveted alluminium ( more inspiration from aircraft, and another skill to learn). It is all drawn up in CAD now, so I could work out the formers I would need to make. It also gives me another reason for new tools, so I bought a load more clekos from ebay and cant find a 2nd hand rivet squeezer so have designed one to make too.
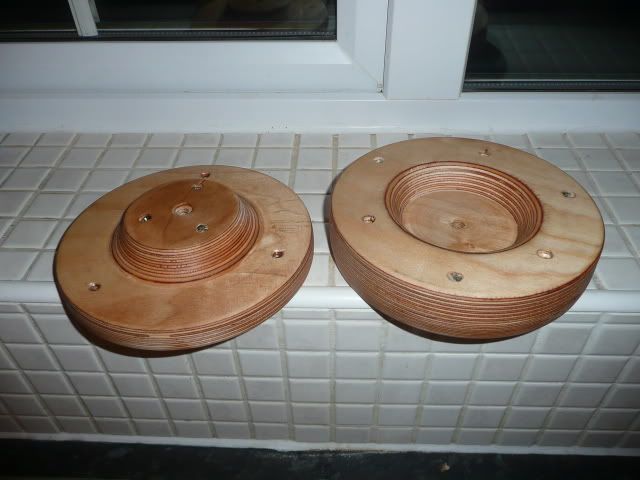
I can't sleep again tonight, so made some mess in the garage this time and just got in from making the first former tool. This one is a giant hole flare from birch ply. I had better call it quits for the night however and stop using the power tools now before the neighbours complain.
The gearbox adaptor CAD is also now completed. It either needs CNC machning or I also have a design that can be made on a water jet cutter from a 30mm ally plate to save cost.
I also have a van loaned tomorrow so I can get more steel and finish the shell. Whilst there I will get the ally for the tank too.
Dave thinks everything should be matt black at the moment. I think he liked the green but was confused why it wasnt still black! The MX5 is loosing the sponsor and event stickers as soon as he has done the events planned this year, so he can go back to plain matt black again.stuart wrote:Looks like you had a very productive day.......did Dave like my paintjob?
little by little
3 days in a row at the unit this weekend again. Motivation is starting to fail though, but whilst it is still going here is this weekends work:
The MX5 was finished and favor returned for the help on the car. Dave still hung around to help me bead roll a boot floor box, which i go in the car on saturday. Without a box pan folder it took a while as it is folded from a single piece of steel, but is nicely finished off and a perfect fit now.
I started making the chassis side of the engine mounts which are also now tacked in, as are transmission mounts. The engine needs to come out again to finish them off, so I will save that and the photos of them until i have finished the tunnel off.
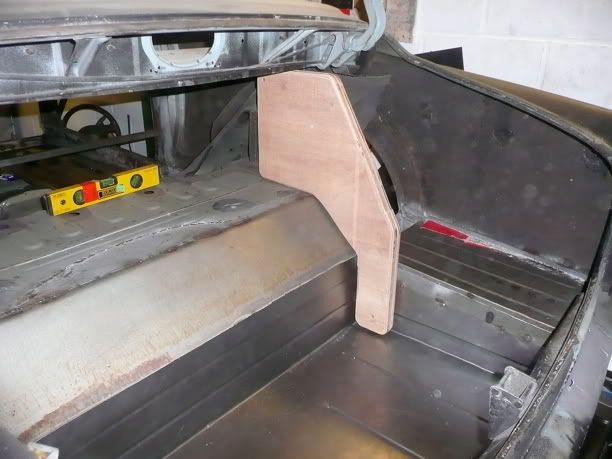
I also started on the formers for the fuel tank, and redesigned it as i did! 120litres was a little excessive anyway, and has been shrunk to just under 100L now. The good bit of the design is no swirl pot will be needed so just the one pump to run too, but it does put the weight higher than I would have liked for a full tank. Still , lower polar moment of inertia than sticking it at the back in that boot floor so it is all a trade off. CAD updated, but here is one of the wooden formers actually in the car.
I am afraid you wont be seeing me take the CRX to a track, as it has been sold to fund some of this build. The good news is that it went to an active Bigpower member so it isnt gone forever. The misses was rather upset to see it go to as she wanted it too. Shame to see it go.
To console myself i spent some of the money on tools (a load more cleko fasteners for the tank), all the suspension bushings I will need from USA, and a giant Aston martin le mans fuel filler. Bloody expensive lump of bling, but it is going to look damn good on the car once I have made the panel it goes on.

With motivation struggling now I might take a few weekends off, dunno. In need some inspiration, or a decent milestone in the project to get me going again.
The MX5 was finished and favor returned for the help on the car. Dave still hung around to help me bead roll a boot floor box, which i go in the car on saturday. Without a box pan folder it took a while as it is folded from a single piece of steel, but is nicely finished off and a perfect fit now.
I started making the chassis side of the engine mounts which are also now tacked in, as are transmission mounts. The engine needs to come out again to finish them off, so I will save that and the photos of them until i have finished the tunnel off.
I also started on the formers for the fuel tank, and redesigned it as i did! 120litres was a little excessive anyway, and has been shrunk to just under 100L now. The good bit of the design is no swirl pot will be needed so just the one pump to run too, but it does put the weight higher than I would have liked for a full tank. Still , lower polar moment of inertia than sticking it at the back in that boot floor so it is all a trade off. CAD updated, but here is one of the wooden formers actually in the car.
I am afraid you wont be seeing me take the CRX to a track, as it has been sold to fund some of this build. The good news is that it went to an active Bigpower member so it isnt gone forever. The misses was rather upset to see it go to as she wanted it too. Shame to see it go.
To console myself i spent some of the money on tools (a load more cleko fasteners for the tank), all the suspension bushings I will need from USA, and a giant Aston martin le mans fuel filler. Bloody expensive lump of bling, but it is going to look damn good on the car once I have made the panel it goes on.
With motivation struggling now I might take a few weekends off, dunno. In need some inspiration, or a decent milestone in the project to get me going again.
break time
Not a lot to post on this project now as the Silvia has stolen my attention briefly (Topic here). But i have done a little design work, and been sourcing some parts. A few new tools came in ( rivet guns, rivet squeezer and some Mil-spec rivets) to make the fuel tank, so i did spend a few hours staring on the alluminium. I have made baffles and started bending up the outside, but I need to get more ally to make the end plates and spin the inlet. Will take pictures next time as it starts coming together.
The only new part to arrive is my full suspension bushing kit for the states. Even with the weak
The only new part to arrive is my full suspension bushing kit for the states. Even with the weak