How big and heavy is the gearbox?
I'm passing Manchester in the next few days and if it'll fit in the back of the Xantia, alongside a few tool boxes, I could get it a bit nearer for you.
1966 Volvo Amazon - Crazy hot rod and track car
That would be brilliant! It is just a regular 5 speed box from an old supra turbo, so isn't big. I managed to lift the huge auto off myself. It was an Ebay purchase so have asked the seller to measure it to be sure. The box is actually located in chapel-en-le-frith, approximately 25 miles south of manchester if that is on your route. Thanks Gerry.Gerry H wrote:How big and heavy is the gearbox?
I'm passing Manchester in the next few days and if it'll fit in the back of the Xantia, alongside a few tool boxes, I could get it a bit nearer for you.
There are 3 new 500W bulbs are in the boot of the Jag. You can pick them up if you want or I can leave them somewhere for you to pick up if you need them tomorrow. You know are also welcome to borrow the Jag for some luxury anytime I don't need it.stuart wrote:Nice update
Thank God for more bulbs, I need them for heat Smile
If you want or need to use a vehicle for the gearbox collection, let me know. Any excuse to roar around in the Jaguar!
mini update
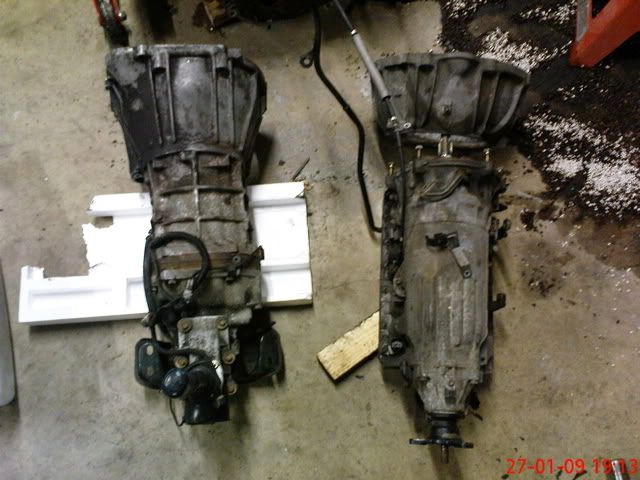
Well, I got the gearbox and offered it up to see how I am going to make it fit the V8.
I know there are Aftermarket conversion kits available, but they are damn expensive and this is quite a unique application, so I will be engineering my own set up. I have been making templates and measurements of the parts for the conversion so will soon start a CAD model and start the proper engineering.
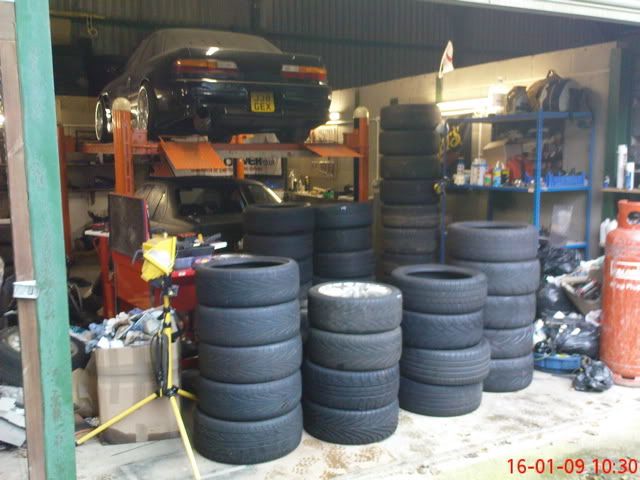
Stu helped clear out the tyres and wheel collection over to the workshop before his hols ( The poor workshop is now overflowing, so there maybe a sale soon of wheels. I don't need all those 4x100 wheels anymore. Most are for my old Honda CRX or the Elise S2 I sold several years ago anyway)
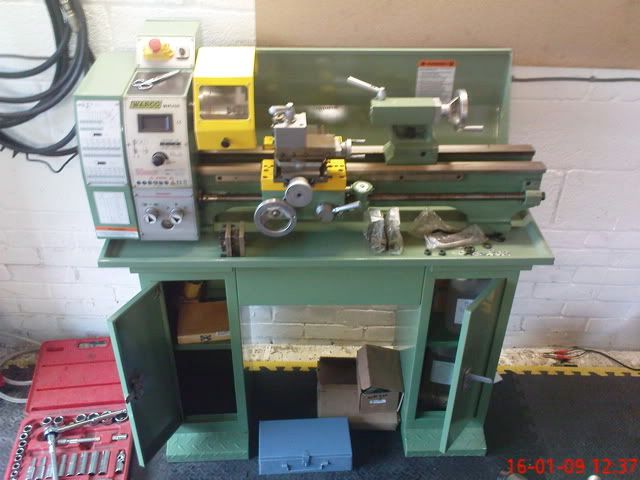
The reason the space was needed, was so some new tools could turn up and I can start my own machine shop. Now i can really start making some of the new parts I designed for this car. I would always rather buy the tools to make something than buy other peoples parts. You then have the tools to make a load of other parts next time. This one was an expensive hit though!
A metal lathe and tooling;
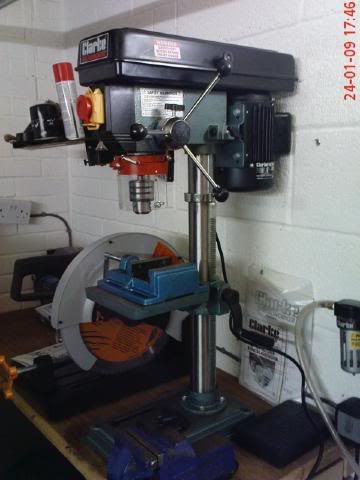
TCT saw, pillar drill and a grinder too for making the lathe tooling:
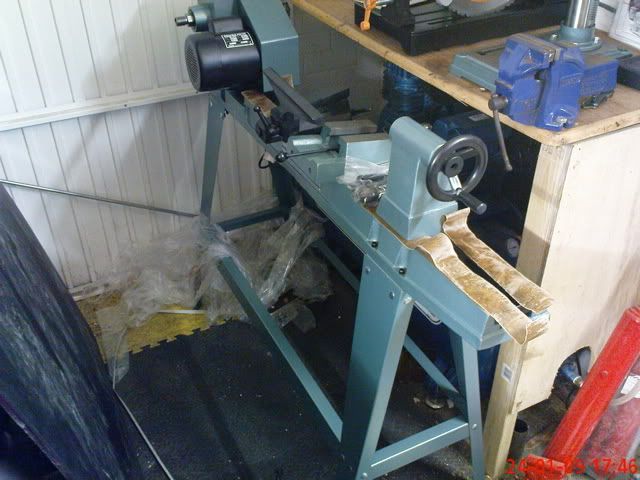
And finally a large wood lathe, which will be converted into a metal spinning lathe to make the various trumpets for the intake system.
I have been making a few tools on the metal lathe, so far and setting up the new purchases, but no parts pictures yet. Plenty of swarf though as I practice on this new bit of kit. The first things I have been making are hole flares for some of the chassis fabrication left, but I have a long list of parts to work through starting with a new steering output shaft for the rack.
I know there are Aftermarket conversion kits available, but they are damn expensive and this is quite a unique application, so I will be engineering my own set up. I have been making templates and measurements of the parts for the conversion so will soon start a CAD model and start the proper engineering.
Stu helped clear out the tyres and wheel collection over to the workshop before his hols ( The poor workshop is now overflowing, so there maybe a sale soon of wheels. I don't need all those 4x100 wheels anymore. Most are for my old Honda CRX or the Elise S2 I sold several years ago anyway)
The reason the space was needed, was so some new tools could turn up and I can start my own machine shop. Now i can really start making some of the new parts I designed for this car. I would always rather buy the tools to make something than buy other peoples parts. You then have the tools to make a load of other parts next time. This one was an expensive hit though!
A metal lathe and tooling;
TCT saw, pillar drill and a grinder too for making the lathe tooling:
And finally a large wood lathe, which will be converted into a metal spinning lathe to make the various trumpets for the intake system.
I have been making a few tools on the metal lathe, so far and setting up the new purchases, but no parts pictures yet. Plenty of swarf though as I practice on this new bit of kit. The first things I have been making are hole flares for some of the chassis fabrication left, but I have a long list of parts to work through starting with a new steering output shaft for the rack.

Re: mini update
Great progress keep up the good work
I may be interested in some of them if I could get them to fit on the BM :-DRPS13 wrote:I don't need all those 4x100 wheels anymore.
Rob
I spent this weekend playing with a few other cars but still got a few bits done.
Started organizing the tyres so there was space for Stu to get to his car when back:

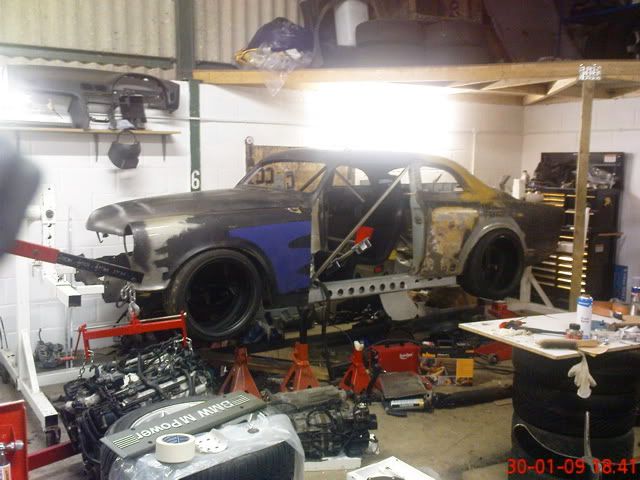
With that done, I had to offer a couple up to the car, and some front end body too:
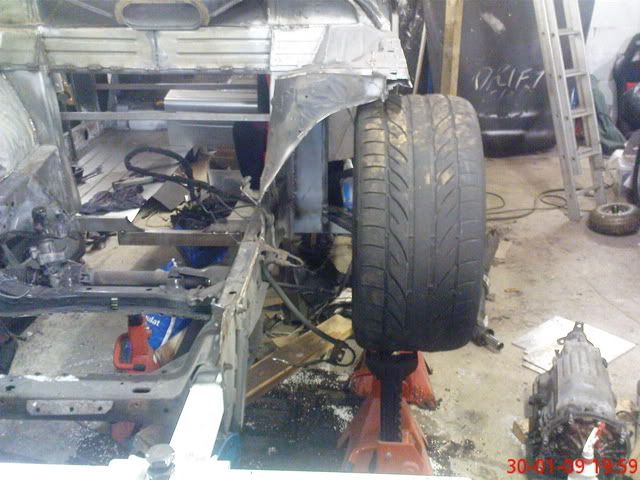
I have aspirations of some serious tyre width under this car. the 275s didnt really fit at the front. The dampers need to go right through them if they are to fit in the wing
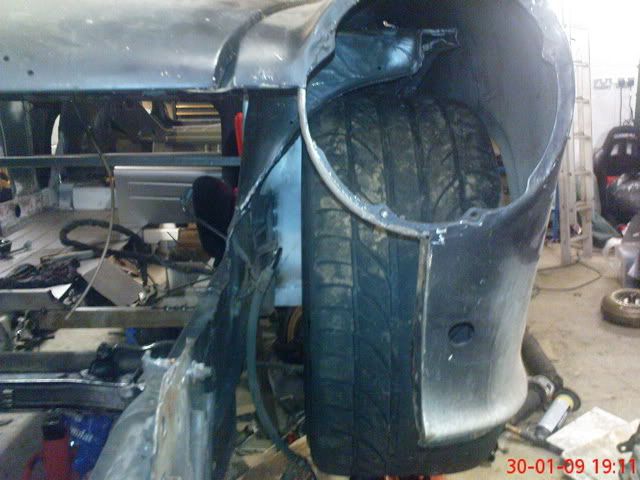
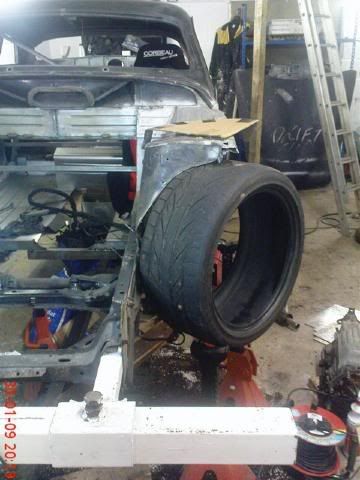
The back was a little better but i was expecting to have to do some work on the rear arches and tub the wheel wells. right now even a 225 doesnt fit without rubbing.
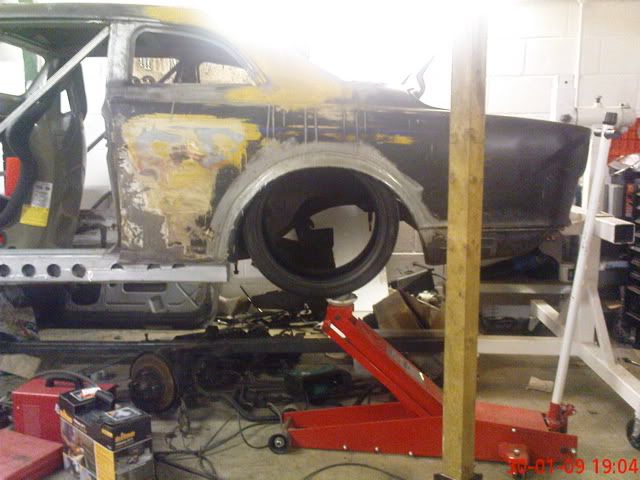
So i need to work out how to get the front tyres out a fair way and seeing what i am realistically going to be able to use. Of course i also want lots of steering lock. I have ordered some new front subframe bolts so i can assemble the front end and try this out properly:
However they don't turn up till later this week and it was damn cold. So i trimmed the front chassis ready for new wheel wells to be made and fitted, then ran home to the warm, but did take a few bits to work with. With the engine set back and different bulk head location I need to modify the steering system substantially. Starting at the rack and working back the next link needed lengthening quite a bit. So first, I cut it in half:
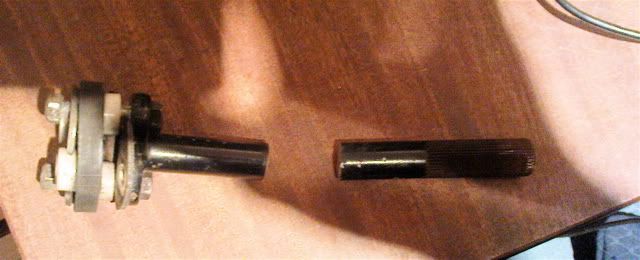
Then modified the splined end in the lathe and made an extension piece with a tight fit.

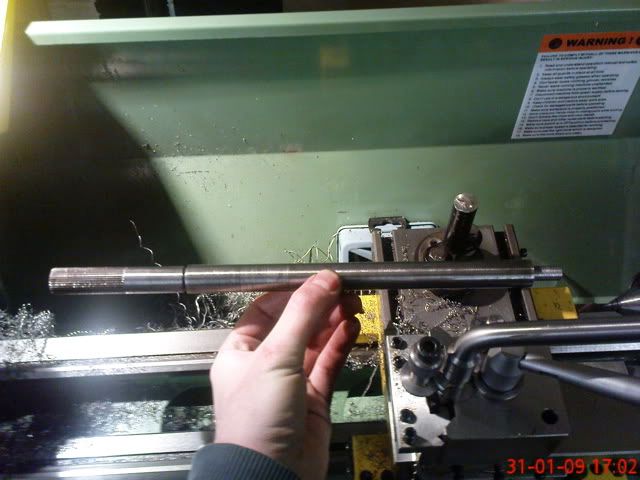
The other end could not fit in the lathe without making a jig, but some careful lining up in the pillar drill and i managed to center drill it for the extension. And the end result ready for welding:

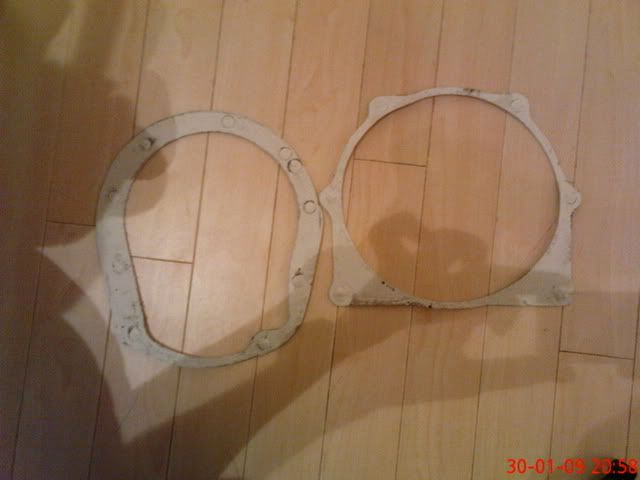
I started measuring up the belhousings too to work out how best to adapt the new box, but the R154 came off a car with a nasty engine leak so was a mess. Even caked in Mr Mussel it is still a mess. I did get a couple of templates made though to play with before i go back and atack the layers of crud on the ijz belhousing again.
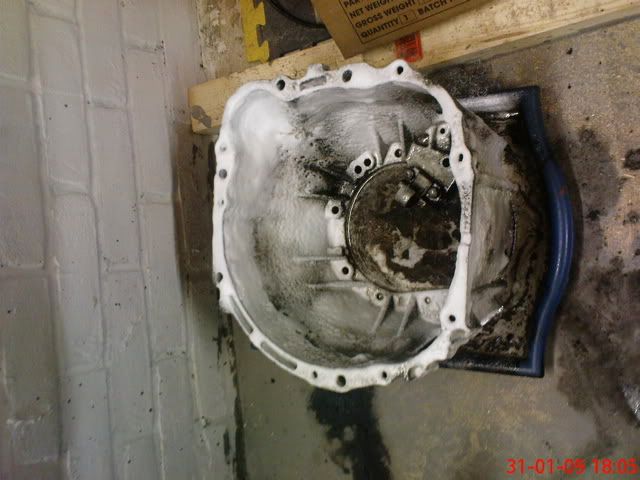
I am still not sure if i should use the 1uz bellhousing with an adaptor to the box, or the 1jz housing with a block adaptor. The later way means it is easier to swap to a V160 6 speed if i ever want to, and have more bolts and dowels going to the box, but is the messier solution. I will probably end up designing both before i decide.
Started organizing the tyres so there was space for Stu to get to his car when back:
With that done, I had to offer a couple up to the car, and some front end body too:
I have aspirations of some serious tyre width under this car. the 275s didnt really fit at the front. The dampers need to go right through them if they are to fit in the wing
The back was a little better but i was expecting to have to do some work on the rear arches and tub the wheel wells. right now even a 225 doesnt fit without rubbing.
So i need to work out how to get the front tyres out a fair way and seeing what i am realistically going to be able to use. Of course i also want lots of steering lock. I have ordered some new front subframe bolts so i can assemble the front end and try this out properly:
However they don't turn up till later this week and it was damn cold. So i trimmed the front chassis ready for new wheel wells to be made and fitted, then ran home to the warm, but did take a few bits to work with. With the engine set back and different bulk head location I need to modify the steering system substantially. Starting at the rack and working back the next link needed lengthening quite a bit. So first, I cut it in half:
Then modified the splined end in the lathe and made an extension piece with a tight fit.
The other end could not fit in the lathe without making a jig, but some careful lining up in the pillar drill and i managed to center drill it for the extension. And the end result ready for welding:
I started measuring up the belhousings too to work out how best to adapt the new box, but the R154 came off a car with a nasty engine leak so was a mess. Even caked in Mr Mussel it is still a mess. I did get a couple of templates made though to play with before i go back and atack the layers of crud on the ijz belhousing again.
I am still not sure if i should use the 1uz bellhousing with an adaptor to the box, or the 1jz housing with a block adaptor. The later way means it is easier to swap to a V160 6 speed if i ever want to, and have more bolts and dowels going to the box, but is the messier solution. I will probably end up designing both before i decide.
You even managed to make a shadow puppet of a dog. Ha ha.
I do love this project mate. And your engine choice is exactly what I intend to use one day (so keep the templates for the bell housing adaptors, you may get an order for another.)
Keep it up mate. :thumb:
I do love this project mate. And your engine choice is exactly what I intend to use one day (so keep the templates for the bell housing adaptors, you may get an order for another.)
Keep it up mate. :thumb:
If it wasnt airbourne, you wernt going hard enough