Anyway, here it is, its a LONG thread, so grab a coffee....
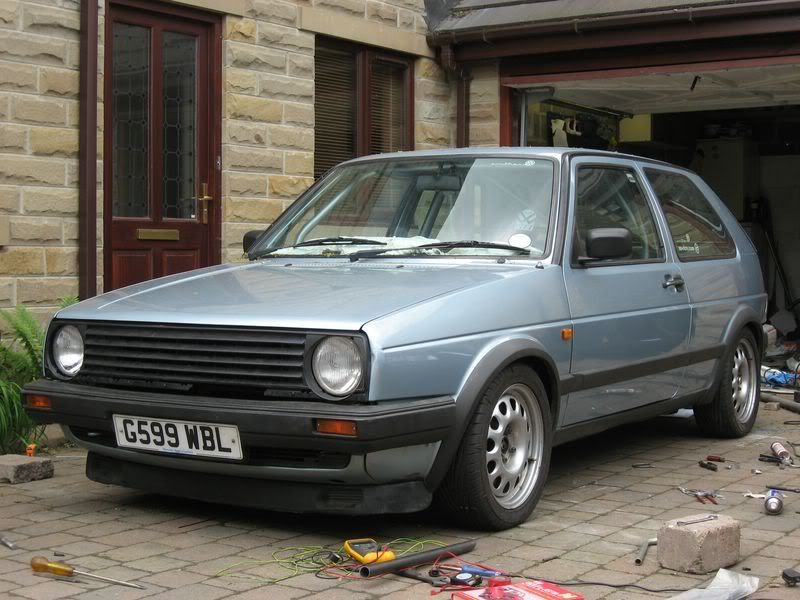
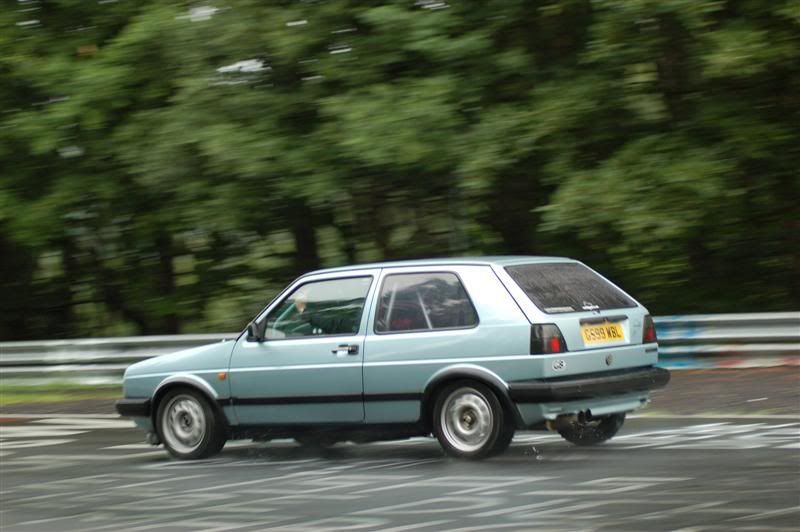
My previous Golf died at the Nurburgring over Easter..
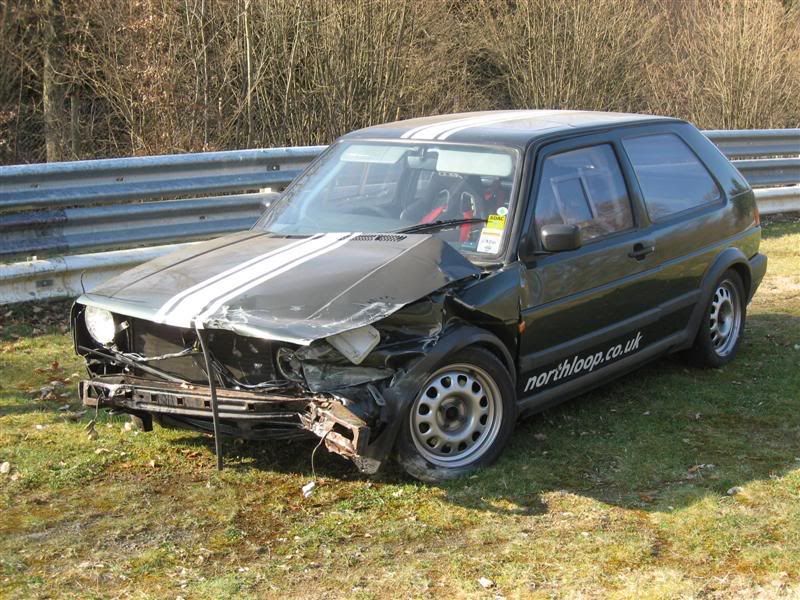
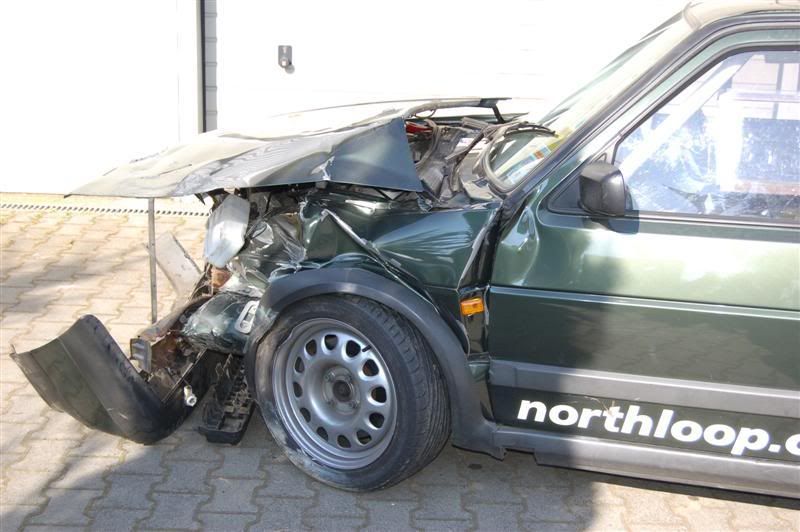
The chassis was not repairable, so I decided to do a transfer of all the bits into a new shell. (I`ve never done anything of this scale before, so its a massive undertaking for me !!).
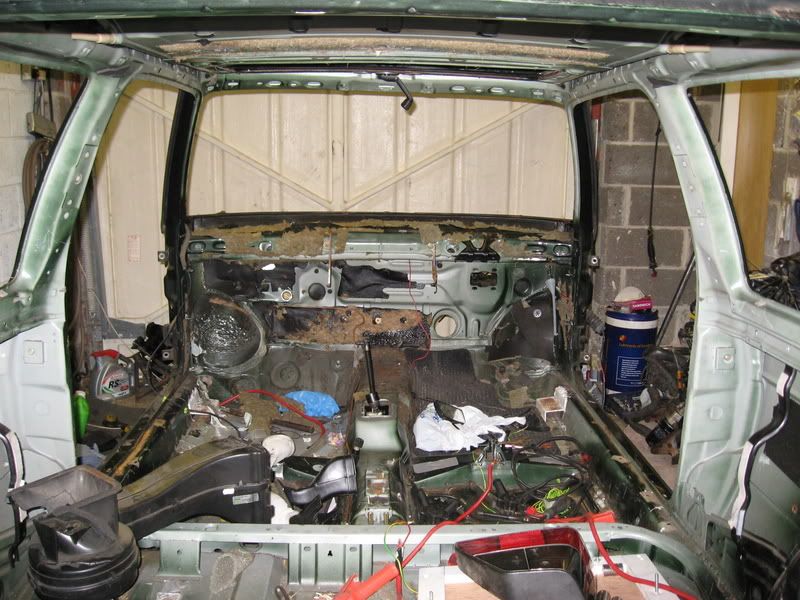
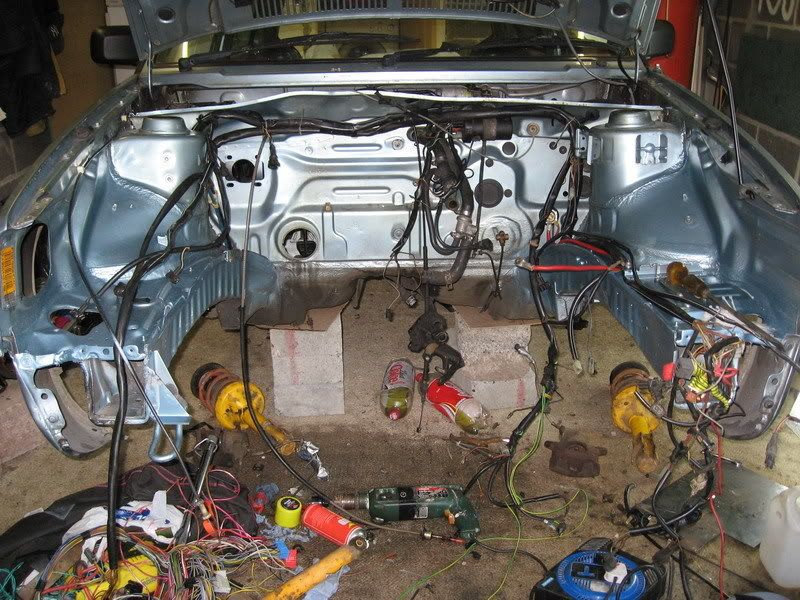
I stripped EVERYTHING off the old shell, I wasnt sure what i`d need, so better safe than sorry !
To make access easier, I pushed it onto its side when it was nearly finished.
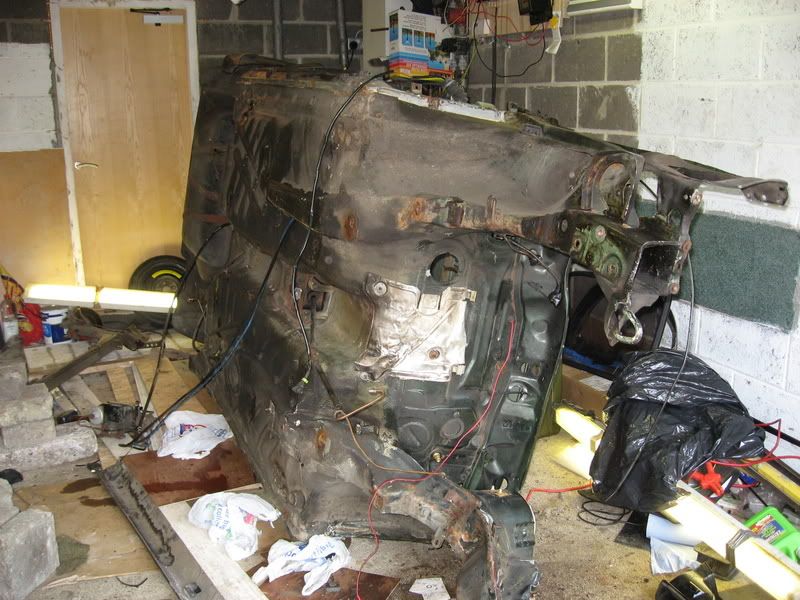
Took the old shell to the scrapyard for disposal.
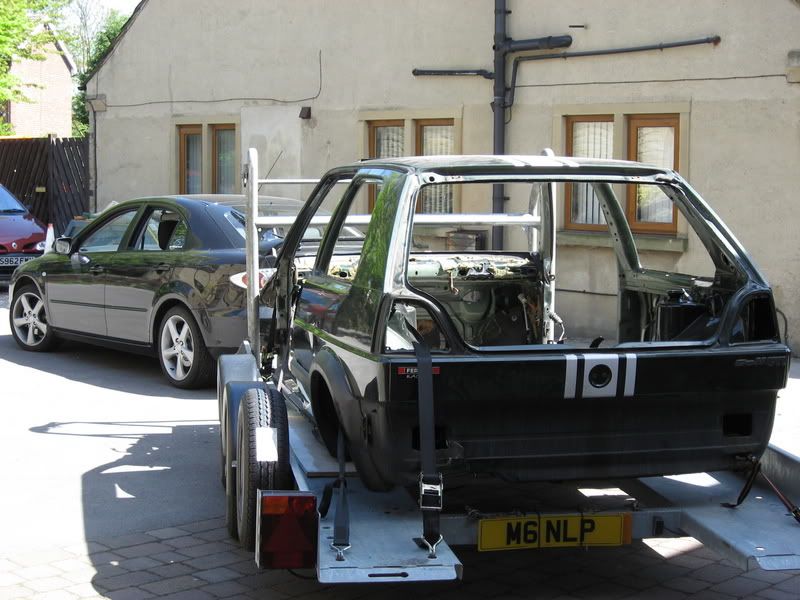
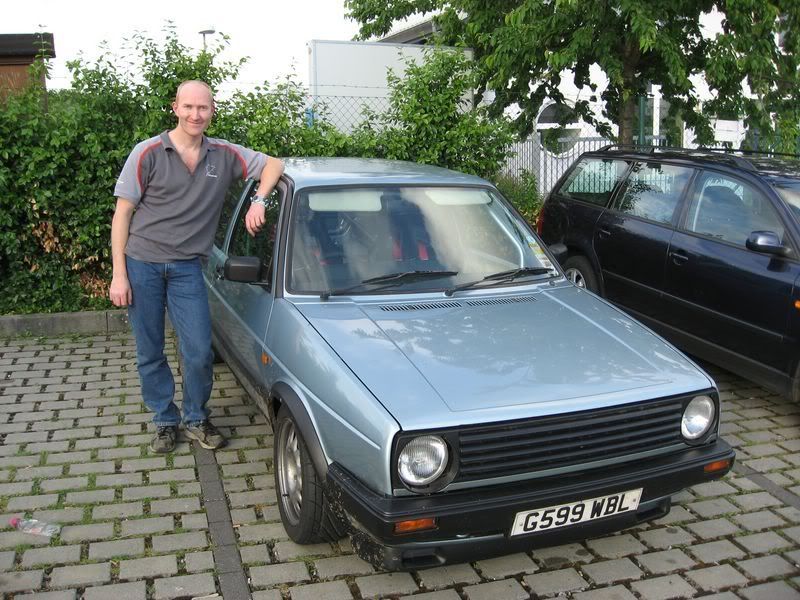
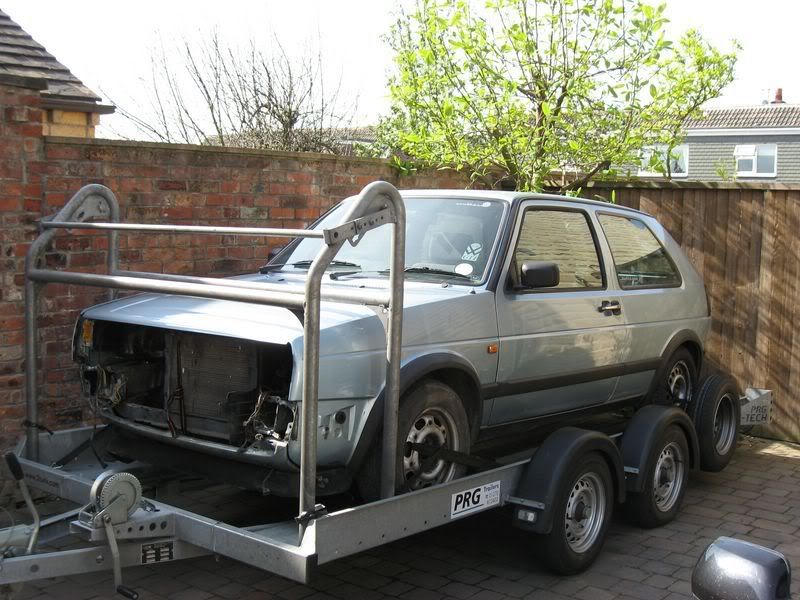
The donor is a mint MK2 CL shell. Unfortunately, that meant the wiring loom was different and so everything needed changing over :?
I collected it from south of Gatwick, which meant a long drive there and back with trailer in the day, but it was worth it.
I have a tight schedule for this project, I need to have the car finished for the end of May to go back to the ring !
Old Engine removed :thumb: . It went very well, would be easier with a proper hoist, but some scaffold, angle iron and a block and it was out quite easily. As I`ve read in many golf threads, the easiest way to remove this engine is to jack up the car, support the engine and then remove the front crossmember, its only 6 bolts, then you can lower the engine onto the floor, there are a couple of benefits from this, you dont need to lift it as high, there is less likelihood of scratching the bodywork and its easier & safer.
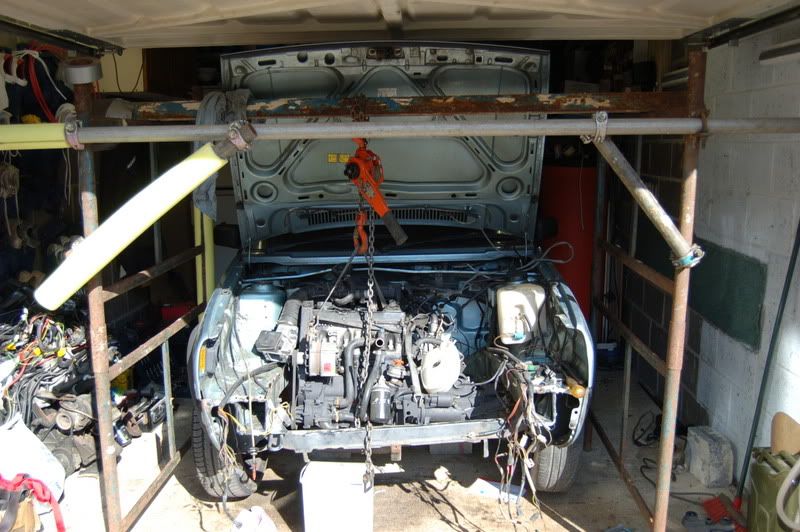
Engine is now out.
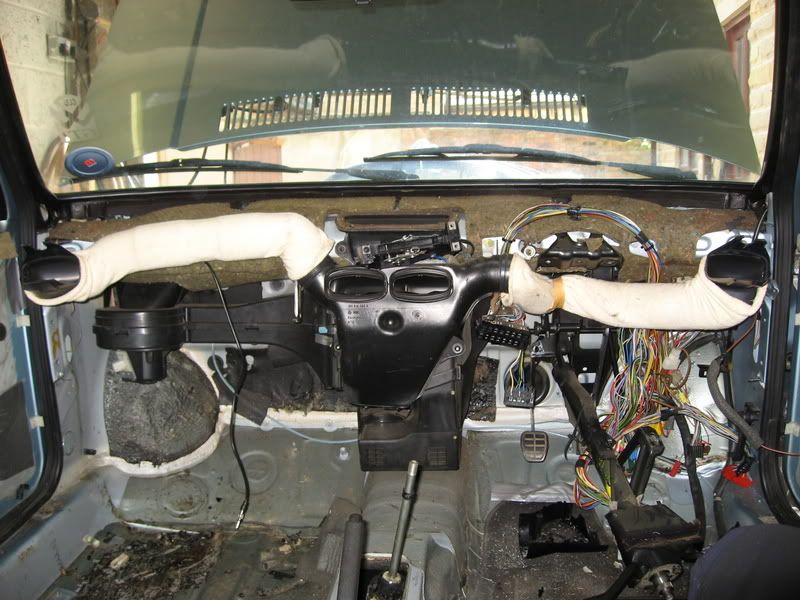
I`m going to move onto the Dash, I`ll remove that and then I can remove the old wiring look, ready to fit the new one.
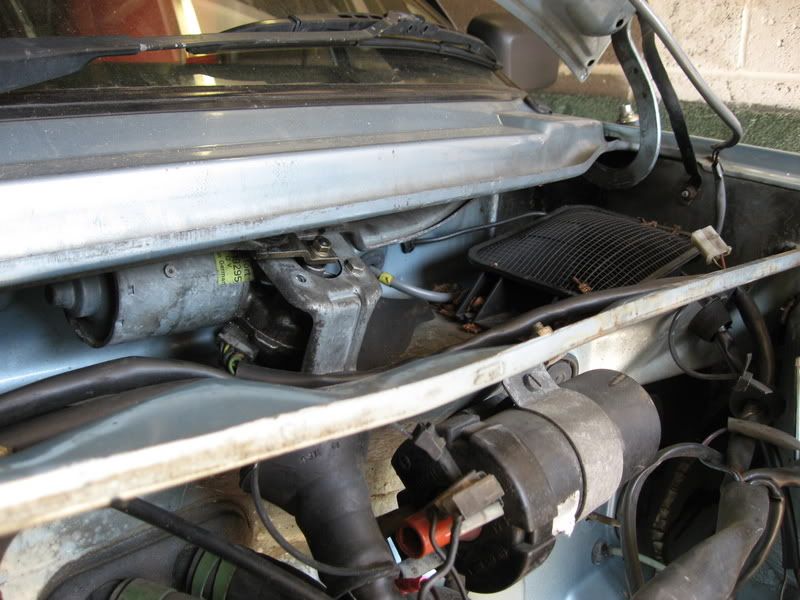
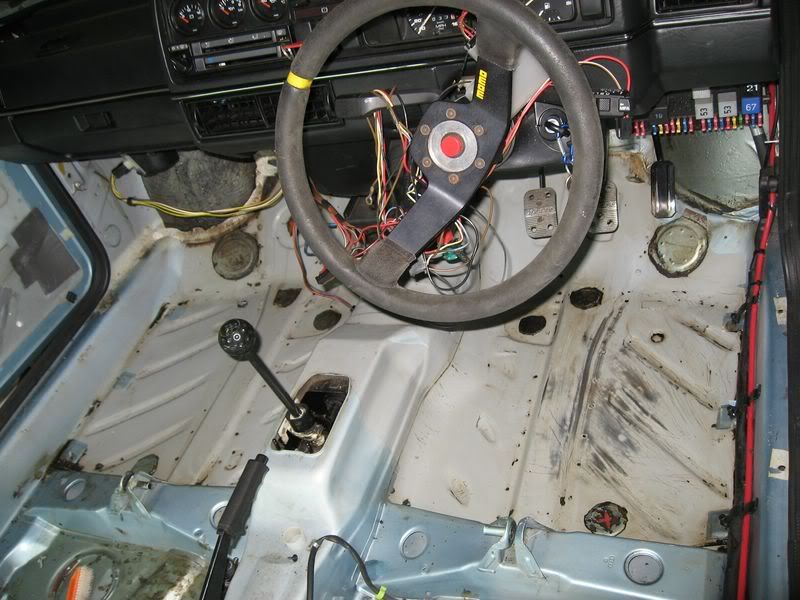
Removed the dash, if you know what to do its easy, if you dont, its a bugger. 7 bolts, sounds easy, but 4 are well hidden in the engine bay. Remove the 3 bolts in the cabin, one at each side and one just next to the steering column, they are pretty obvious.
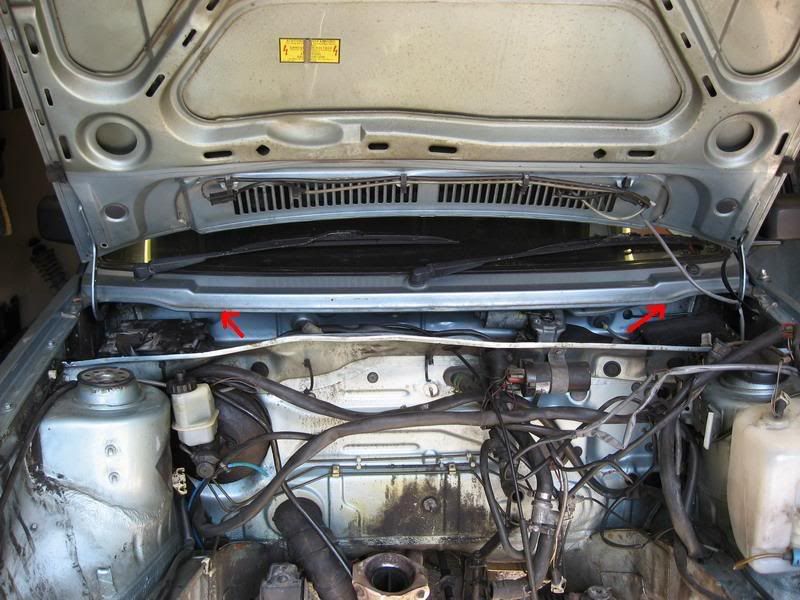
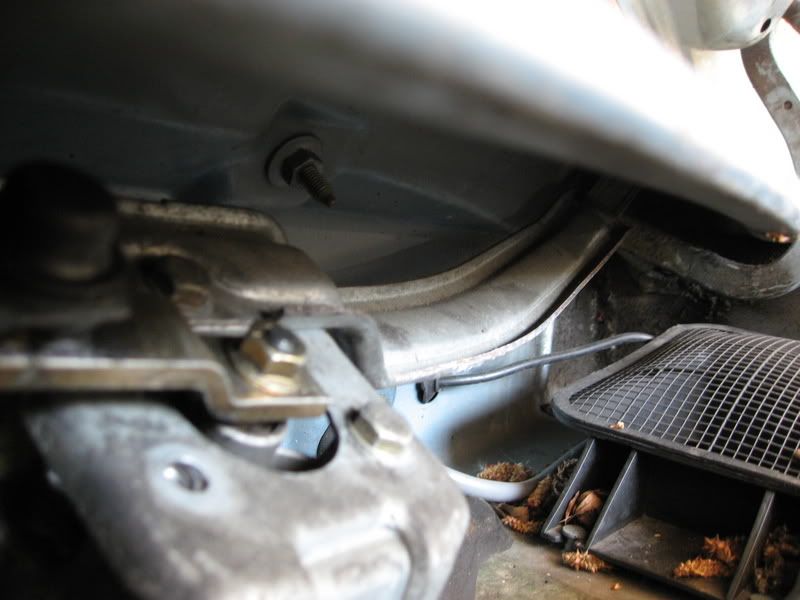
If you now look where the arrows are pointing, you`ll see 2 more nuts that require removing.
Look towards the wiper motor
Now if you look under the scuttle tray, near the windscreen, there is a hidden bolt, remove the blighter.
Above the master cylinder, next to the ecu, look under the scuttle tray again
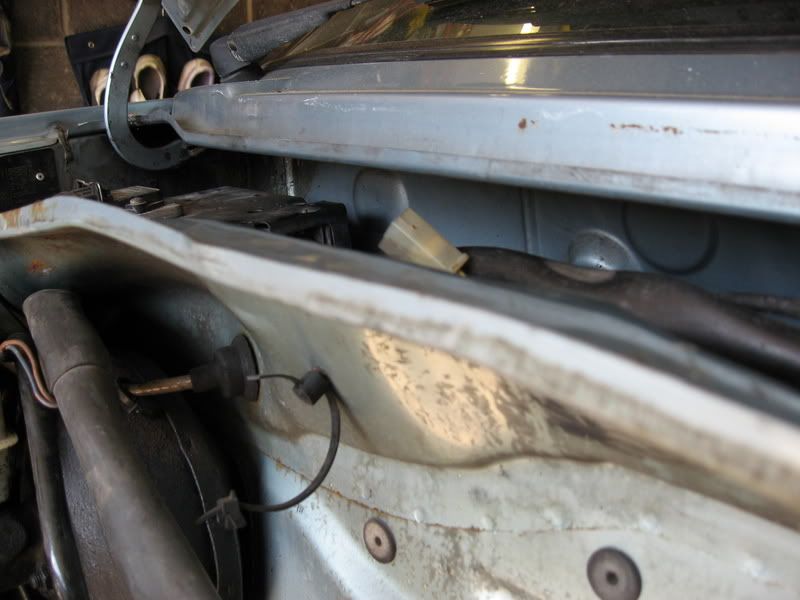
Another bolt...
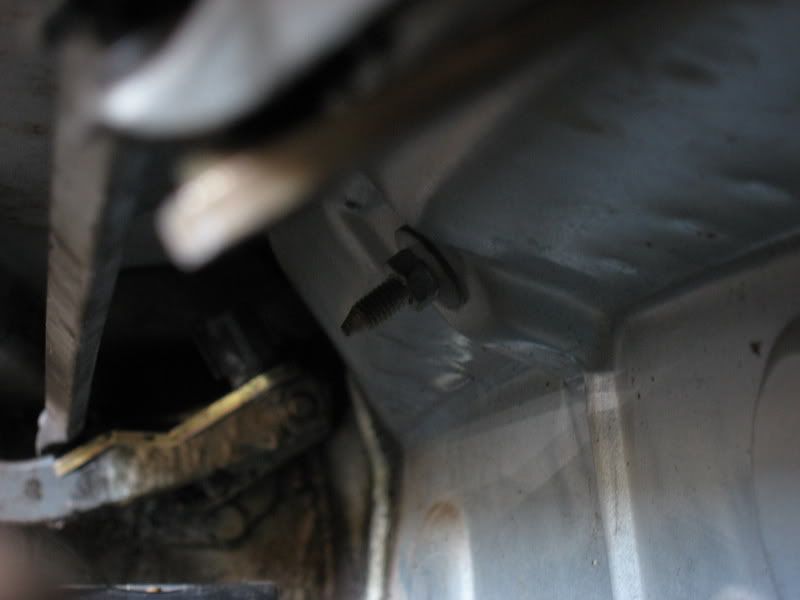
Remove those and the dash lifts out easily.
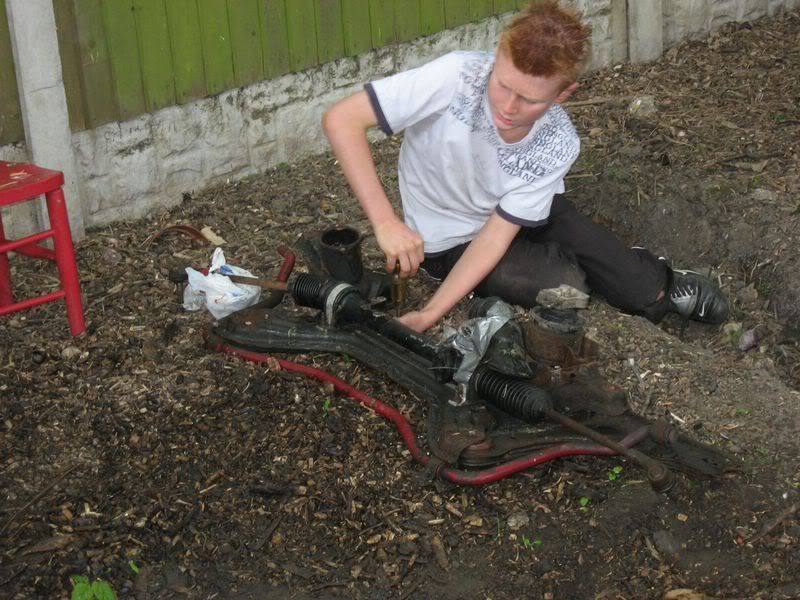
After removing the Engine and Dash, I removed the Master Cylinder and servo, that gives easier access to the wiring loom. Started removing the loom and Chris, who had phoned earlier with an offer of help turned up.
We removed the front subframe and then removed the wishbones ready for polybishing and removed the old steering rack. I`m fitting the rack from my old golf, its a quicker rack and better suited to track use.
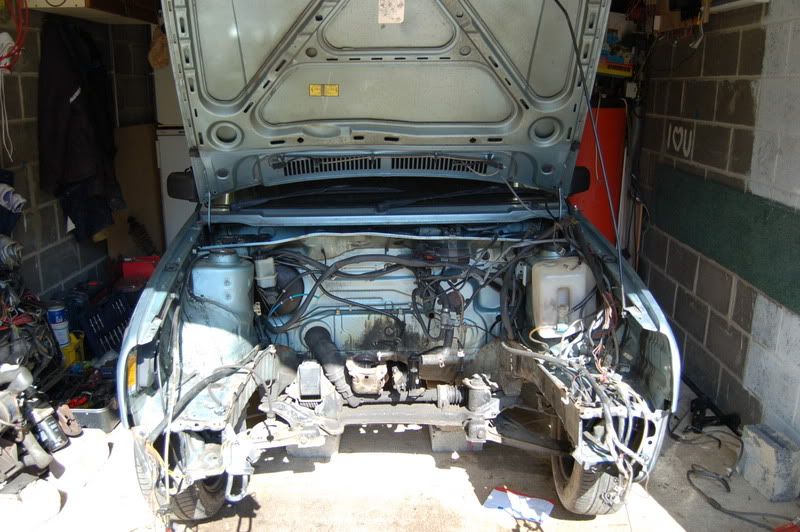
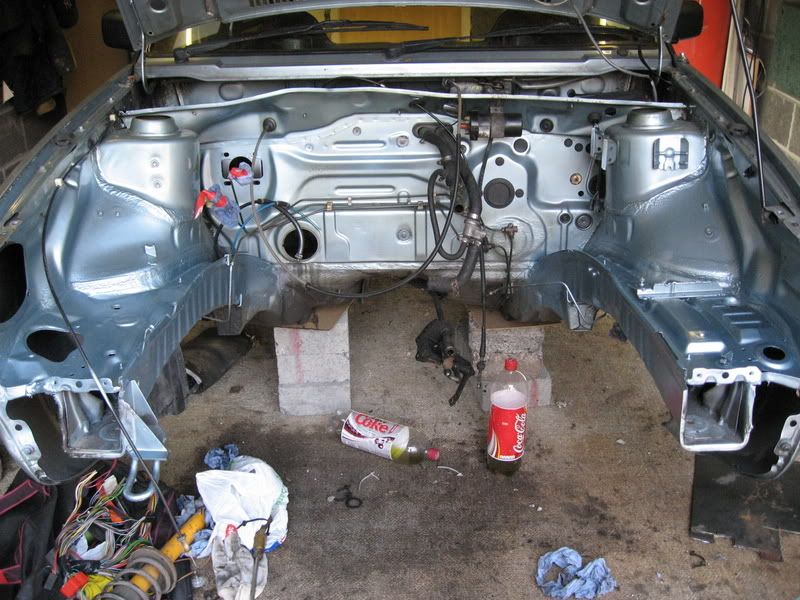
Once finished, the view under the wheelarch was quite bare...

Chris had to leave, so I finished removing the wiring loom and some sound insulating material so save those precious grams. The dash is fully stripped and ready to be re-wired tomorrow.
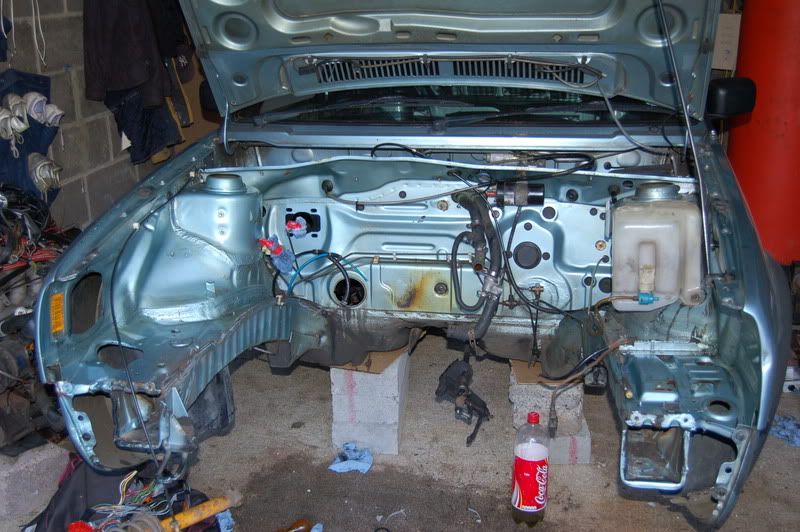
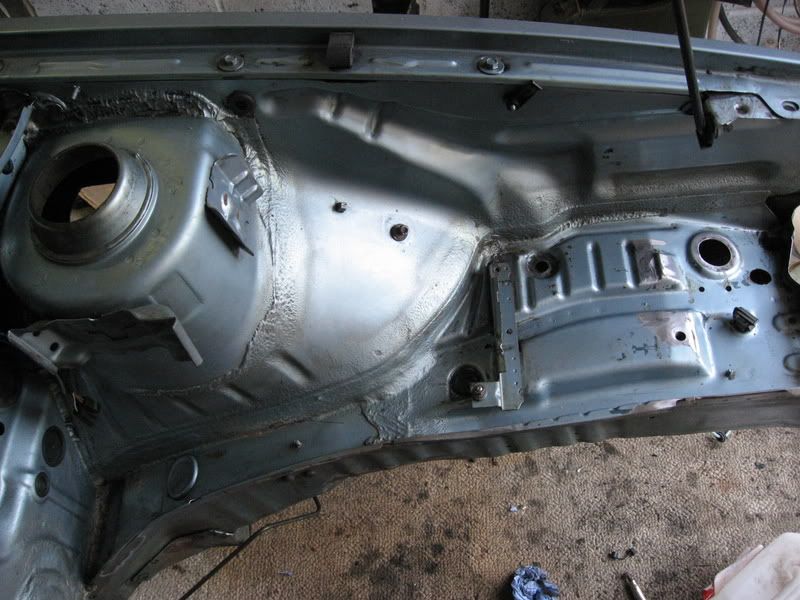
I am tidying the engine bay before refitting my engine. I want to treat any obvious rust so Louise and I set about cleaning the bay with some rag and white spirit.
Before
After (well, nearly after, will be a bit cleaner tomorrow..)
Its not 100% finished, so I`ll do that tomorrow. I have a wire brush attachment for the battery drill and I`m going to remove any rust with that to bare metal, prime it and then paint it the same colour as the rest of the engine bay.
A long day at it today, started late, but only finished at 10pm :blink:
Anyway, decided to finish off the engine bay then I can start putting the loom and brake pipes back in.
After a partial clean yesterday, we had done the drivers side and part of the bulkhead..
Some vigorous cleaning with white spirit removed the grease, oil and other muck, here is the nearside inner wing before cleaning
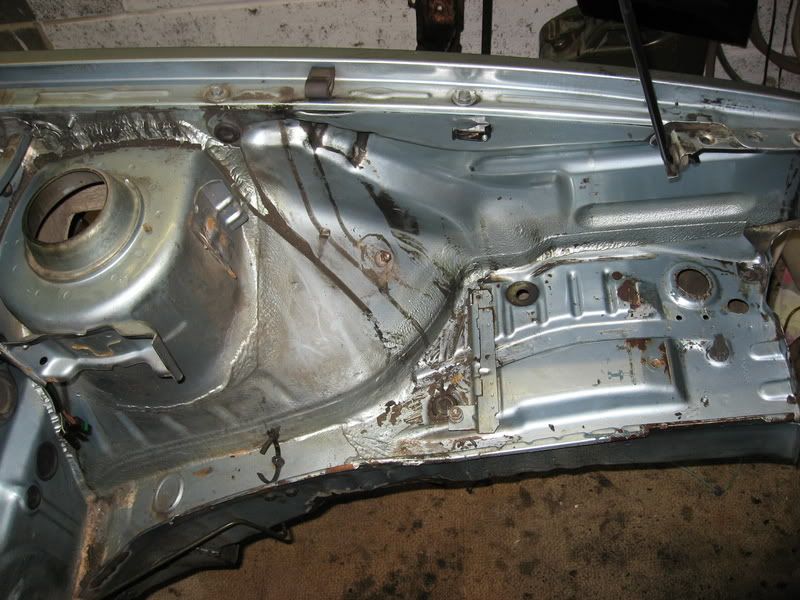
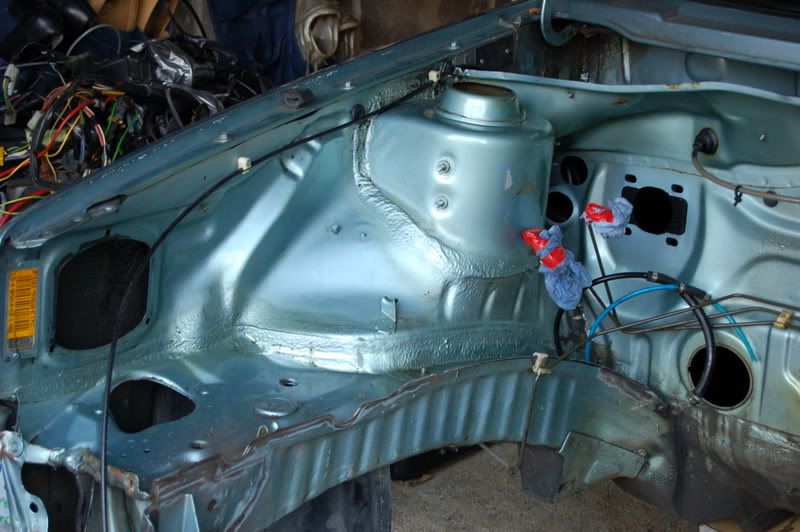
After cleaning
I then removed any rust I could find back to bare metal
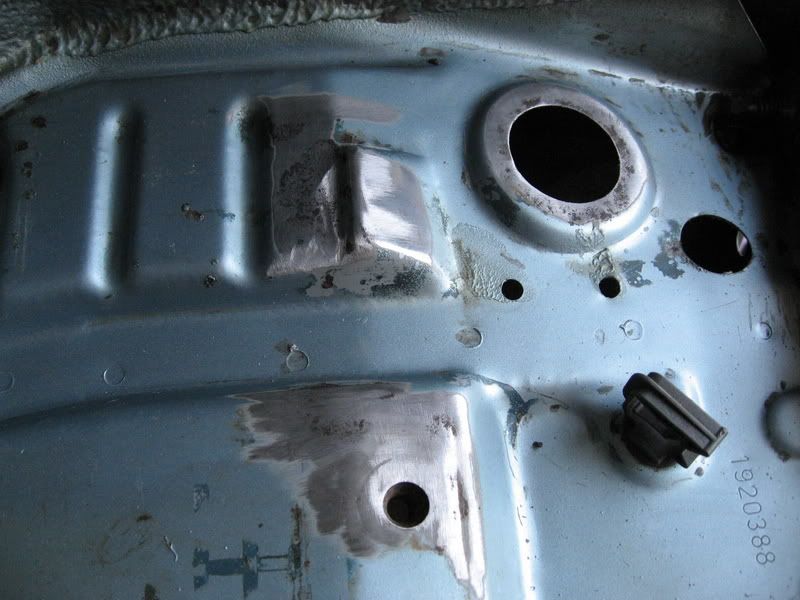
Applied some primer then topcoat.
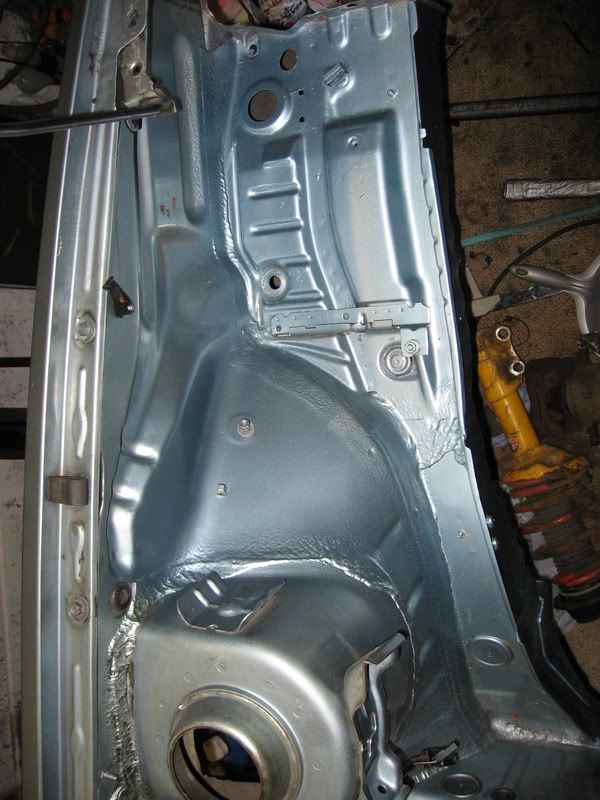
The completed engine bay. It wont win any concours awards, but I`ve treated all the rust and it should stop the corrosion for a good number of years. :thumb:
BEFORE
AFTER
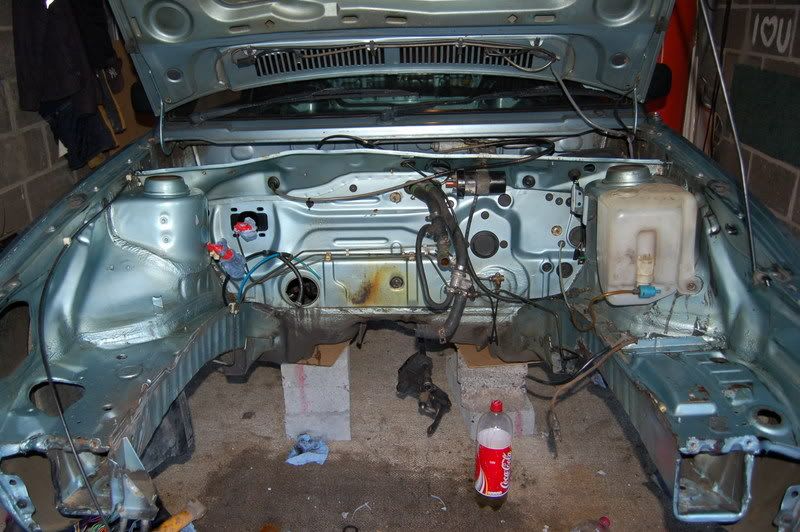
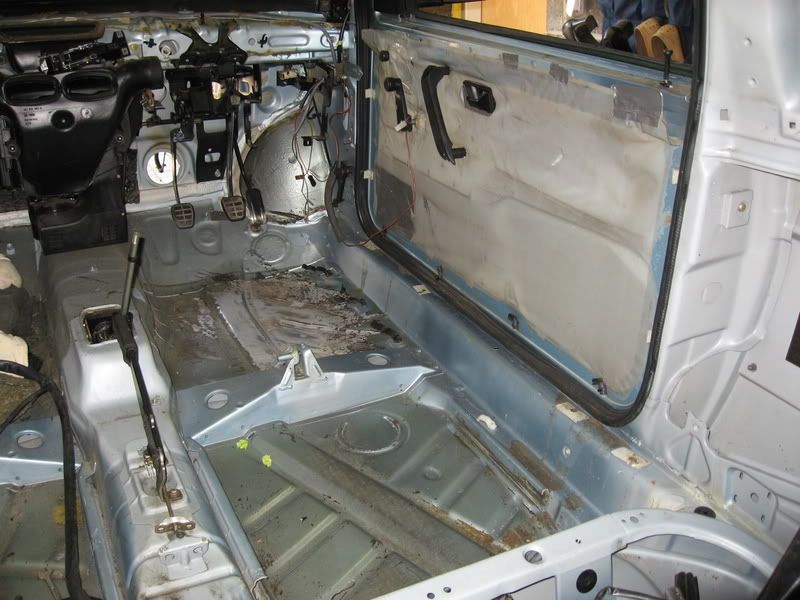
Next job was onto the internal wiring loom whilst the paint dried. I removed the rear wiper, it will not be needed as I`ll be fitting the polycarbonate windows and the wiper would just scratch it. I then removed the loom, which runs from the fuseboard, along the drivers side and across the back of the car. I wired up the handbrake, petrol pump & level and rear lights
No Loom
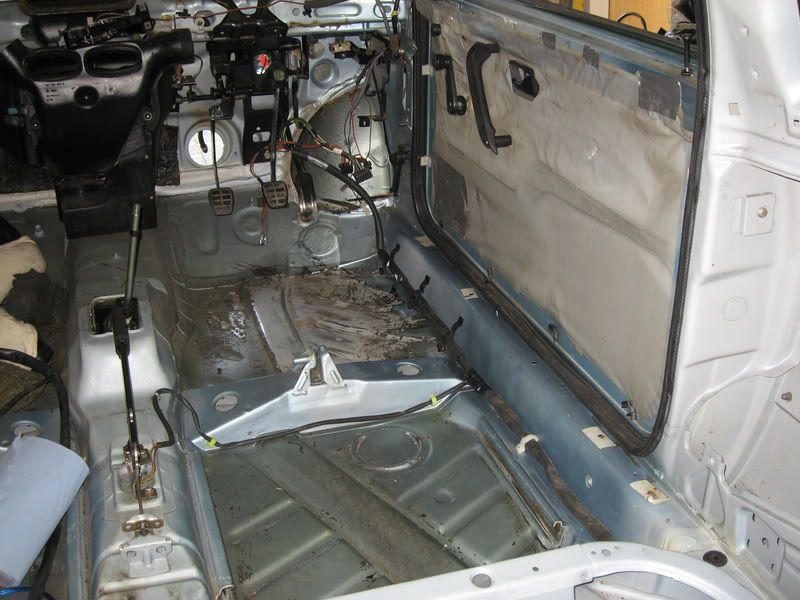
With new loom fitted.
 .
.The fuel lines and fuel pump were next. The ones fitted were too small and would not supply enough fuel to the engine. I had to lower the petrol tank to be able to feed the pipes from the top of the tank to the pump. That job took ages, it was very fiddly...
Feeding wires above petrol tank.
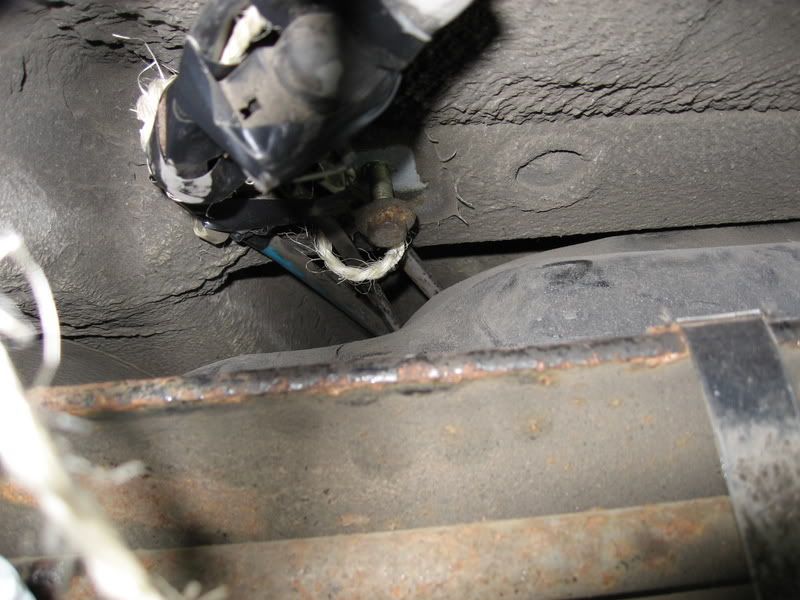
I then bolted the higher capacity fuel pump to the chassis, connected the fuel lines to the tank and ran the larger pipes into the engine bay, they are all connected, pump wired up and pipes clipped into place.
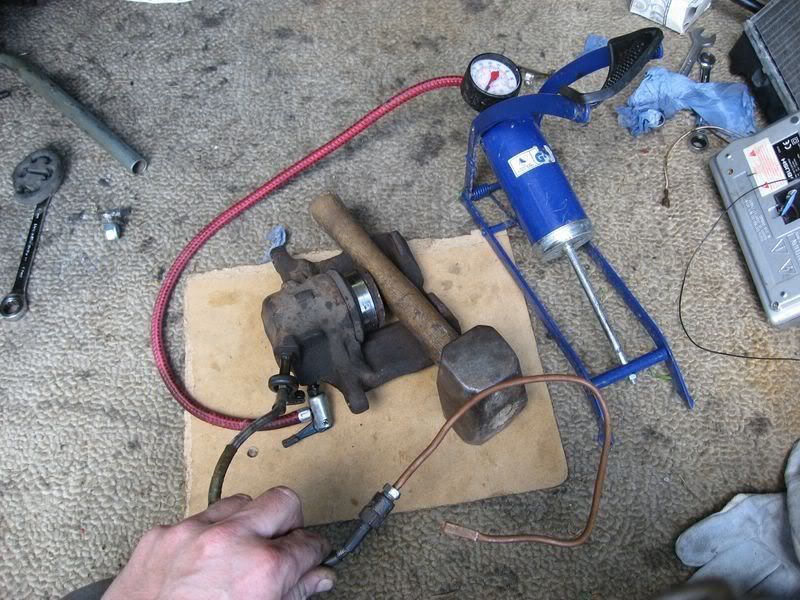
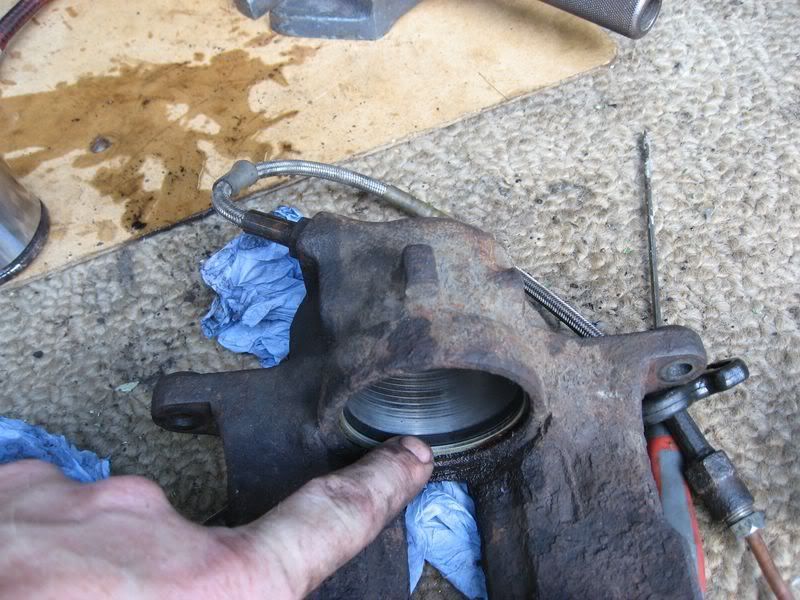
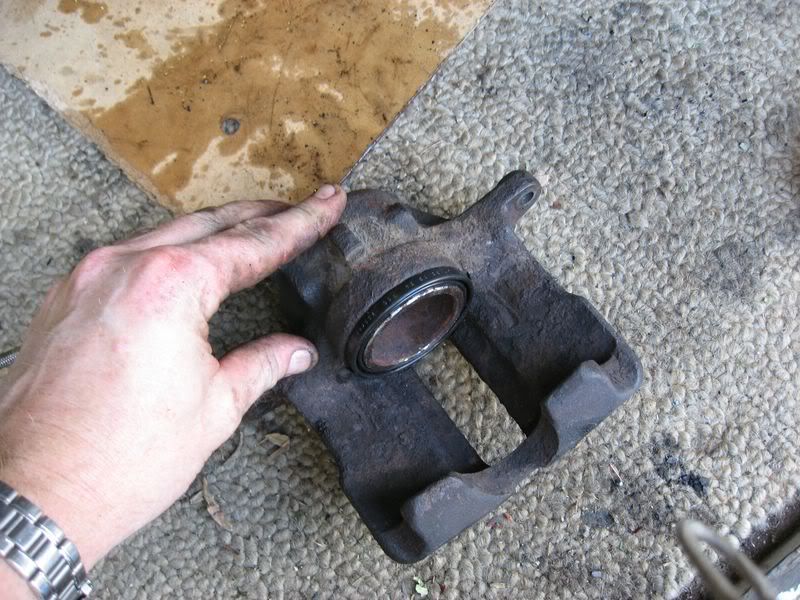
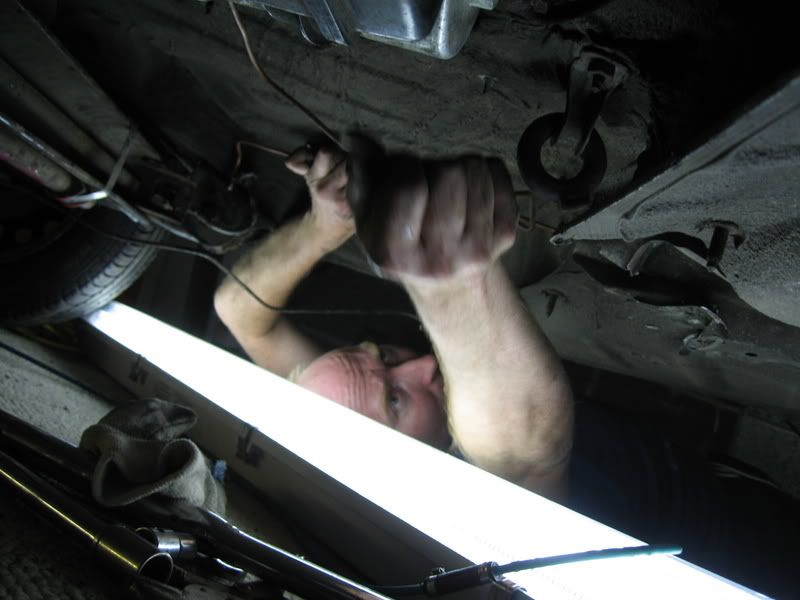
I am changing the brake pipes, by the time I`ve added the bias valve and converted the system into a front / rear split, I`ll have to replace most of the pipes anyway. I used my old pipes as templates, I`m getting new ones made tomorrow when I go to see Chris to get the wheel bearings pressed in.
Access isnt great, I`m sure a workshop with hydraulic lifter would make it easier, but where is the fun in that ?
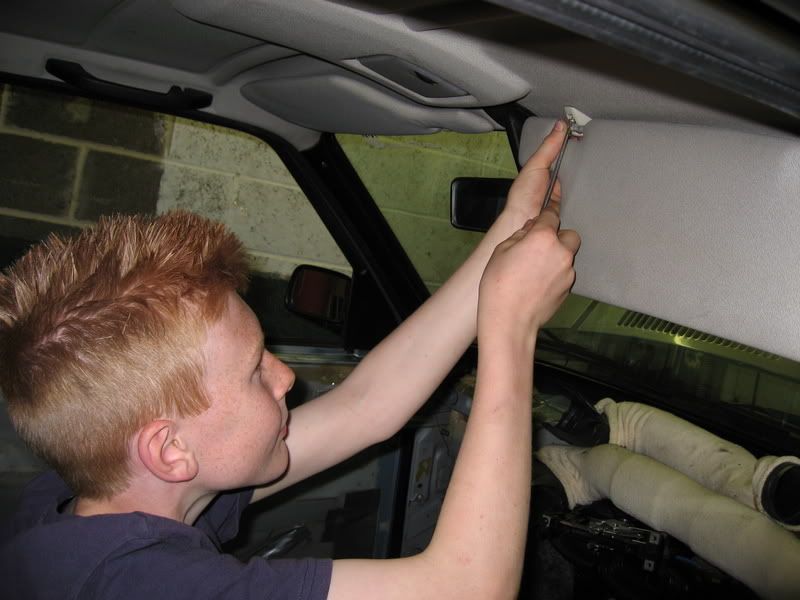
While I was doing that, Matthew and Louise started removing the headlining and interior trim that had been left in place.
Removing the sunvisors
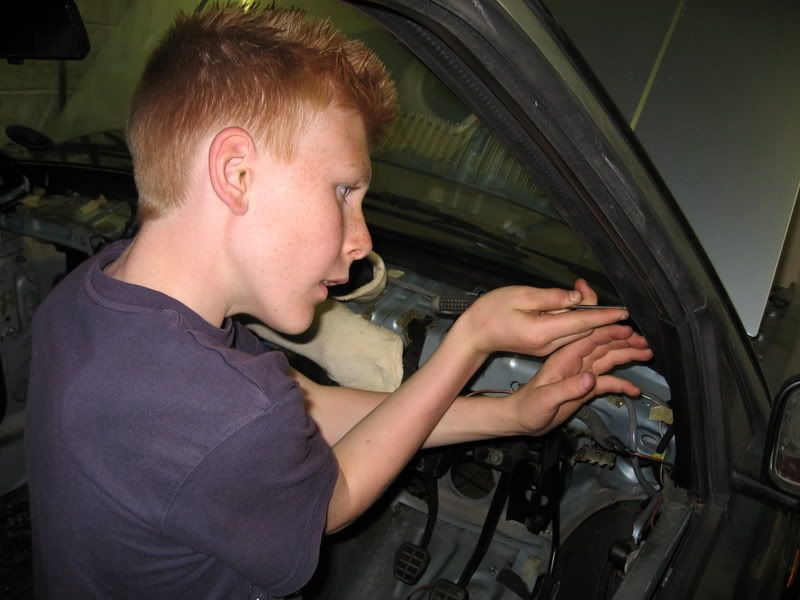
And the windscreen trim
Tomorrow I`ll be heading off to get the wheelbearings pressed and new brake pipes made up. The poly bushes are due Friday, so I can then refit the front subframe ready for the engine to be refitted, first I need to change the oil pump and other bits, so I may do that tomorrow..
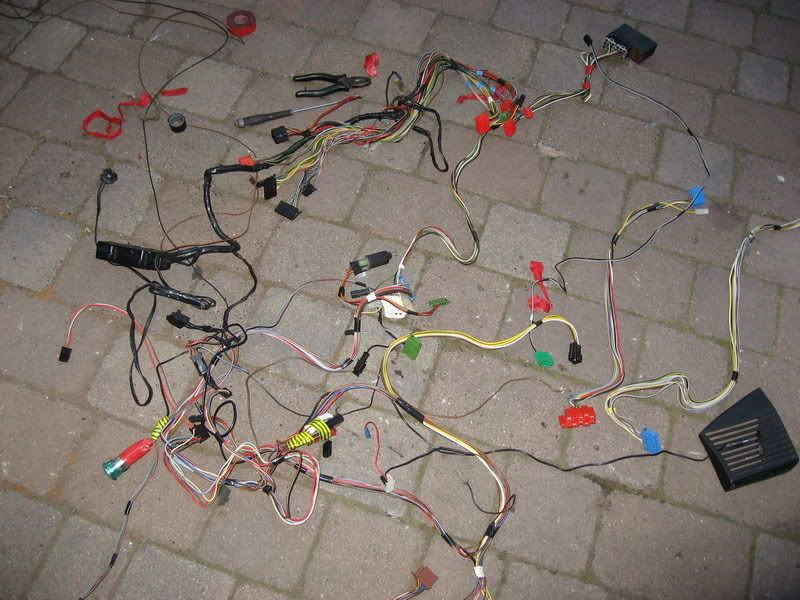
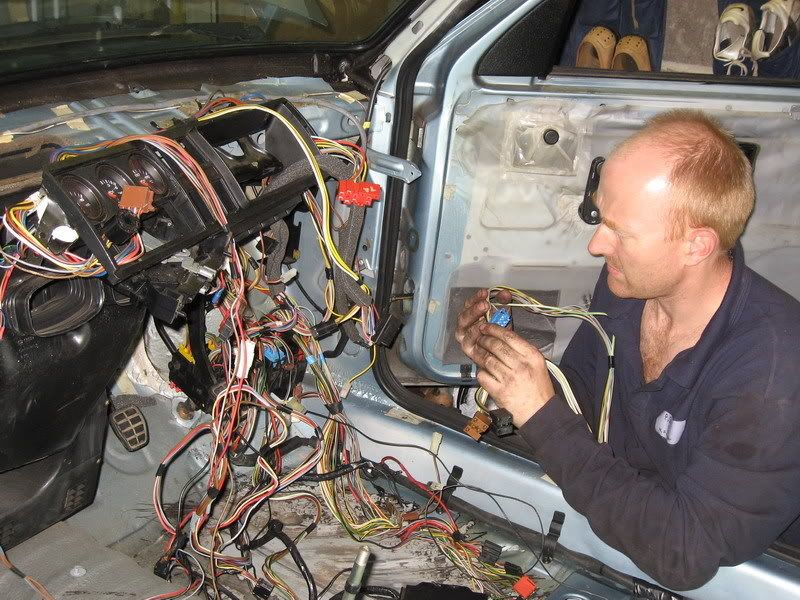
Tackled the wiring harness this evening.
I started on the engine bay harness, This was the harness I started with...
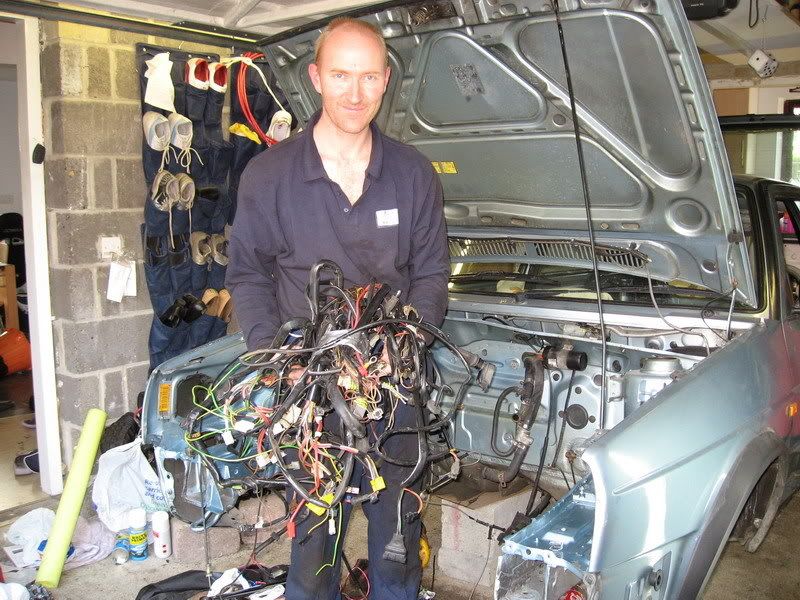
After careful routing and the re-making of a few soldered joints, I ended up with everything in place :thumb: Its not obvious, but all the loom is where it should be.
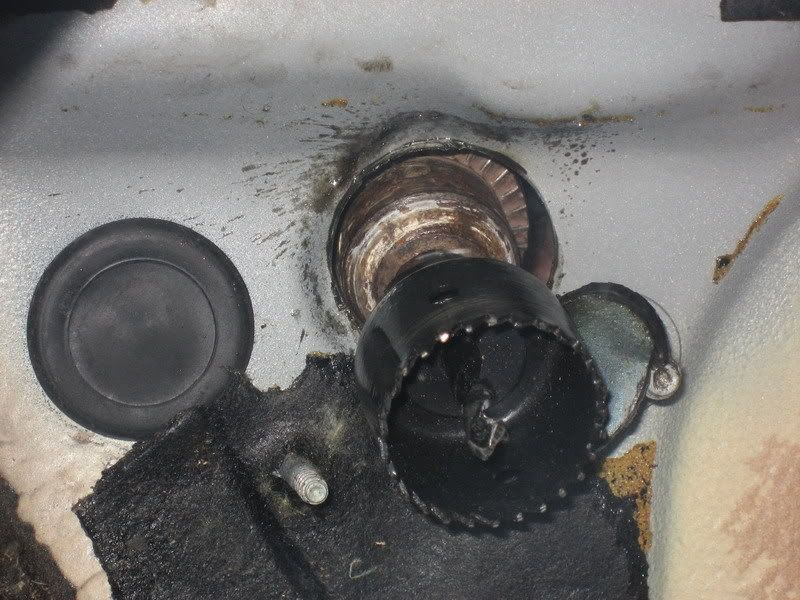
As my battery is in the boot, I need a main feed from the engine bay to the cabin. I have a rubberised connector that allows the cable to pass through the bulkhead, but this car didnt have a suitable hole. one hole saw later and I had a hole
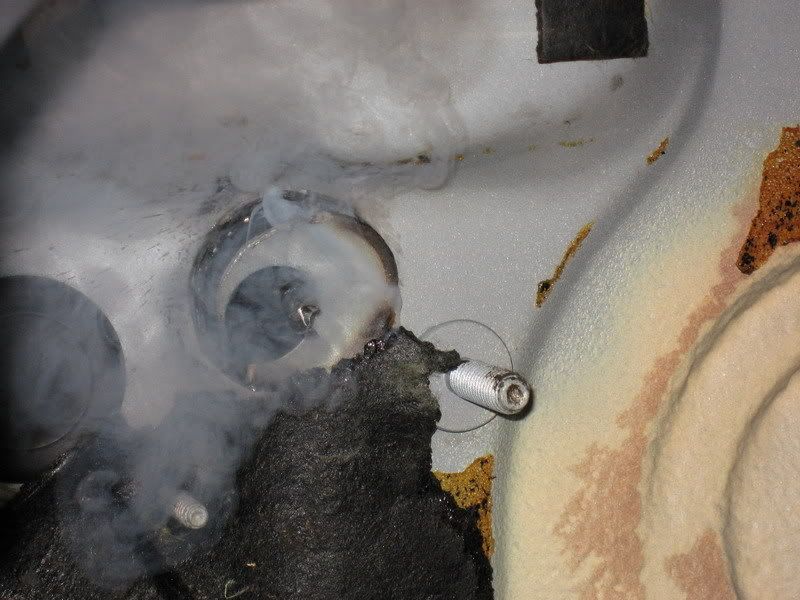
Connected the main Live feed ready to be connected when I run the cable to the battery in the cabin

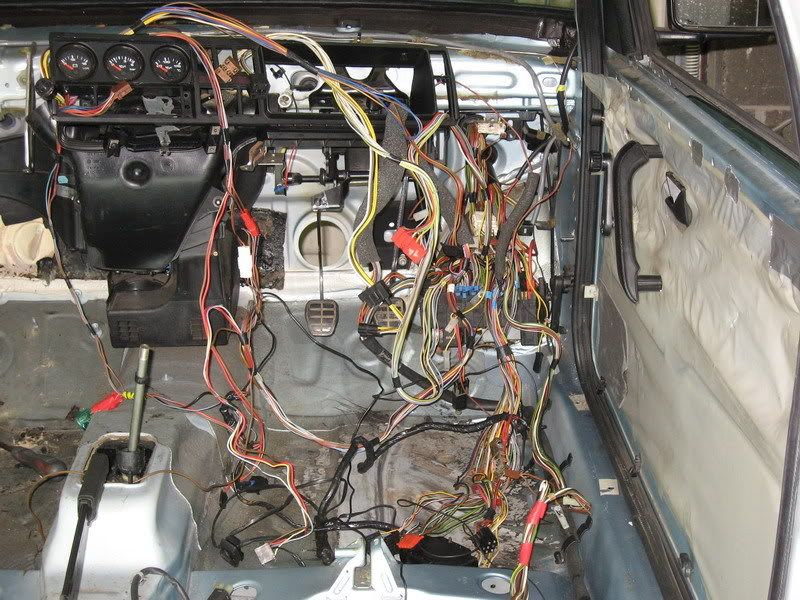
I than laid out the cabin wiring harness.
Connecting it all into the fusebox tested my patience, but it seemed to go OK.
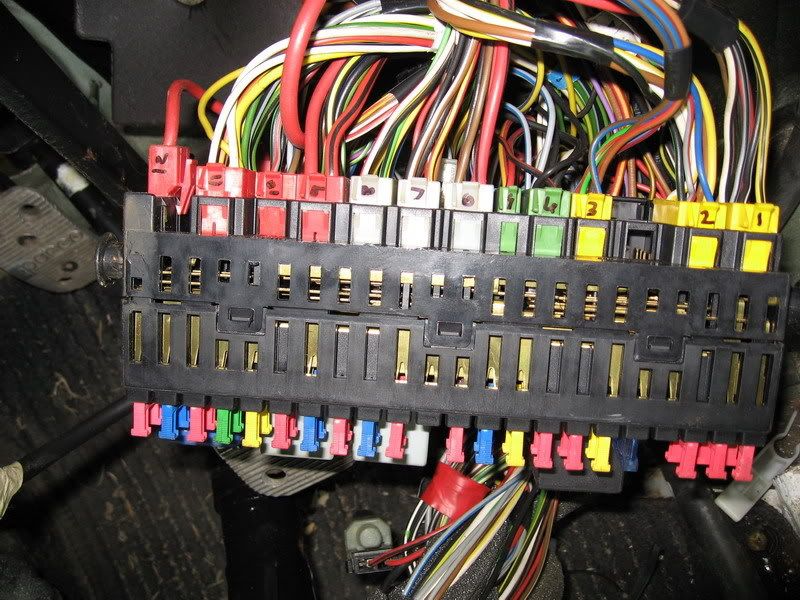
Before stripping my old golf, I`d taken LOTS of photos of all the wires and where they went. I also took a few of the fusebox after i`d numbered each connector. This proved invaluable when reconnecting them all :thumb:
Fusebox after numbering before removal from old golf
The harness is now all connected to the fusebox, I just need to refit the dash and steering column to connect all the pugs where they need to go. I hope to fit the engine next week (I`m working tomorrow and all weeekend, so no progress will happen). Once thats in, I can connect up everything in the engine bay too :thumb: I dont want to secure the dash until I`ve tested the engine, so I`ll temporarily fit it to be able to check the circuits. At the moment, it looks worse than it is.
Thats all for today, next update will be on Monday.
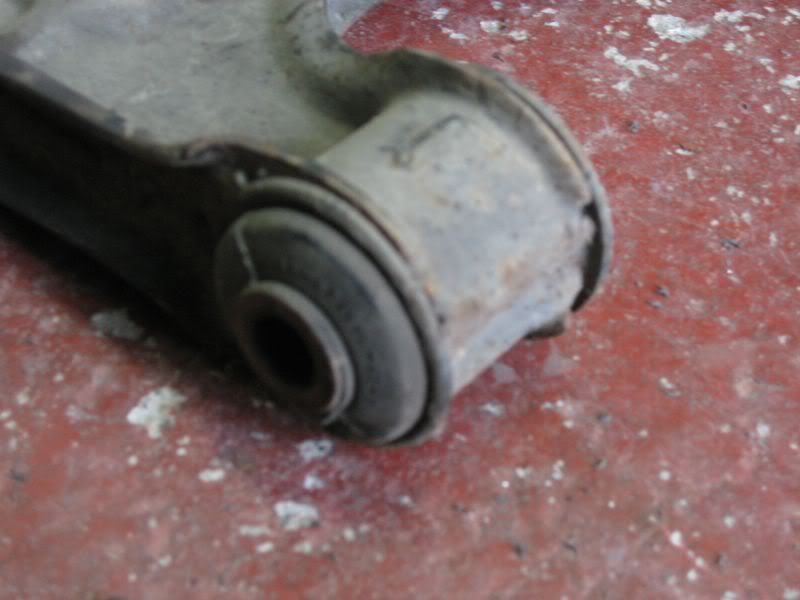
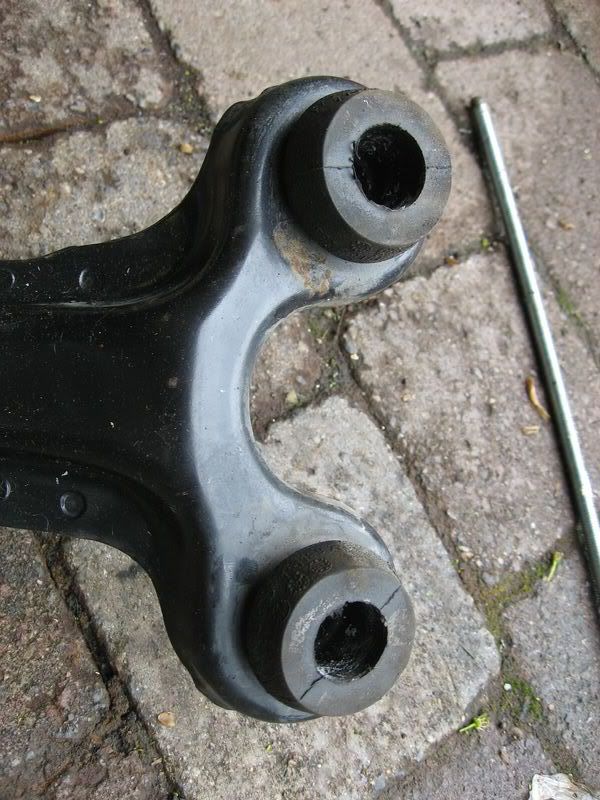
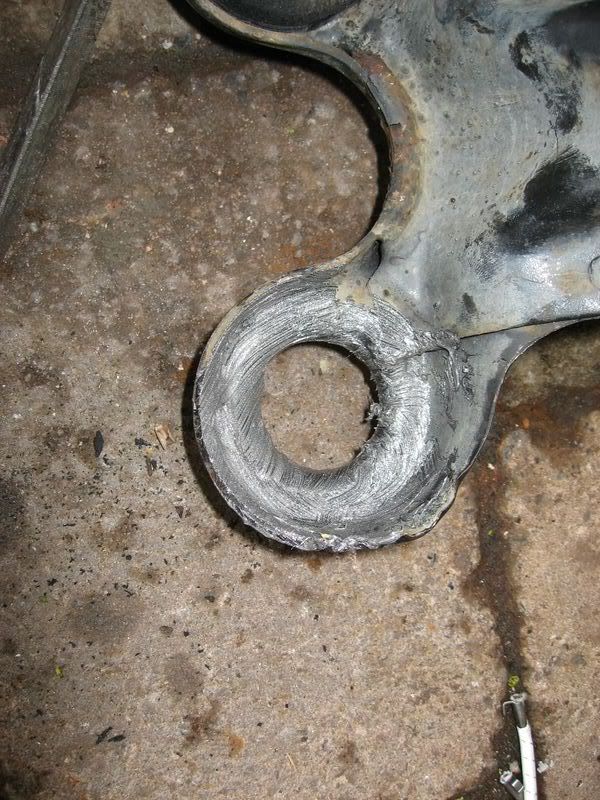
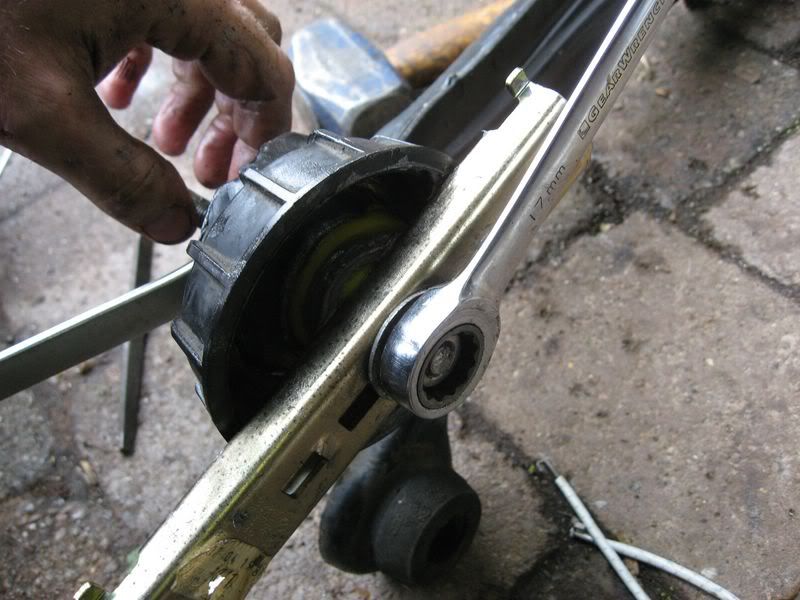
Wishbones needed new Polybushes fitting:
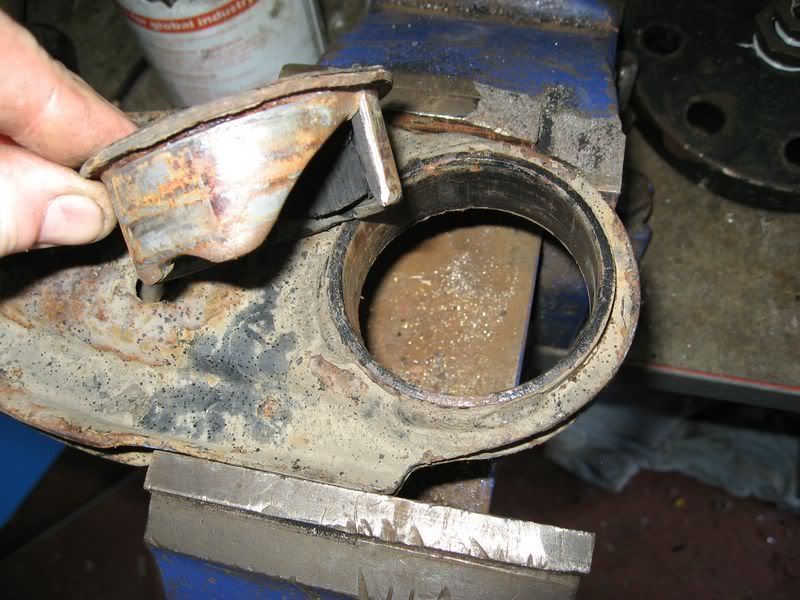
Old bushes
As I didnt have a suitable press to remove the larger bush, I cut the middle out with a hacksaw
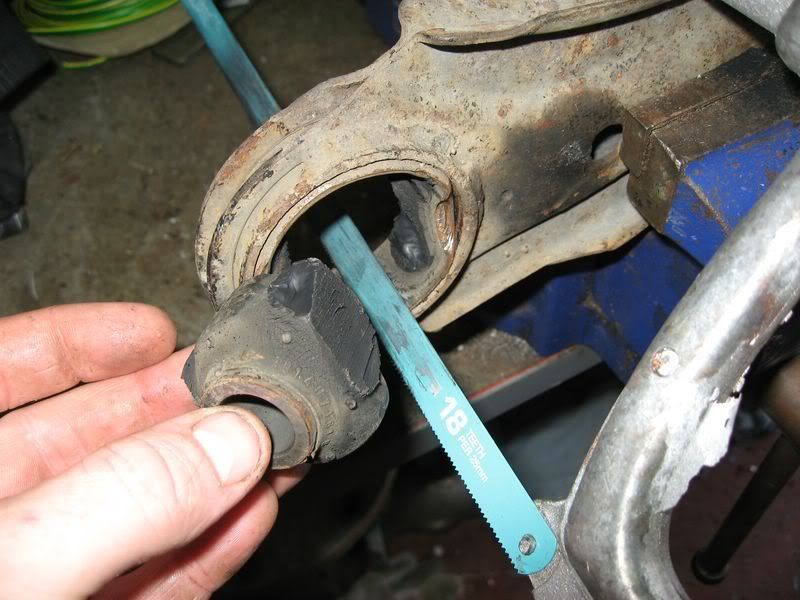
Note that I did NOT saw all the way through
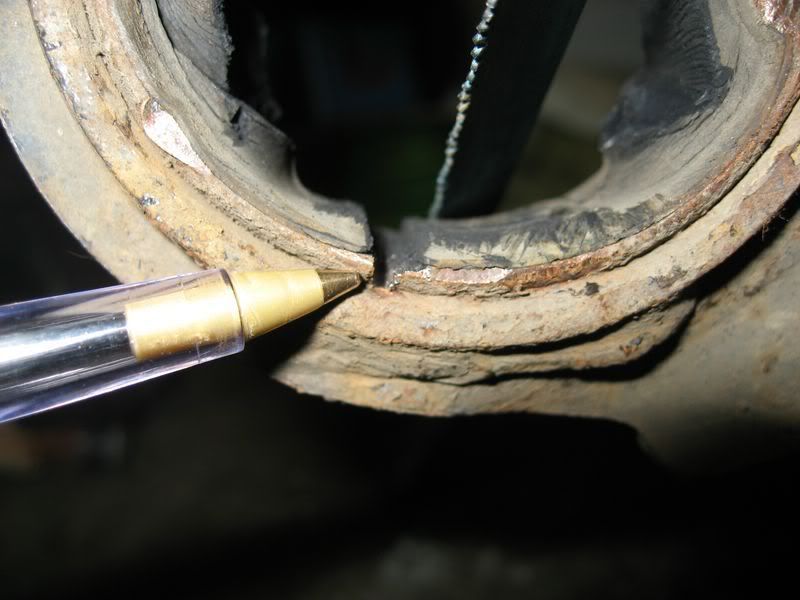
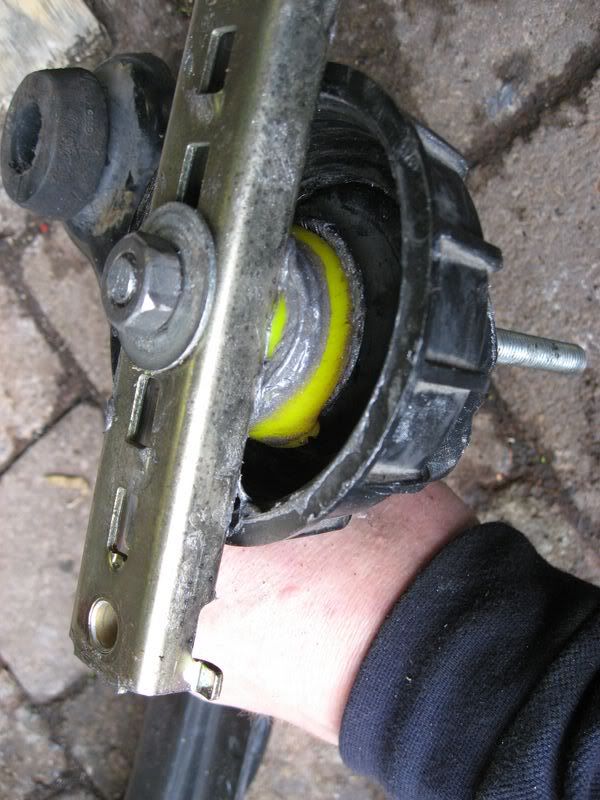
Now chisel the inner part of the bush, it comes out quite easily. You can see how it is `tearing` the remaining bit of the metal that I hadnt sawn through. This saves the chance of scoring the inner face of the wishbone
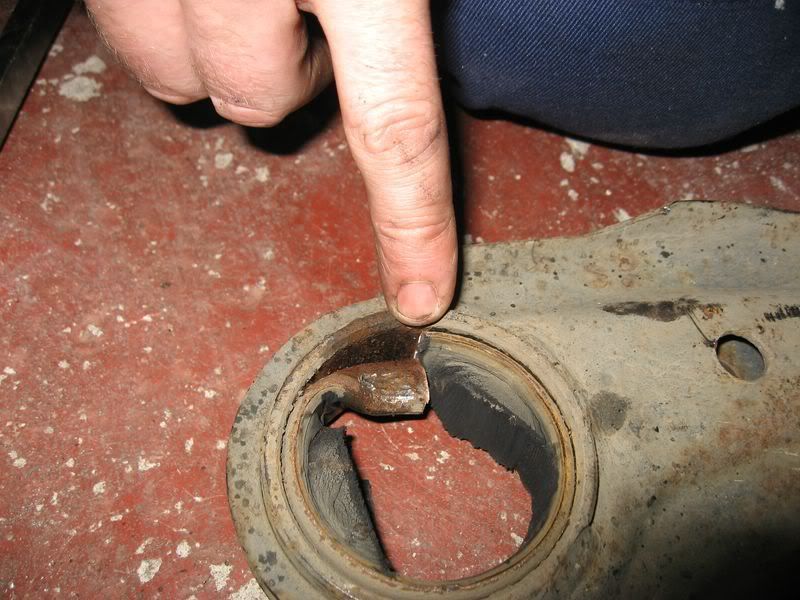
The inner now drops out
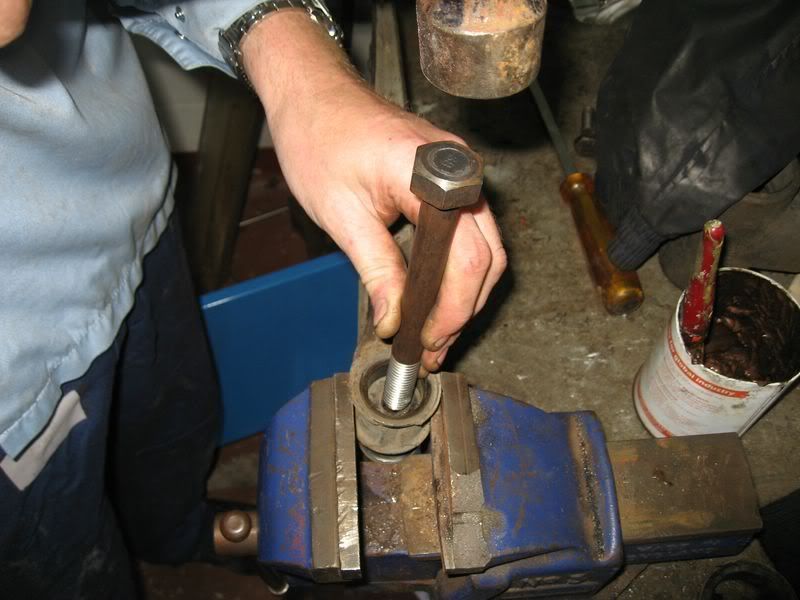
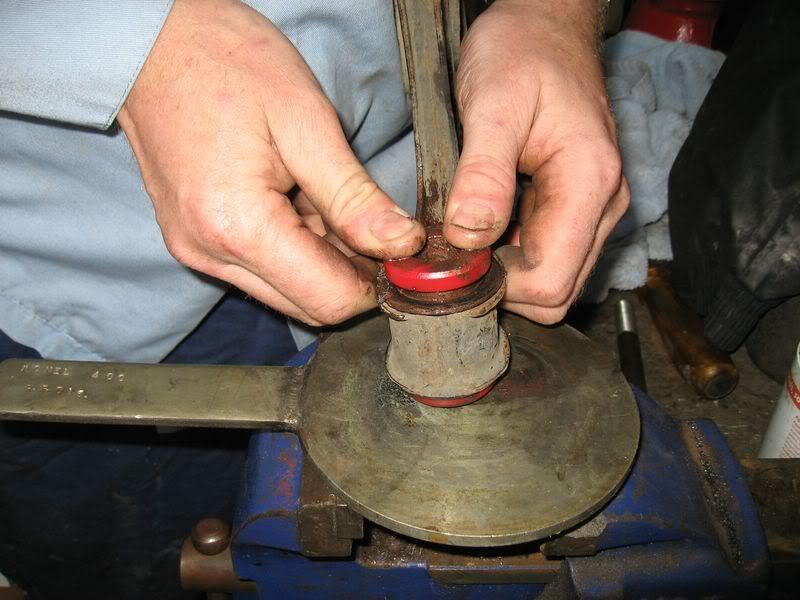
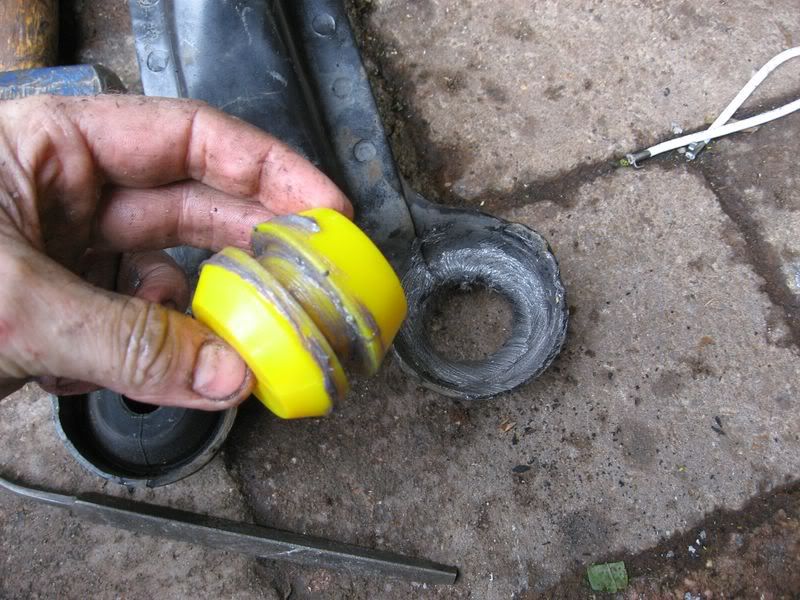
Apply copious amounts of grease to the now bush, this will aid fitment and also reduce the chance of the new bush `squeaking` when you are driving
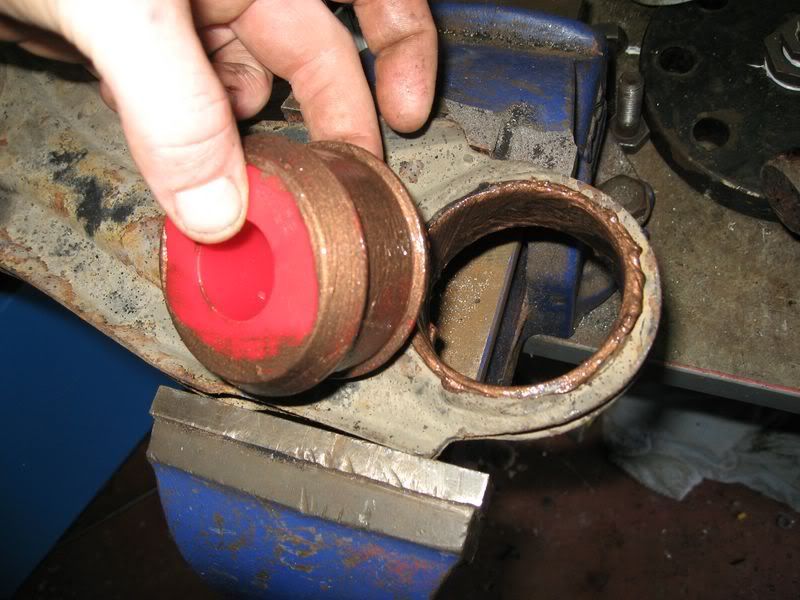
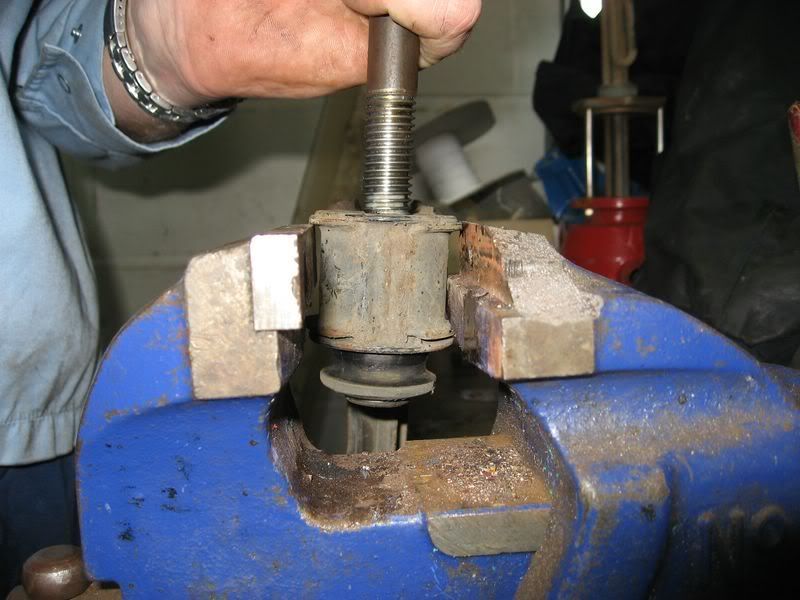
Using a vice, ensure the new bush is square and carefully close the vice jaws pressing the bush into the wishbone
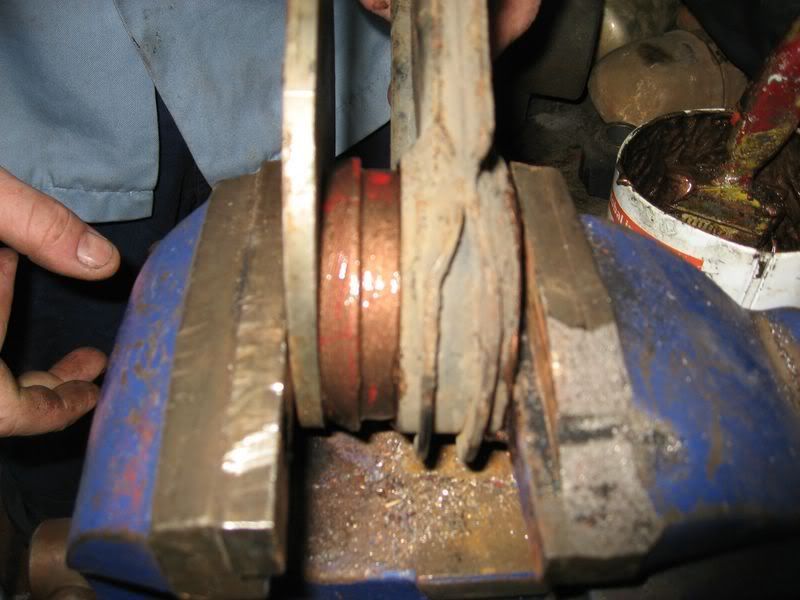
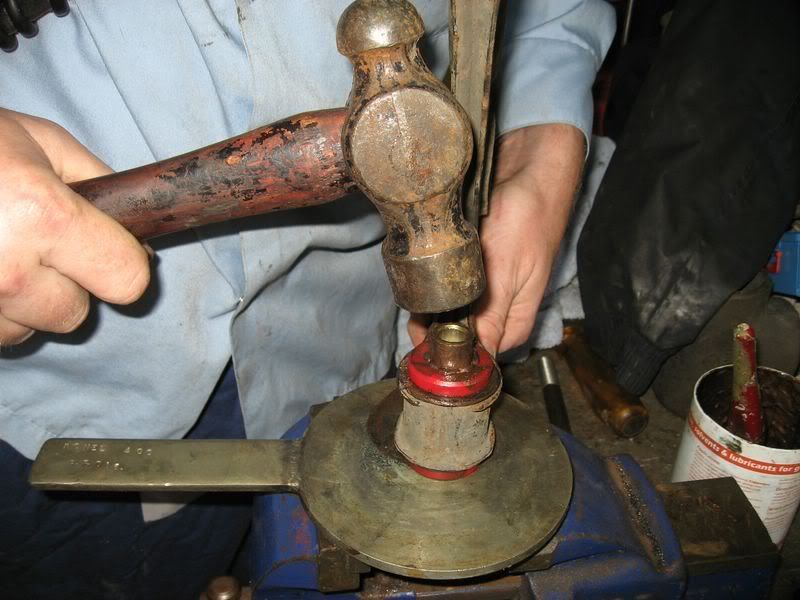
Grease the new inner sleeve and tap that into place
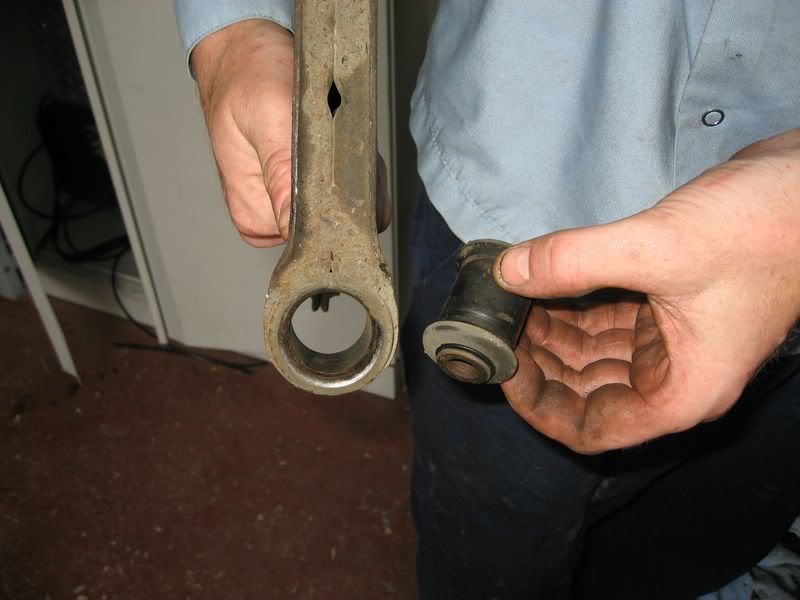
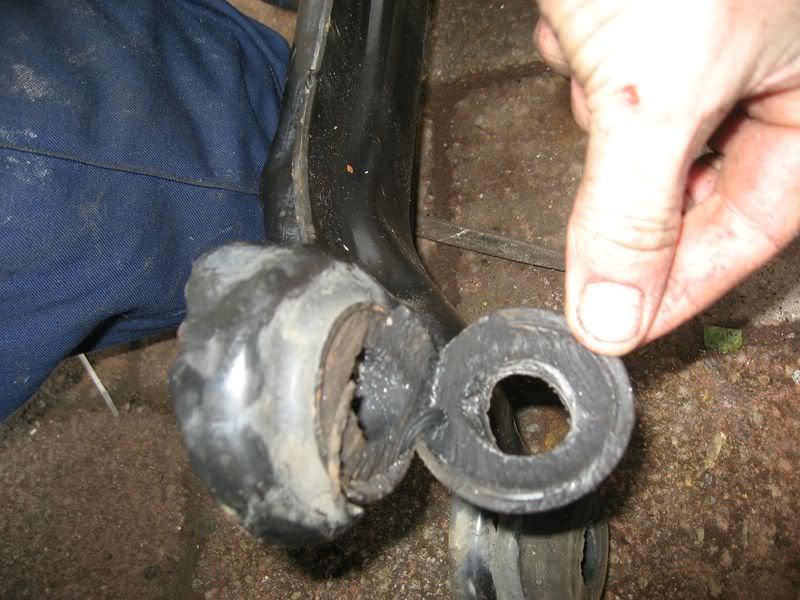
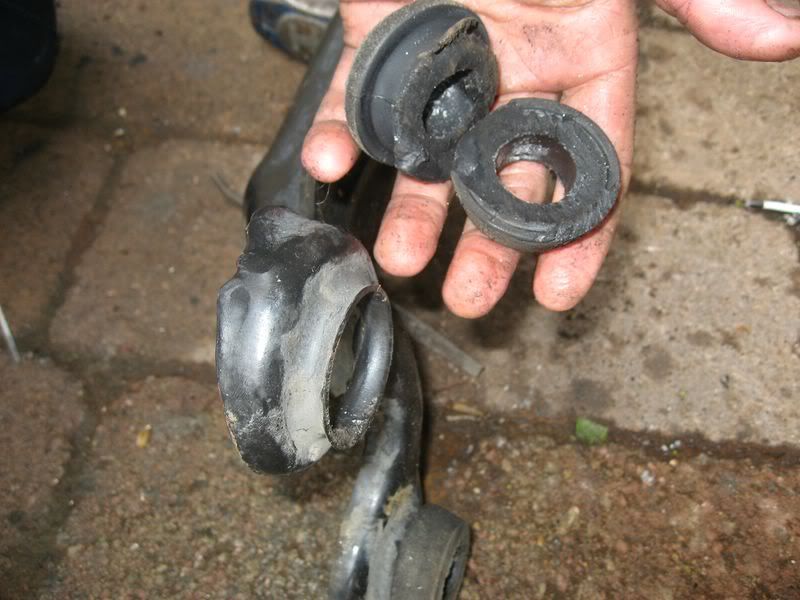
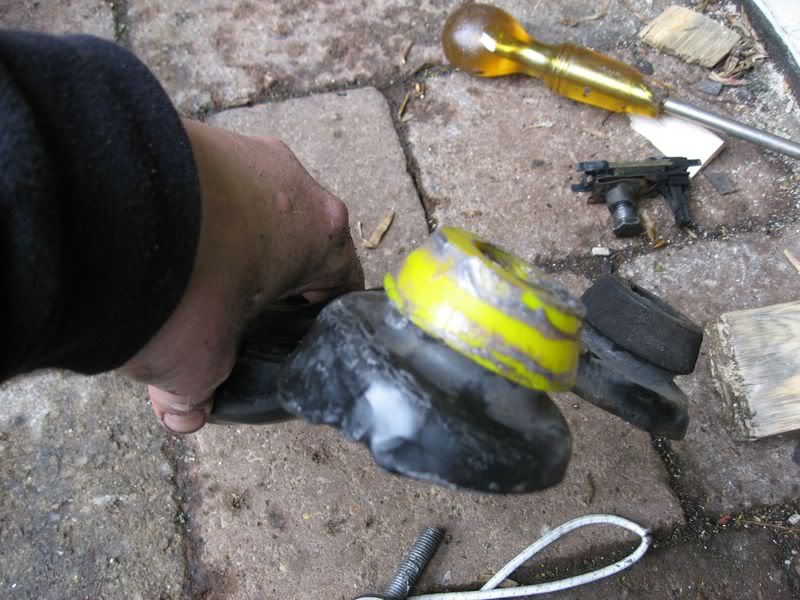
To remove the other bush, simply tap it out with a suitable drift
It comes out easily
The new bush comes in 2 parts, so as before, apply lots of grease to all the surfaces
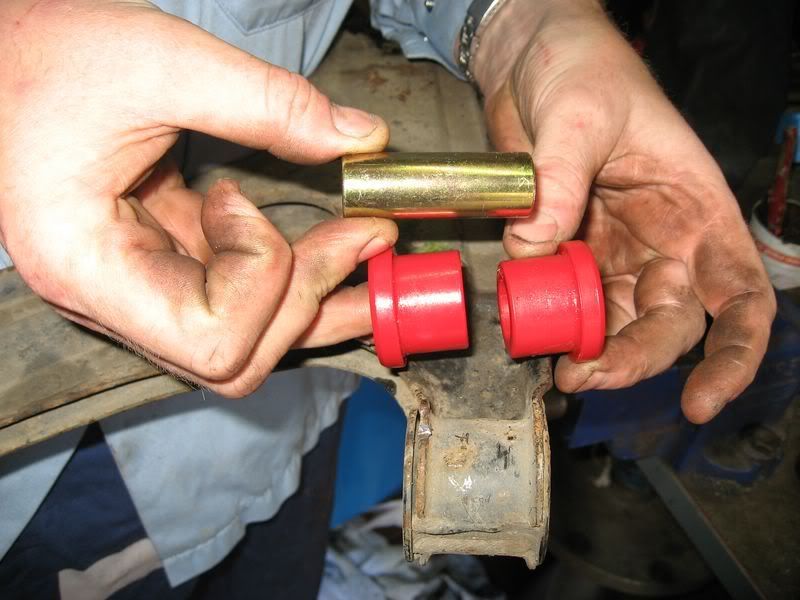
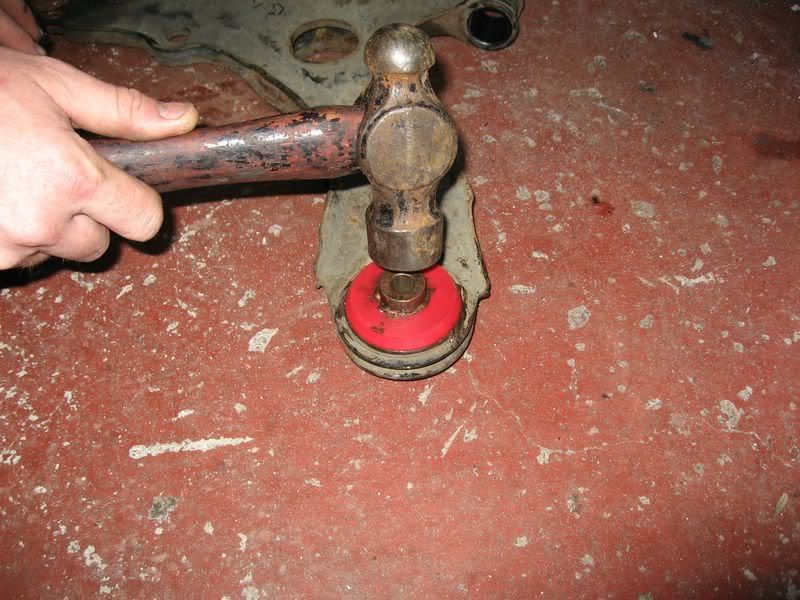
The new bush simply presses into the wishbone,
if necessary, a light tap with a hammer may be required to insert the inner sleeve
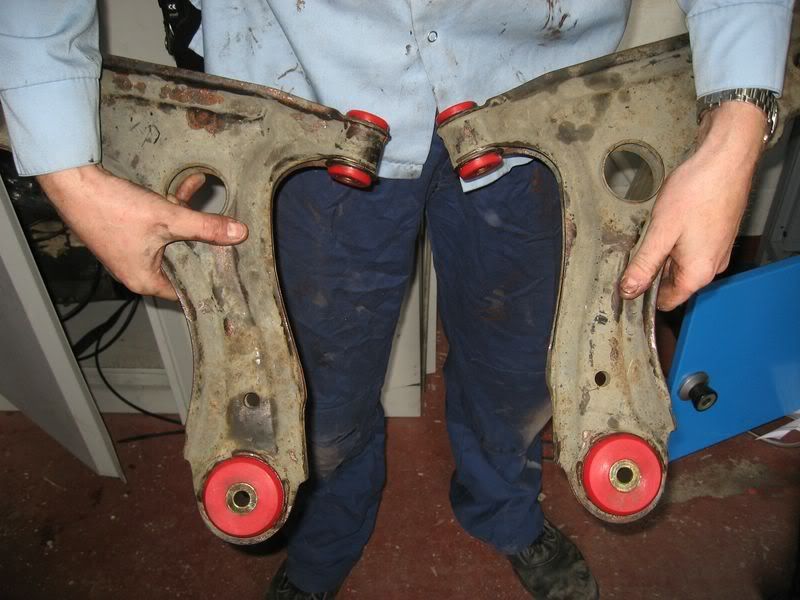
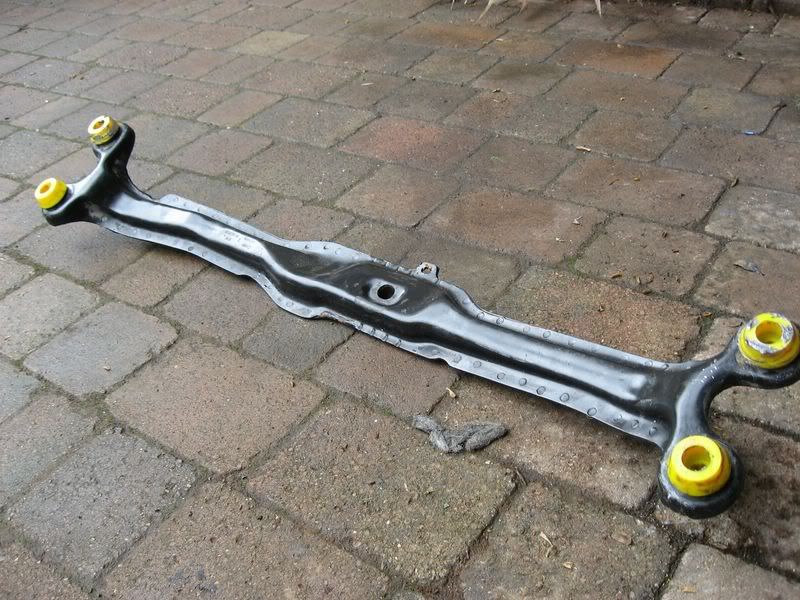
Repeat for the other wishbone and you now have 2 polybushes wishbones ready for fitting to the car :thumb:
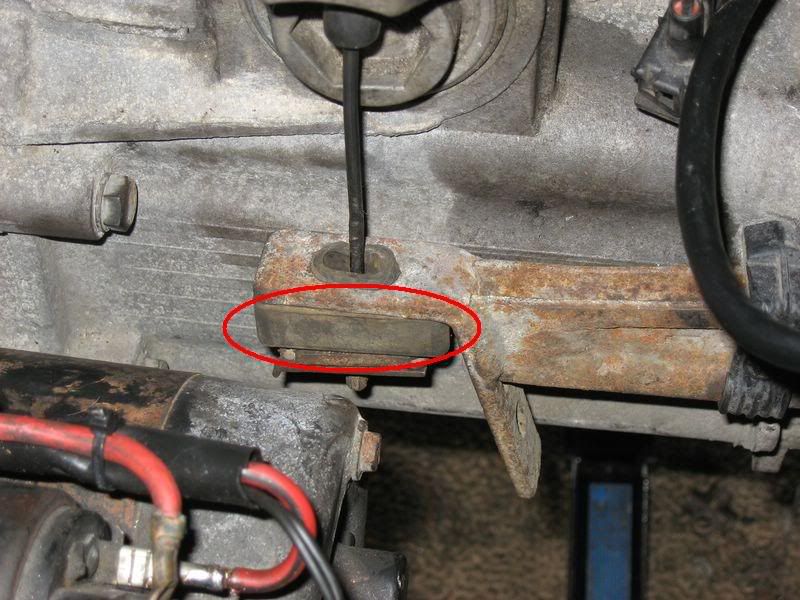
hmmm, I knew the oil filter had take a hit from the engine mount, removed the oil filter, oil cooler plate and saw the central shaft is slightly bent.
Thats not a problem, I can sort that, but the oil cooler is `squashed` at one side, I`ve highlighted where in the photo below.
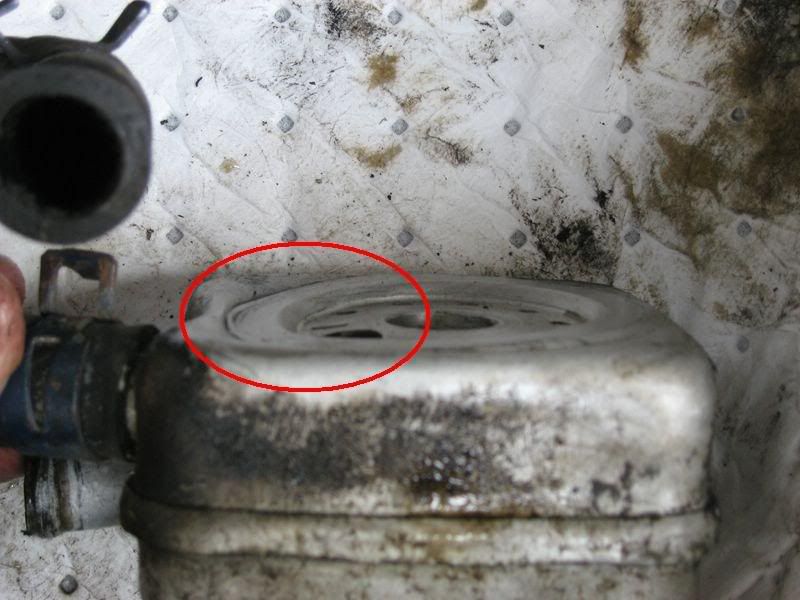
I need a new sandwich plate, so i`ll get one tomorrow.
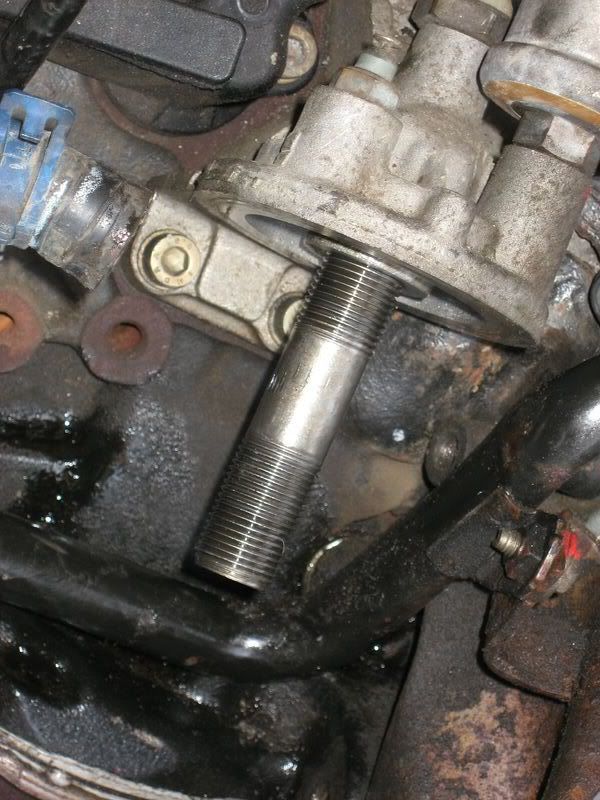
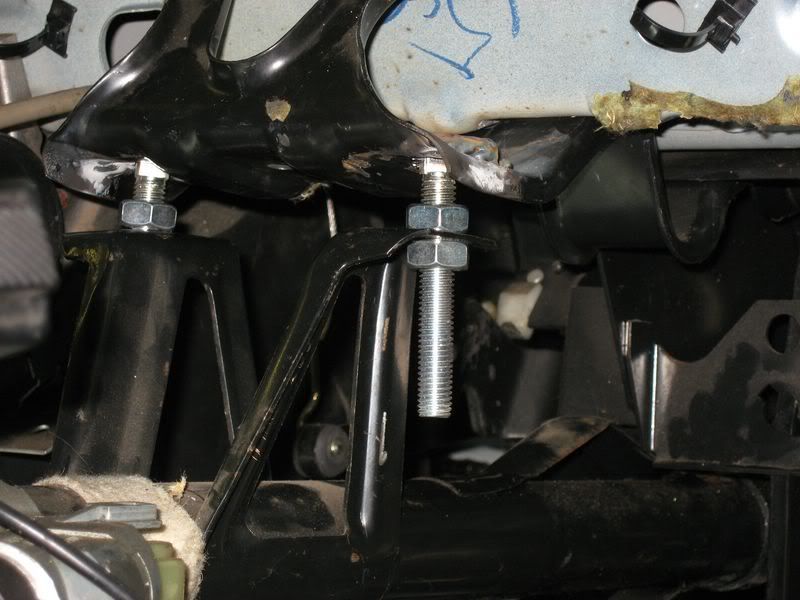
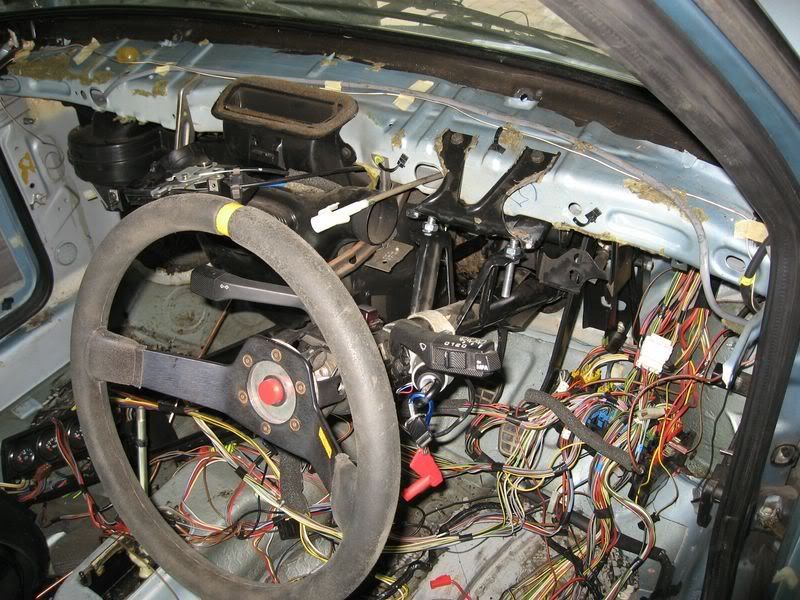
Anyway, I`ve fitted the steering column. I welded a couple of bolts to the mount, then put 2 nuts of the resulting threaded shaft. This will allow easy adjustment of height so I can fine-tune it once everything is in the car :thumb:
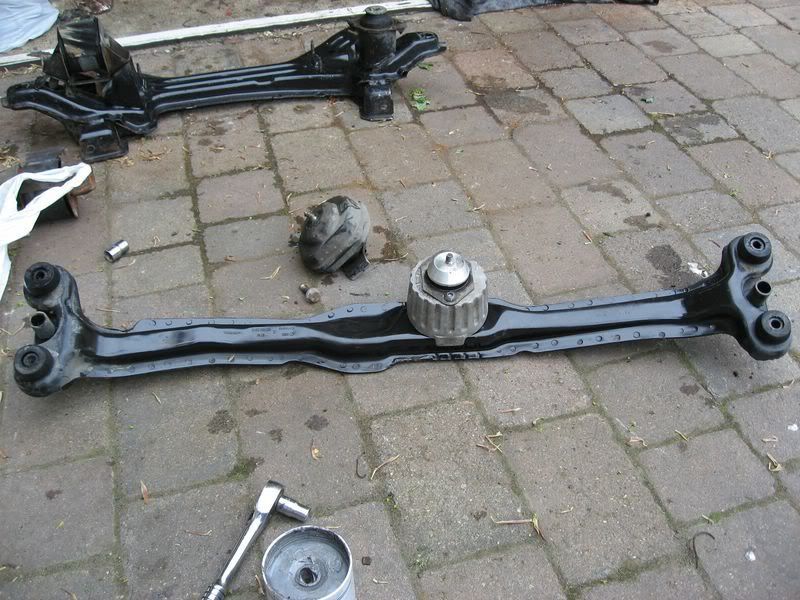
The subframe on the new car was in better condition then my old one, but required a good clean
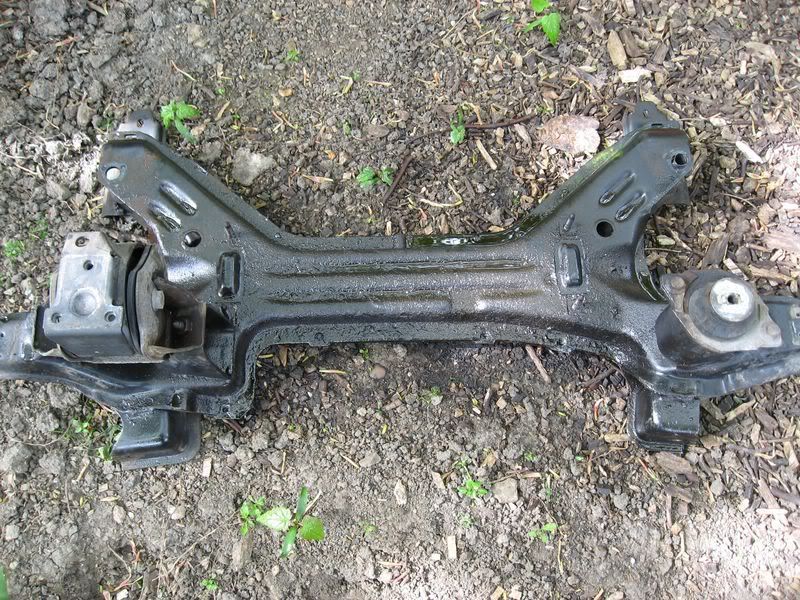
Whilst I was cleaning that and the wishbones, Matthew was removing the steering rack and antiroll bar from the old subframe
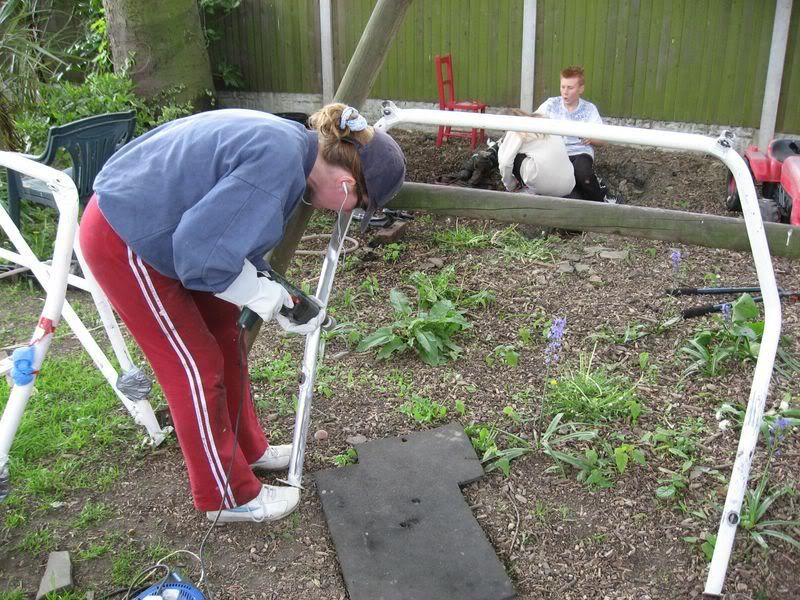
Meanwhile, Louise was sanding the rollcage ready for spraying, it was a long boring job and she stuck at it all day :blink:
I fitted the heavy duty vibratech engine mount to the front crossmember
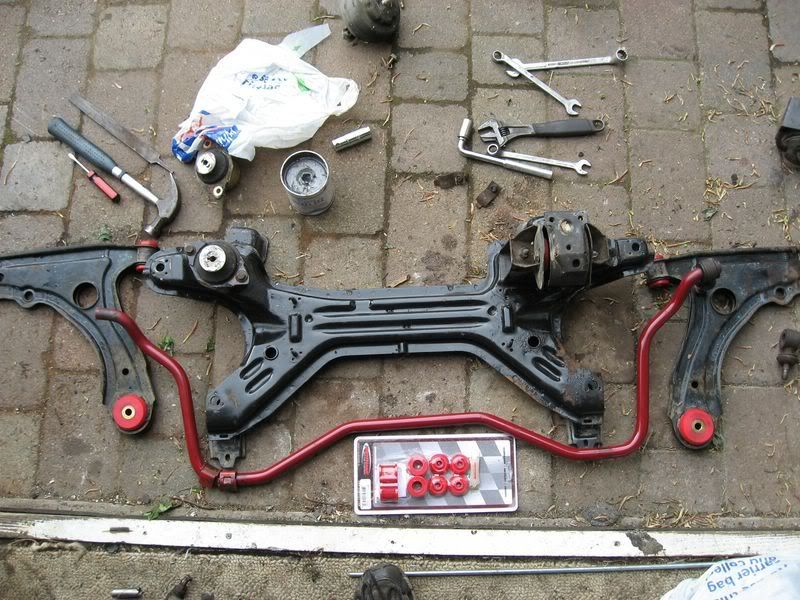
The cleaned subframe, ready to assemble with new polybushed wishbones, anti roll bar and uprated engine mounts
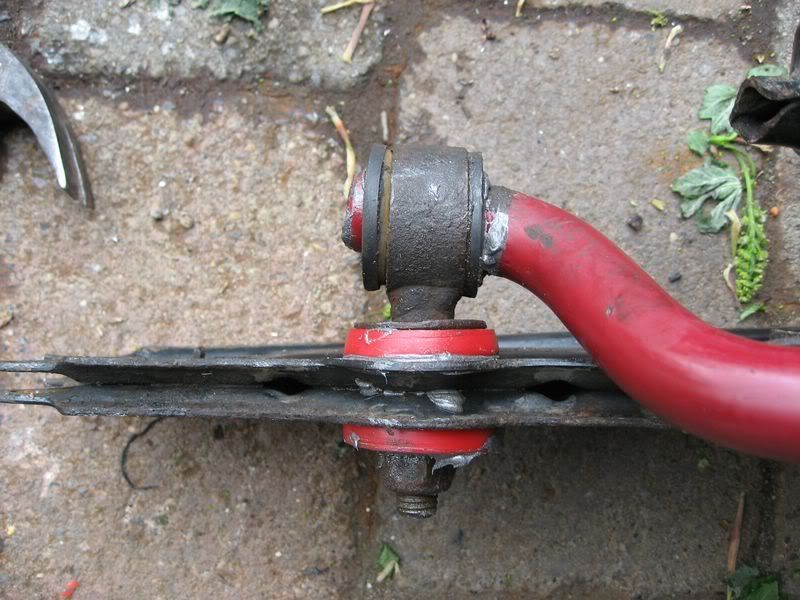
The old antoroll bar end mount rubbers were badly worn

After fitting new polybush mounts, it was held nice and square again
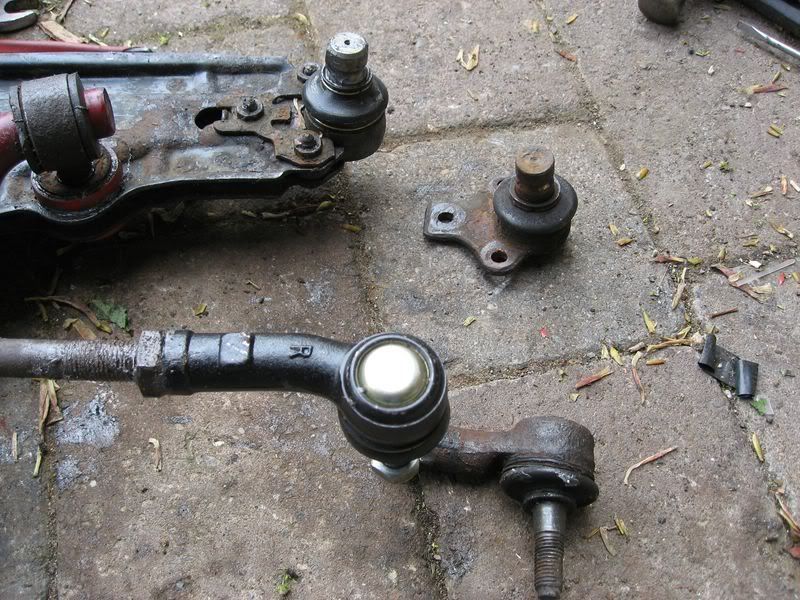
Decided it was sensible to change the tie rod ends and lower balljoints. The tie rods are `handed`, so you have to get the left on the left side and right on the right... I made sure they were fitted the same distance along the tie-rods to keep the tracking somewhere near straight ahead...
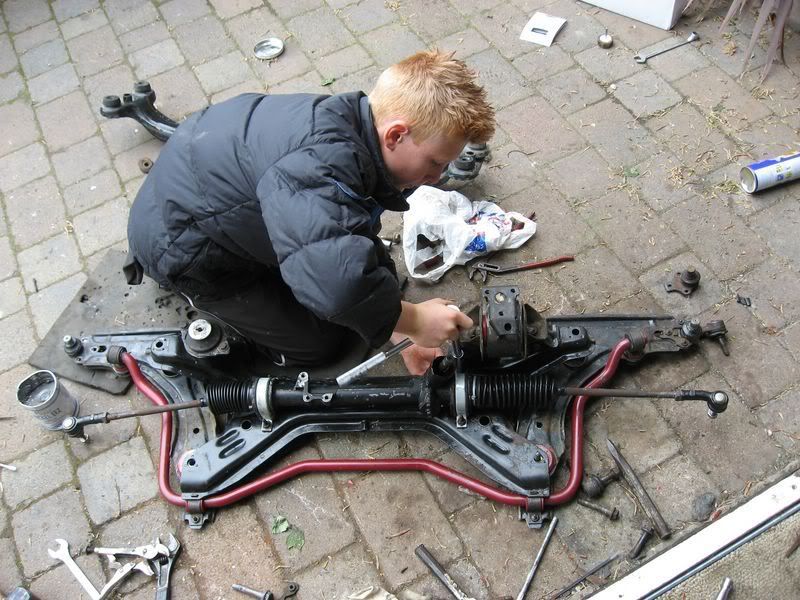
Matthew fitted the steering rack and assisted me fitting the antiroll abr
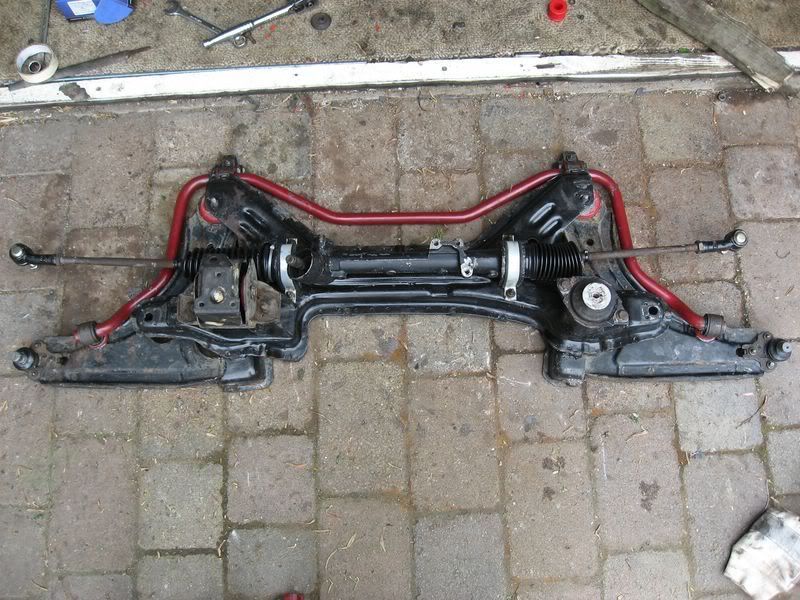
The completed front subframe ready for fitting :thumb:
Cheers Paul, yeah I was sad too, but this one will be better than that, so there is some benefit.
Moved onto the engine this afternoon.
After inspecting the oil filter housing, I replaced the bent front engine bracket which had been damaged in the impact, the replacement was donated by
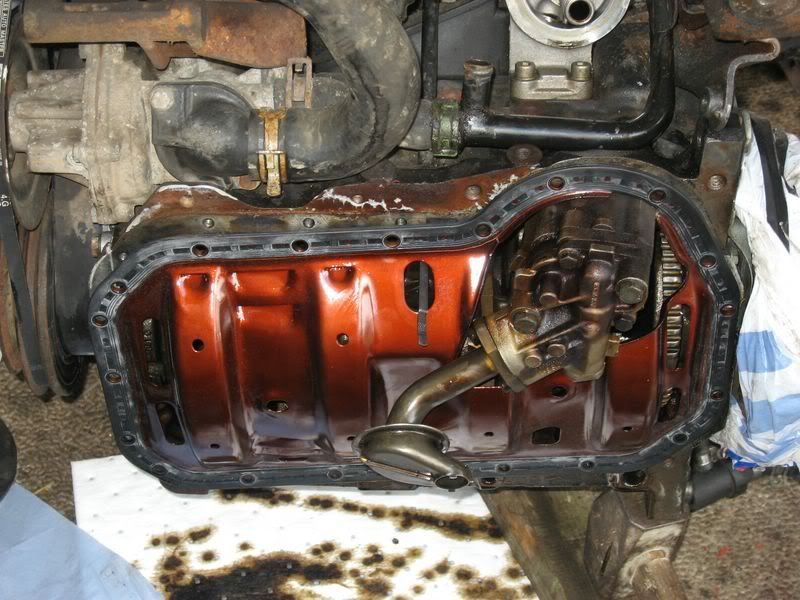
Removed the sump to change the oil pump, I removed the old pump and took it apart to inspect, unfortunately, I didnt see any visible signs of damage or play in the gears, so I can only hope the internal relief valve is damaged :unsure:
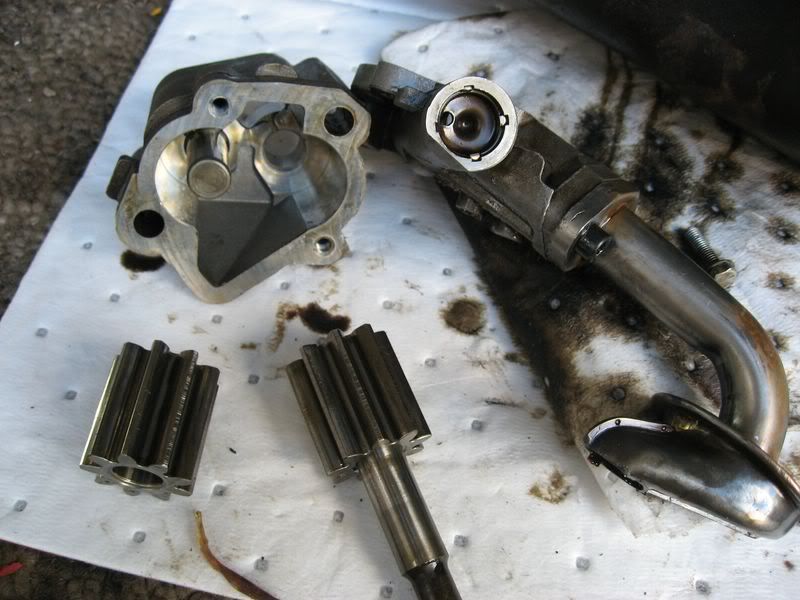
I fitted the Windage tray I`d bought to stop the oil splashing onto the bottom of the crankshft and the oil pump donated by the same friend. :thumb:
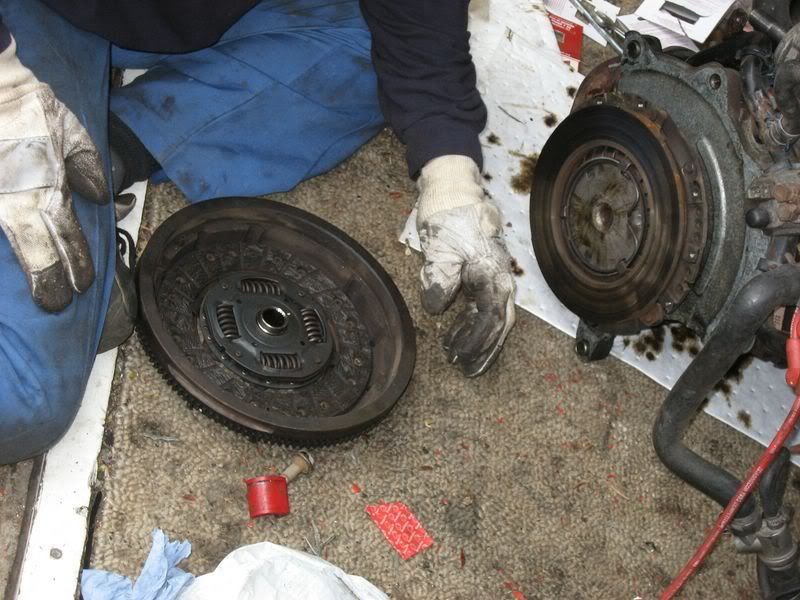
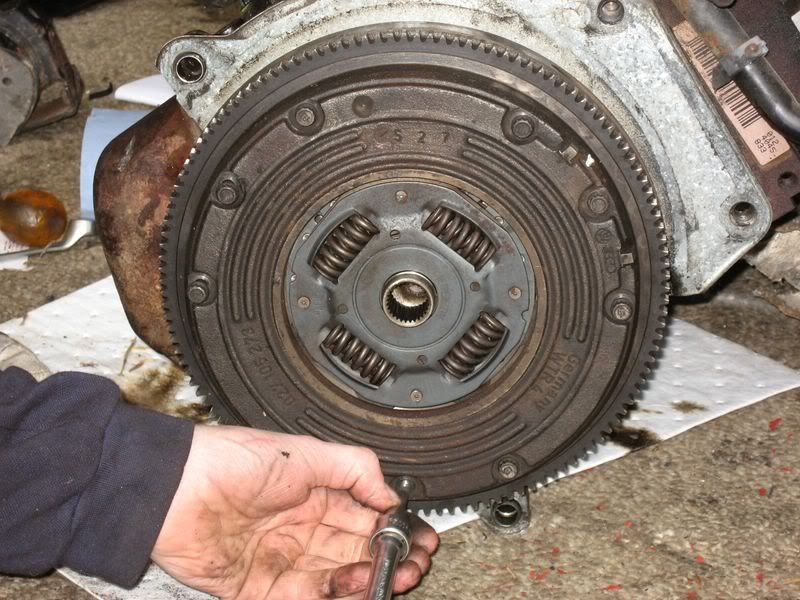
Refitted the Clutch and flywheel, I aligned it by eye.
I am pleased to say the gearbox slid into place easily, first time. I`ve had experience in the past with on old MK2 Escort I had and it took several attempts to get the gearbox on, so when it slid on with the first attempt, I was pleased.
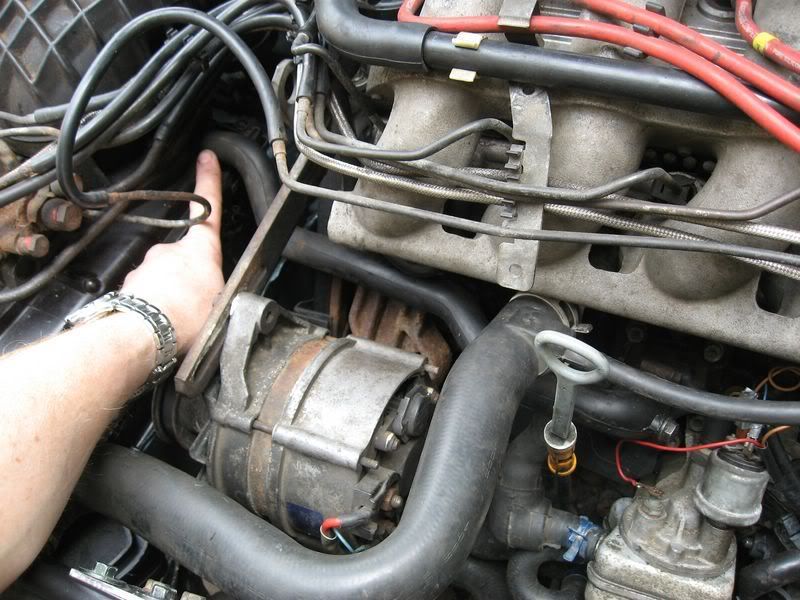
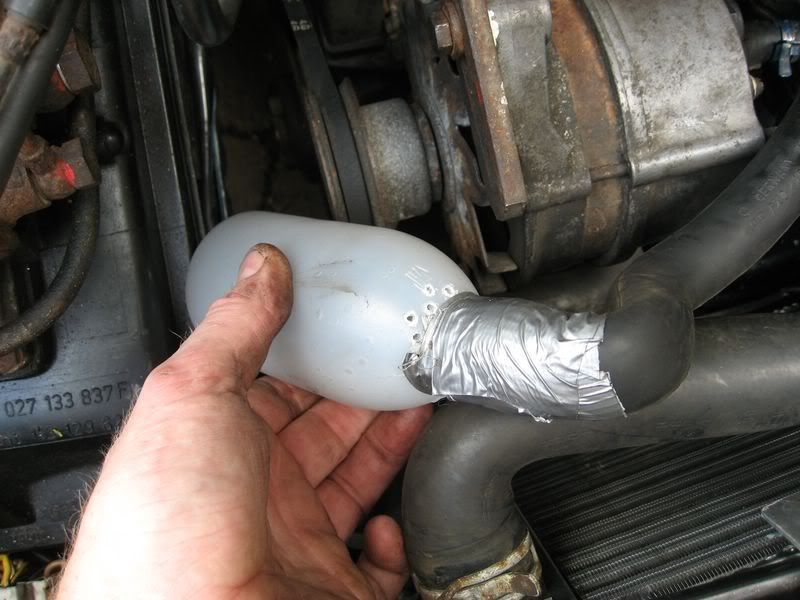
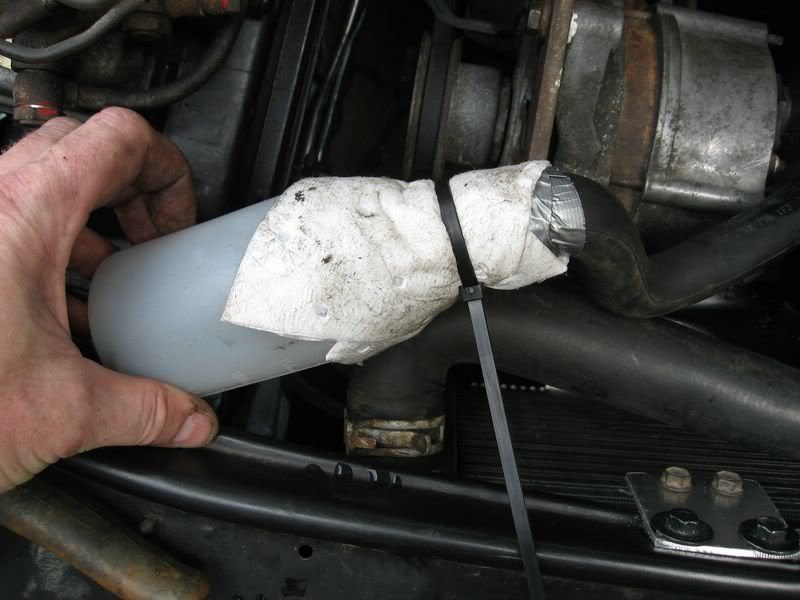
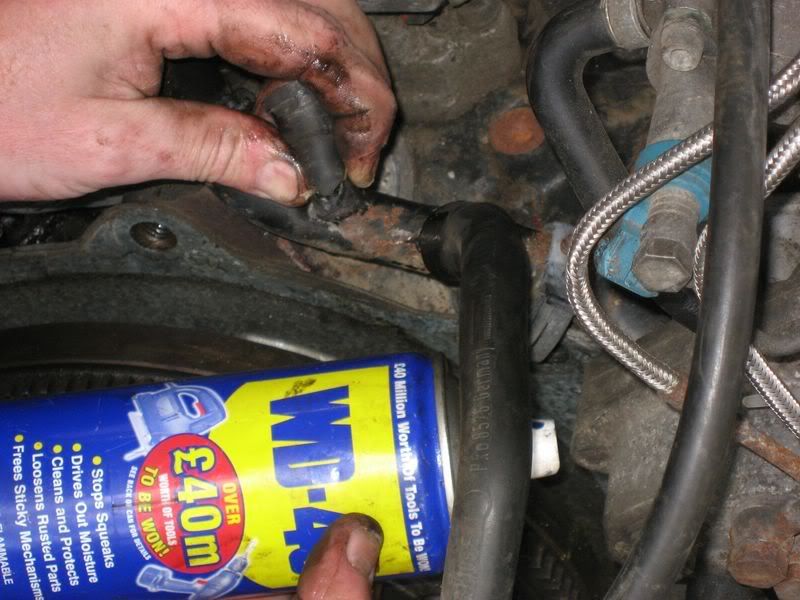
The water pipe from the system to the expansion tank had split too, I cut the end off, but that was a larger diameter than the remaining pipe, to get it to fit, I sprayed a little WD40 on the inside of the pipe and it went on quite easily
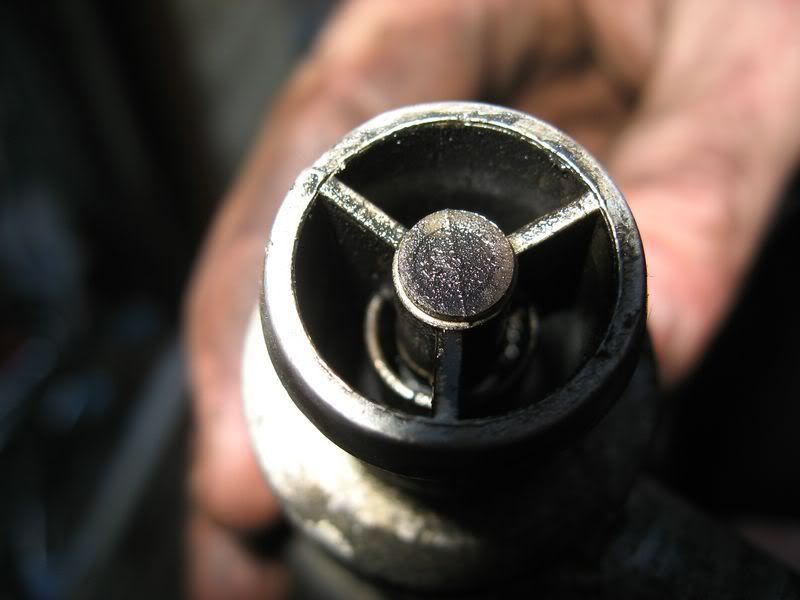
The idle was very lumpy before the crash, the ISV is well know for causing problems, I removed it and it was pretty caked up inside
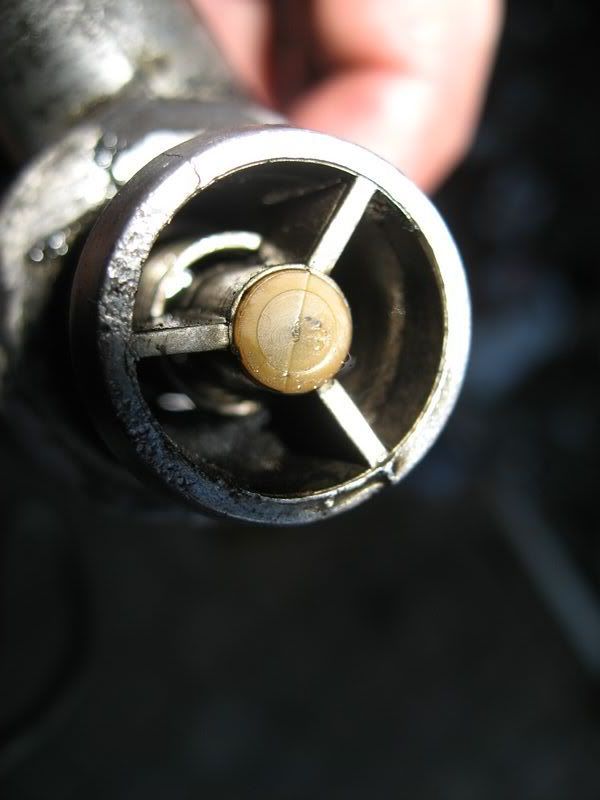
Cleaned the valve and the supplying pipes with petrol
After soaking for an hour and shaking it, the end result was much cleaner. Hard to see on the photo, but it is much better
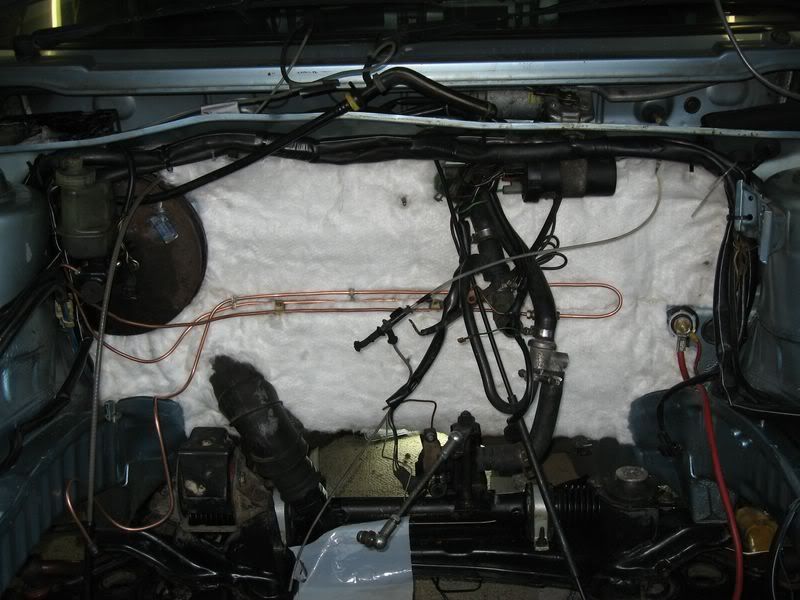
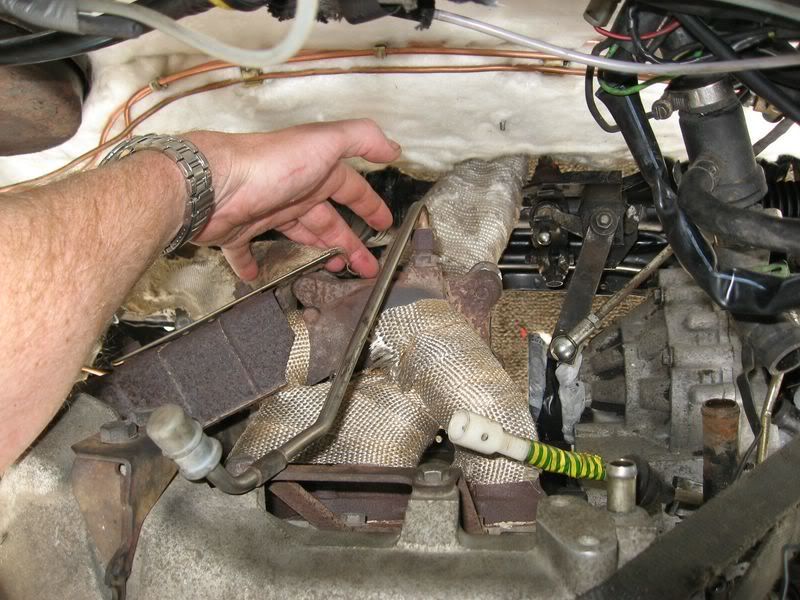
Before fitting the engine, I`d been given some self adhesice fibreglass needle mat to stick to the bulkhead and above the exhaust on the underside of the car to try and stop some of the heat getting into the cabin. A friend (who supplied mewith the exhaust wrap) gave it to me to try :thumb:
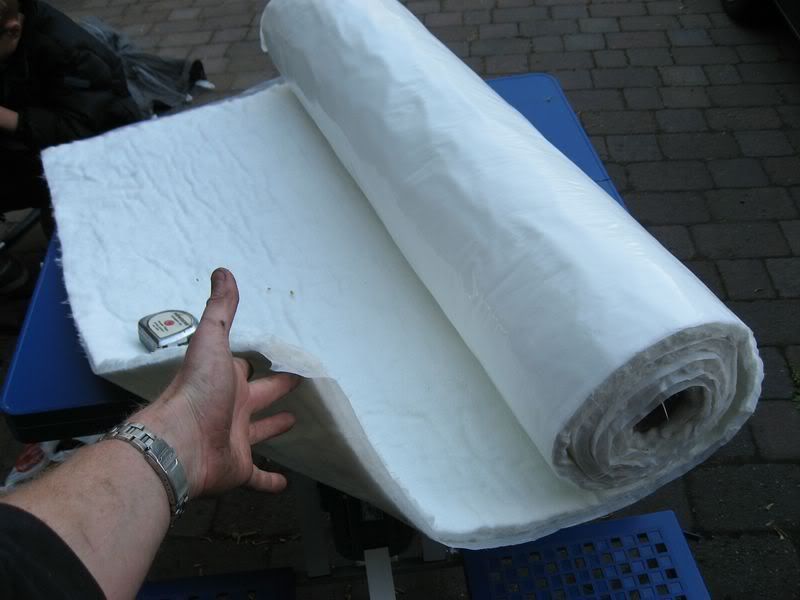
Cut some to fit and attached it to the bulkhead, i`ll be doing the `transmission tunnel` tomorrow before fitting the engine. It should stop the metal from getting as hot, which it certainly did over easter. It also weighs next to nothing, so thats good :thumb:
Fitted the Engine,
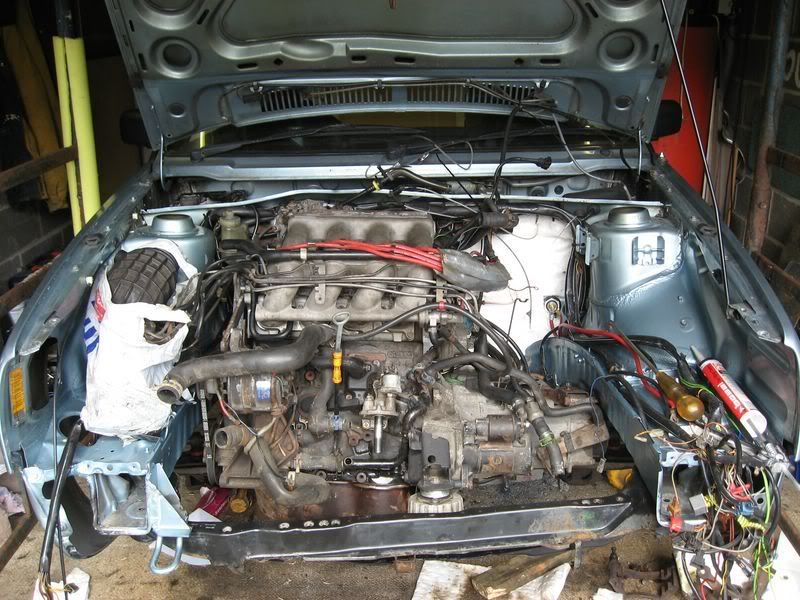
Today was engine fitting day. Set up my portable scaffold and block again and after manhandling it into position, I connected it to the block
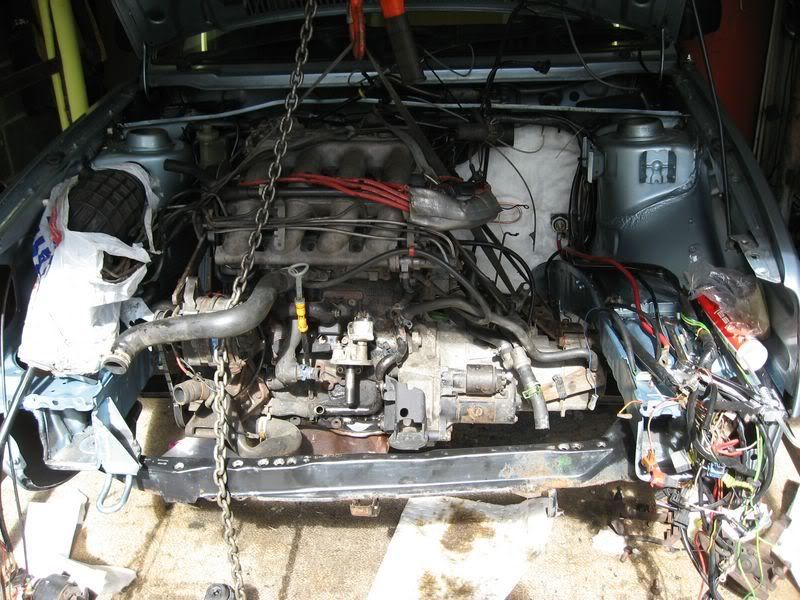
Lifted above the engine mounts and then thought that instead of skinning my knuckles when bolting up the exhaust downpipe, I`d do it whilst I had a bit more access, then lower the engine, worked much better :thumb:
Load of access !
Lowered Engine onto the mounts and fitted the front crossmember. However, the crossmember caused me some problems. Its held in place temporarily by 2 long bolts (about 55mm long), but the ones I had were 45mm and were too short. I had put the bolts into a bag when I removed the engine and every other bolt i`d needed to mount the engine was there, apart from those 2. It took me several minutes to realise the bolts the the rear engine mount used were the 45mm ones, and I`d fitted the 55mm ones, leaving me with the 45mm ones that were too short :shame: . Swapped them around and it fastened into place properly.
I then started connecting the wires and pipes back to the engine, everything was going really well, I had to refer to my photos that I`d taken of the engine in the old shell a couple of times, but most were pretty obvious. However, I came to a stop when I tried to connect the water pipes to the heater matrix.
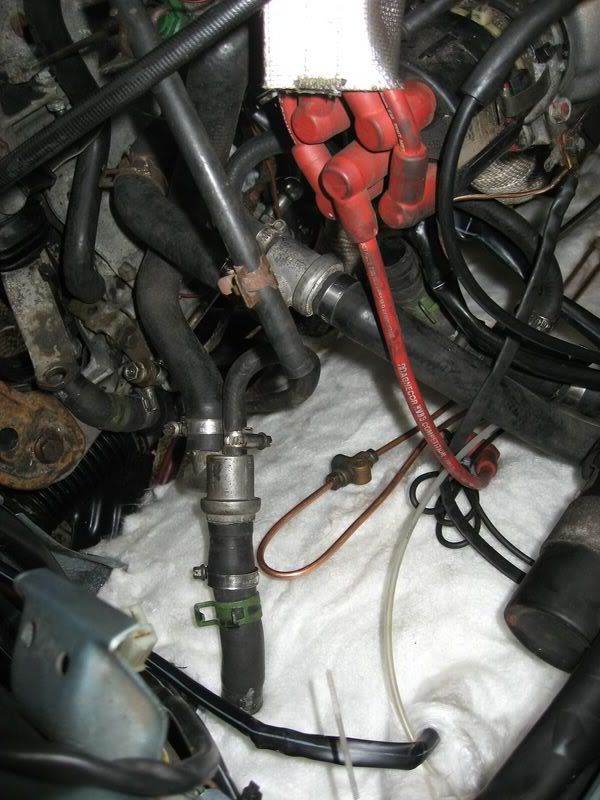
If you look at the above photo, you`ll see the pipes going throught the bulkhead and those from the engine, but I just couldnt get them to mate up. After several attempts, I stood back and realised that I`d left the valves on the engine pipes, and they were also still connected to the bulkhead on the new car :lol: What a fool... Removed one set of connectors and it went in place easily...
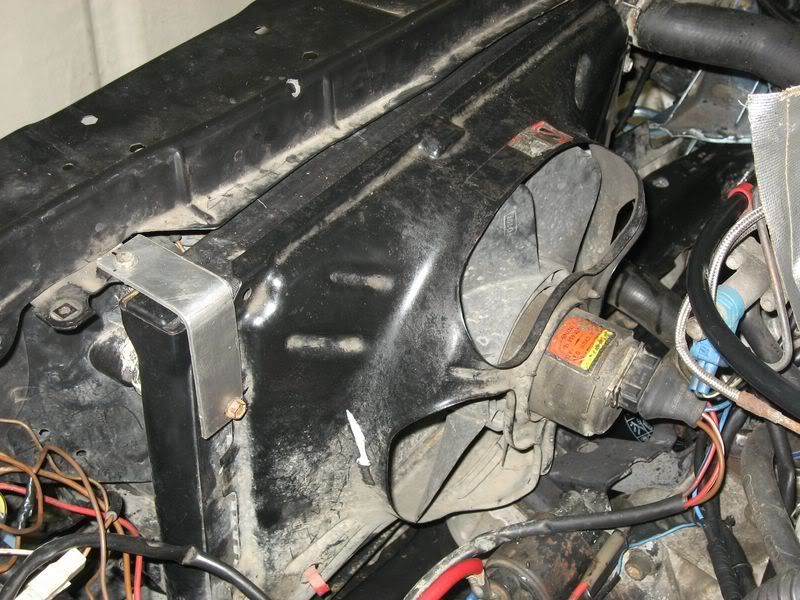
The radiator expansion tank had been secured by a random piece of aluminium in the old car, that I always thought looked a bit cheap, seeing as I`d bought a welder, I decided to weld the bracket into place
My first weld on the car..

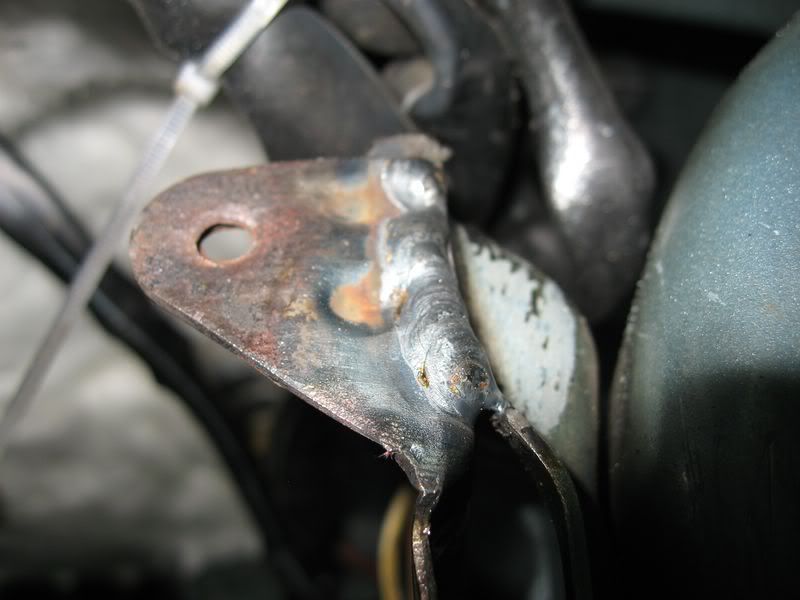
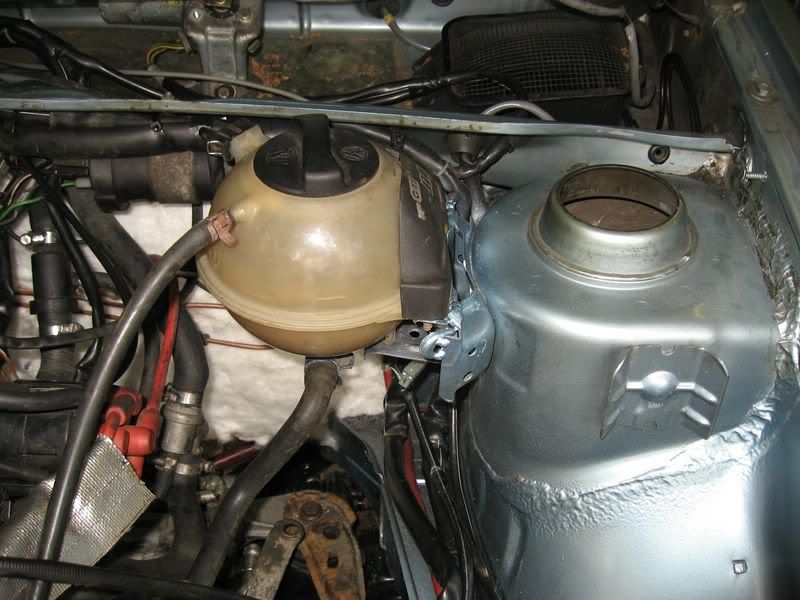
And the expansion tank secured to its new secure bracket :thumb:
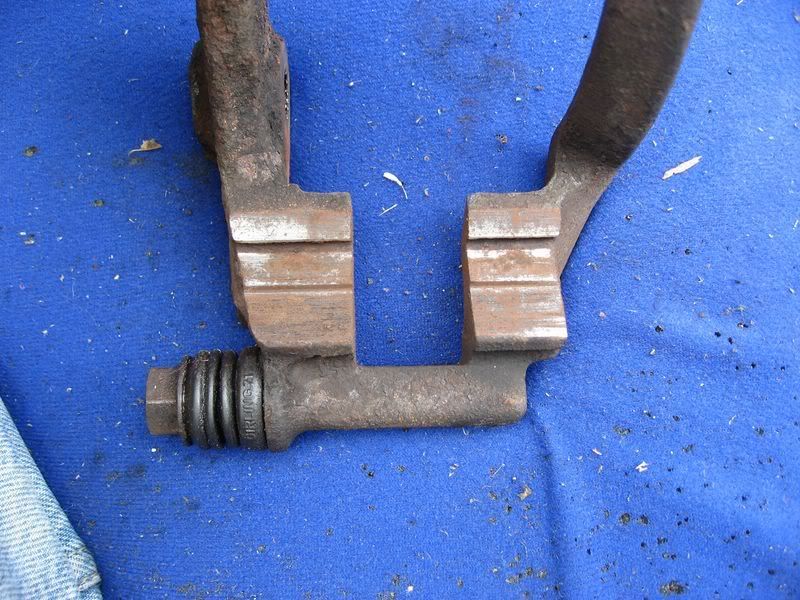
Next up was the tie rod end, this went in easily, however, it is slightly tapered and I could not get the locknut to turn, the whole shaft was spinning.
Found a simple solution, use some of these pliers to squeeze the taper into the socket, this locked it enough to be able to tighten the locknut
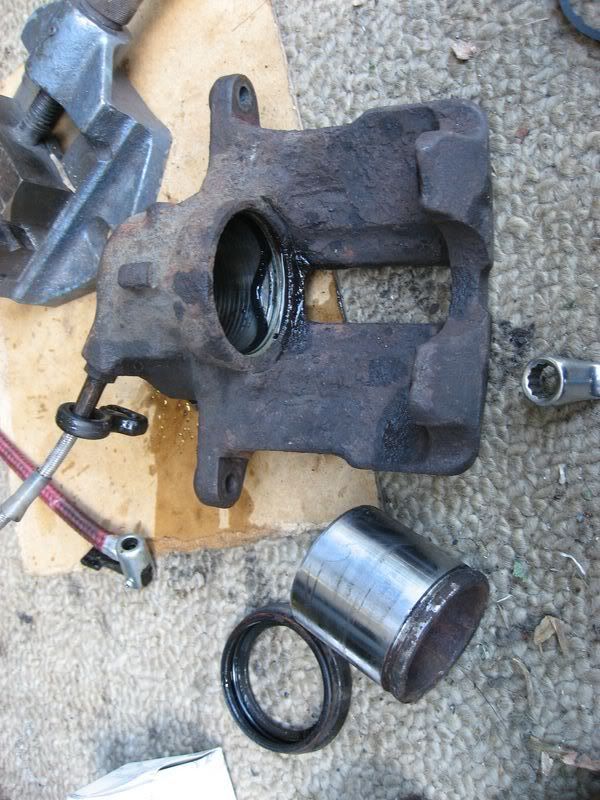
The lower balljoints had been a pain to remove, the hole where they were secured was pretty corroded.
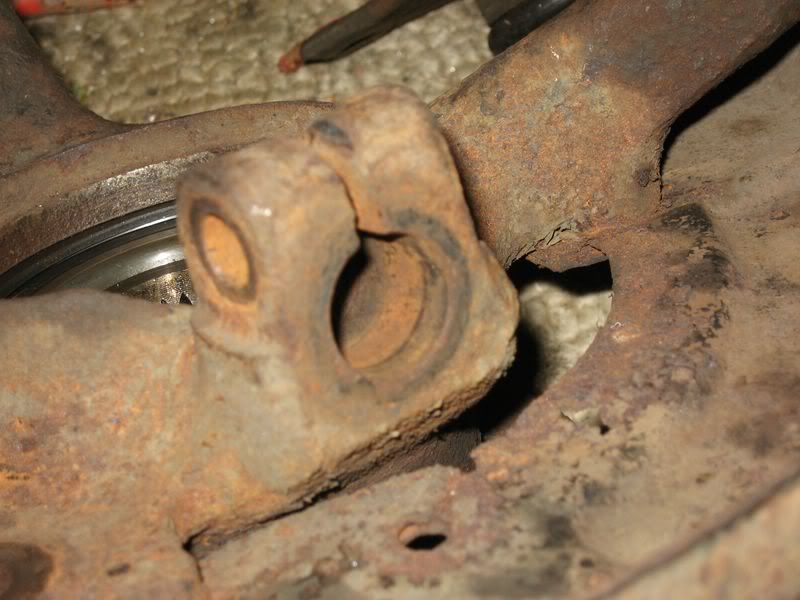
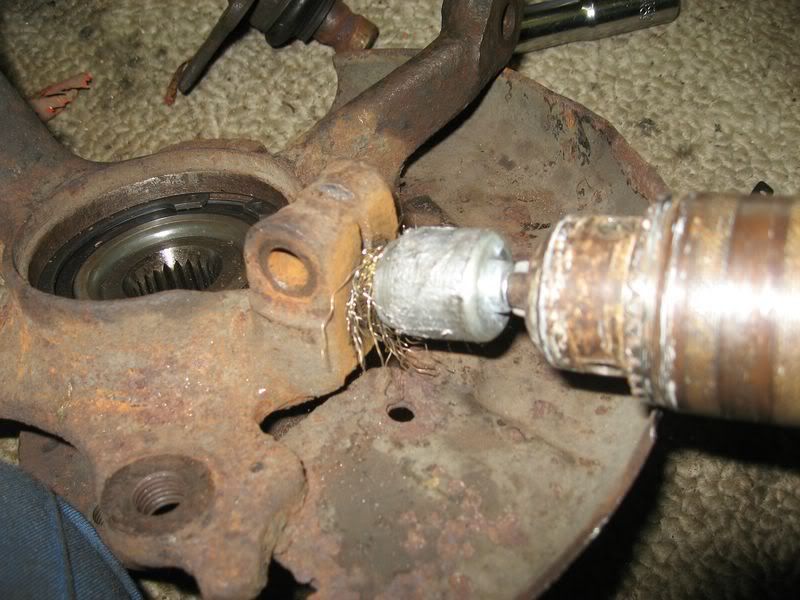
to ensure I had a fighting chance in the future I cleaned it out with a wire wheel attachment in the drill
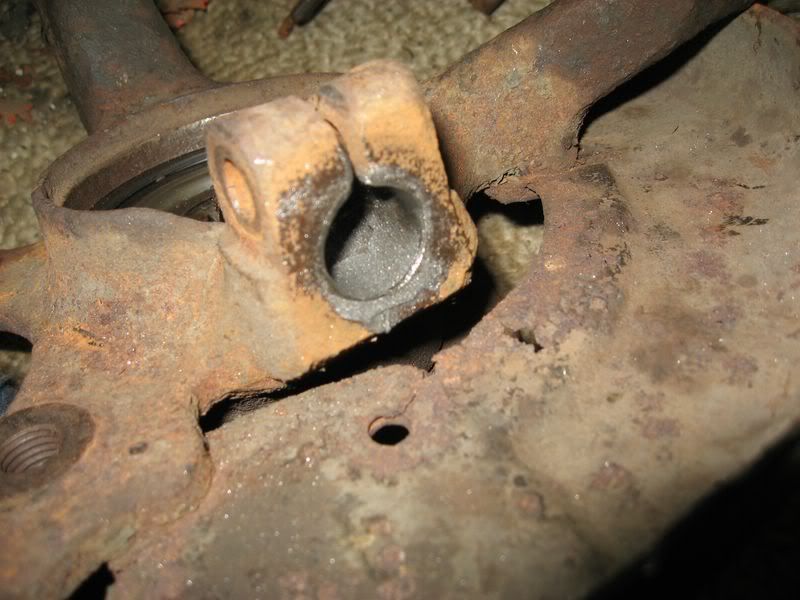
All clean and greased up ready for fitting. :thumb:
Fitted a well greased new lower-balljoint bolt

Pushed the tie rod end into place.
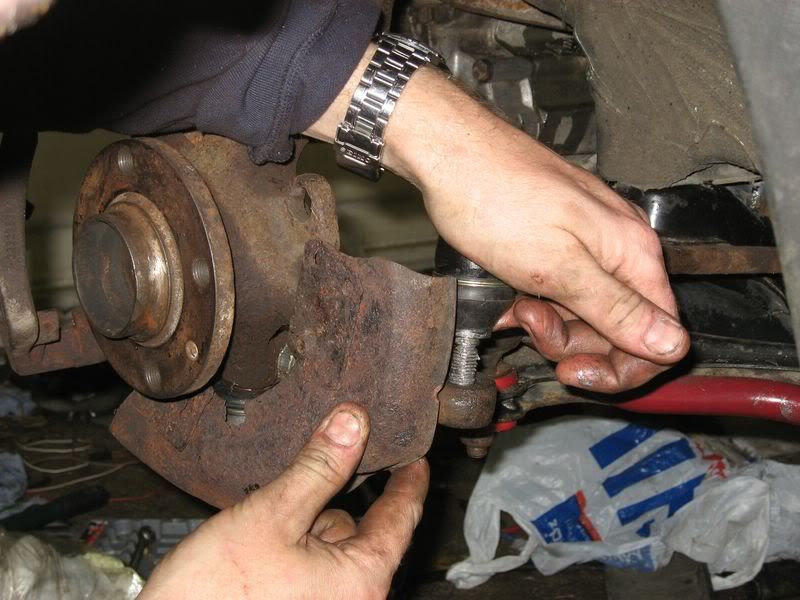
When I tried to tighten it, the shaft started spinning. Its a tapered shaft and it wouldnt grip. To stop this, I squeezed the tie-rod into the hub and this caused enough friction to enable me to tighted the new locknut :thumb:
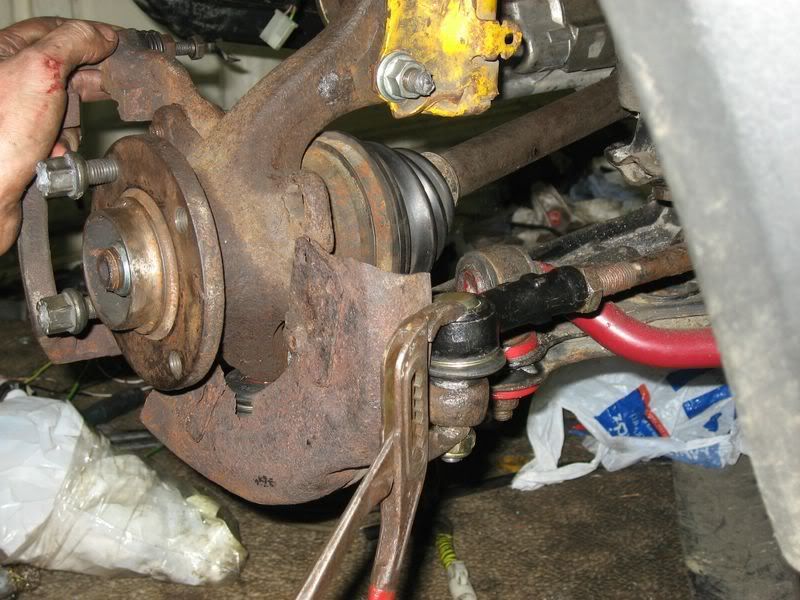
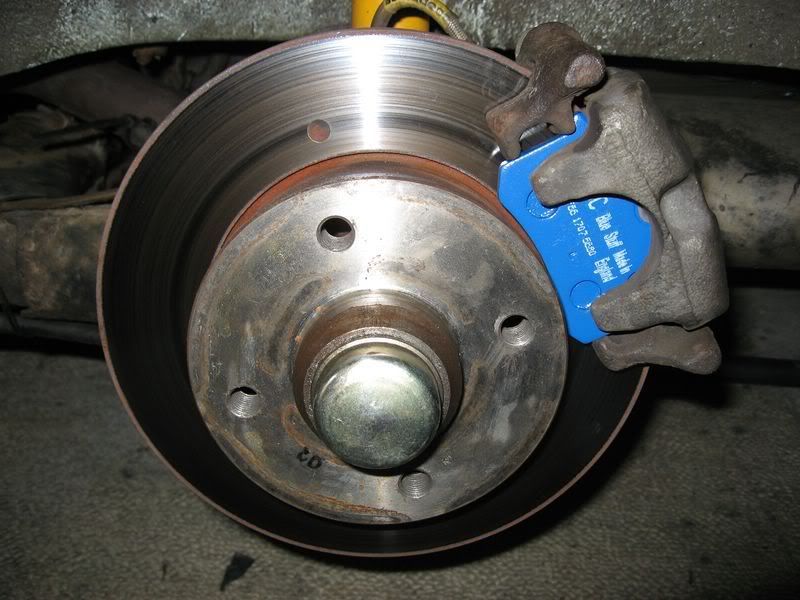
The hub all assembled ready for the wheel :thumb: (I`ve used the old suspension to enable the car to be moved, once the coilovers arrive I can quickly swap them over)
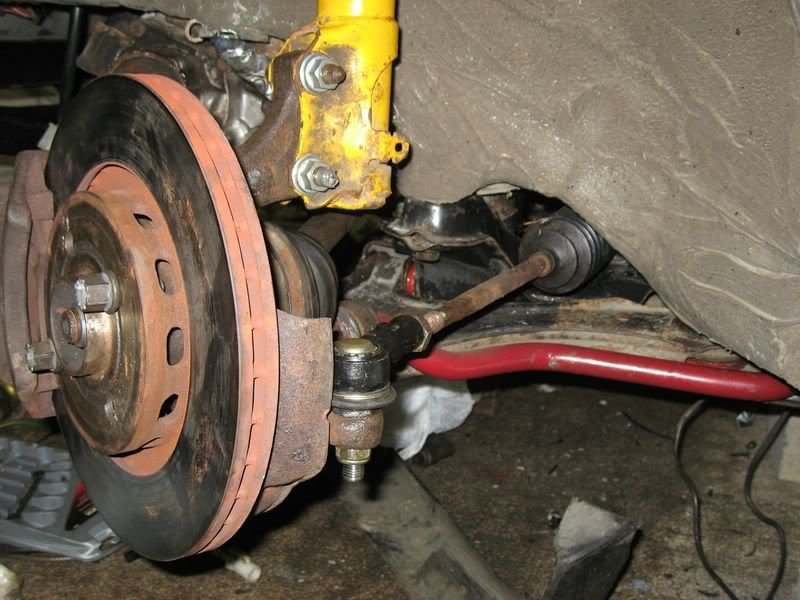
New front coilover ready to assemble
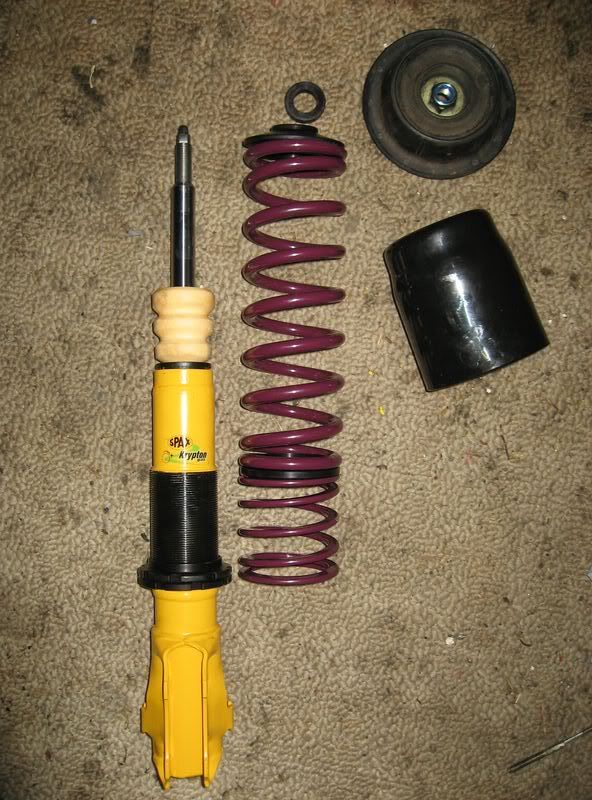
I am well aware of what can happen to coilovers if you dont grease the threads properly. These are GVK`s after 3years on the car and no greasing !:o

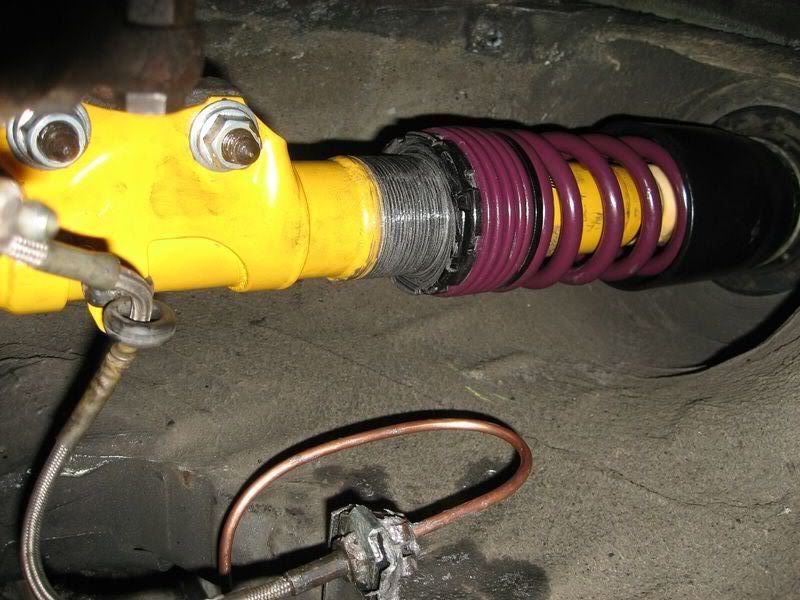
Applied liberal amount of grease to the whole thread (an old paintbrush is ideal for applying grease to items and not your fingers

Then simply removed the old ones I`d temporarily fitted and bolted in the new one. I`ve set the height to a mid (ish) point and will fine tune once its on the floor.
Just fitted one tonight, i`m working tomorrow and didnt want to be late, but i`ll try and get the rest fitted tomorrow.
minor report update, more details to follow..
Tried starting the engine today. First turn of the key and this is a clip of what happened...
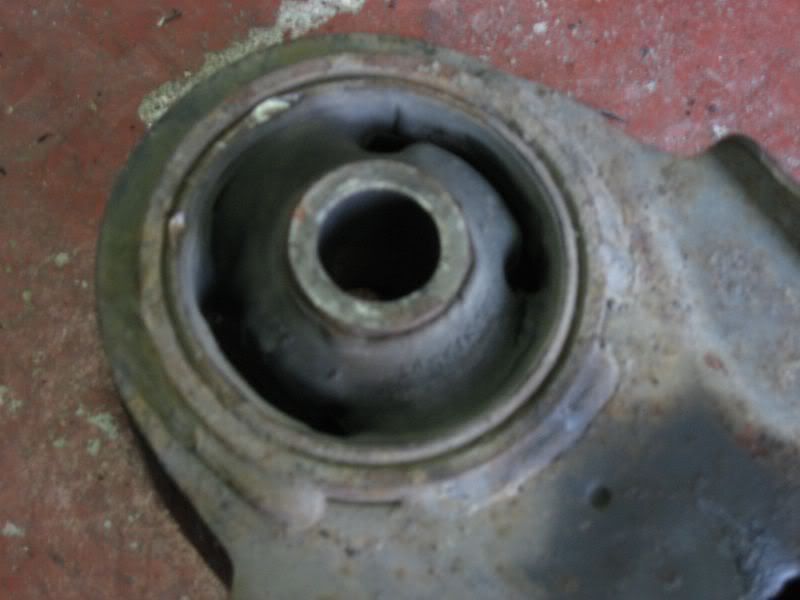
When I refitted the front subframe, I noticed the mounting rubbers were pretty worn and cracking in places. The new ones arrived today, so I fitted those.
Supported the front engine mount and unbolted the subframe
You can see the existing rubber mount here
Saw through it
Then just pull it out of the subframe
Thoroughly grease the subframe and the new bush
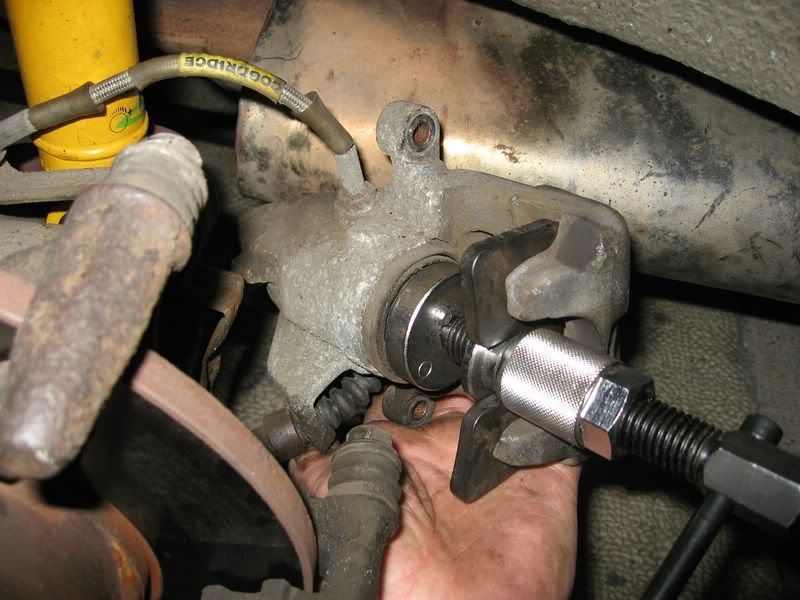
I didnt have a suitable vide / press available, so a length of threaded bar, spacer washers and bar with a hole in the middle does the job of a small press :thumb:

Ensure the bush is aligned CENTRALLY to the hole, or it will not go through....
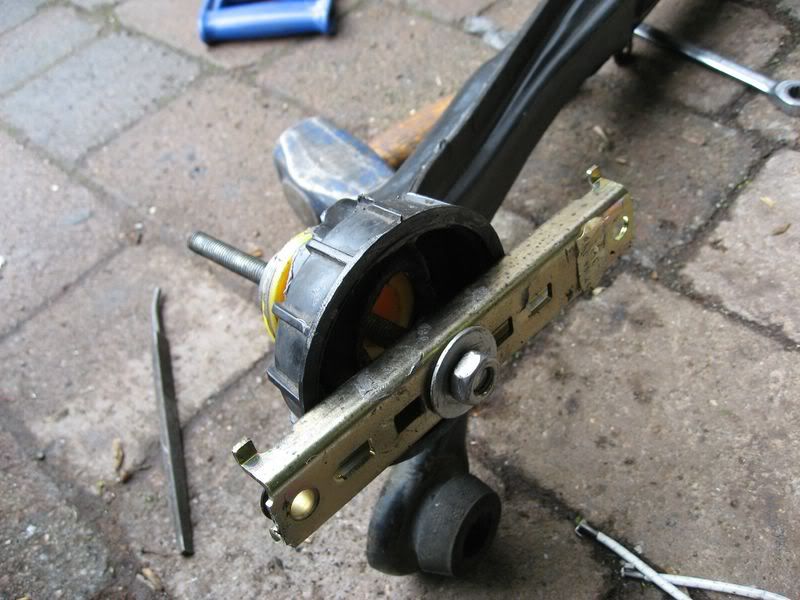
Tighted the bolt to compress the bush, which slowly pushes it through the hole. Make sure it stays central by `wiggling` the threaded bar if necessary
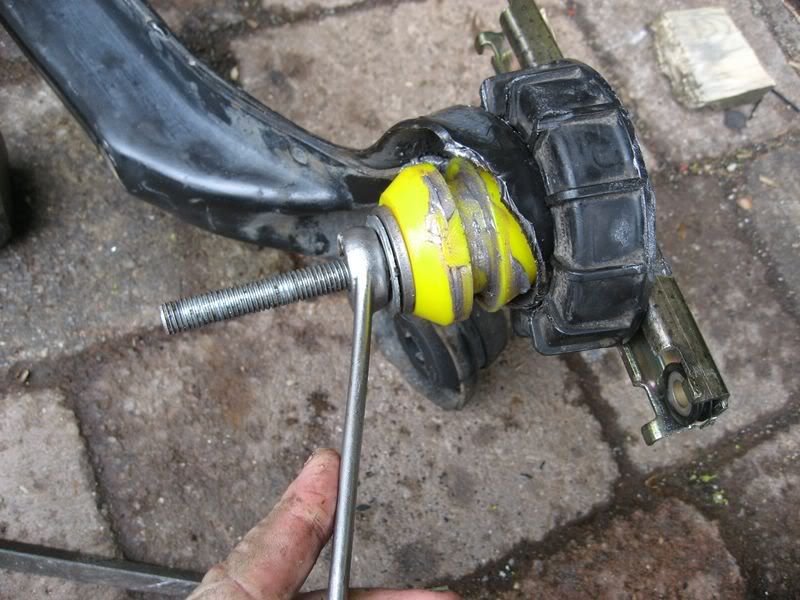
Here you can see the bush 80% through the hole
The bush will `pop` through the hole without a massive amount of force, of you find one edge doesnt come through all the way, just move the threaded bar around with your hand and that should be enough to make it come all the way through
The new bush in place
and the completed front subframe
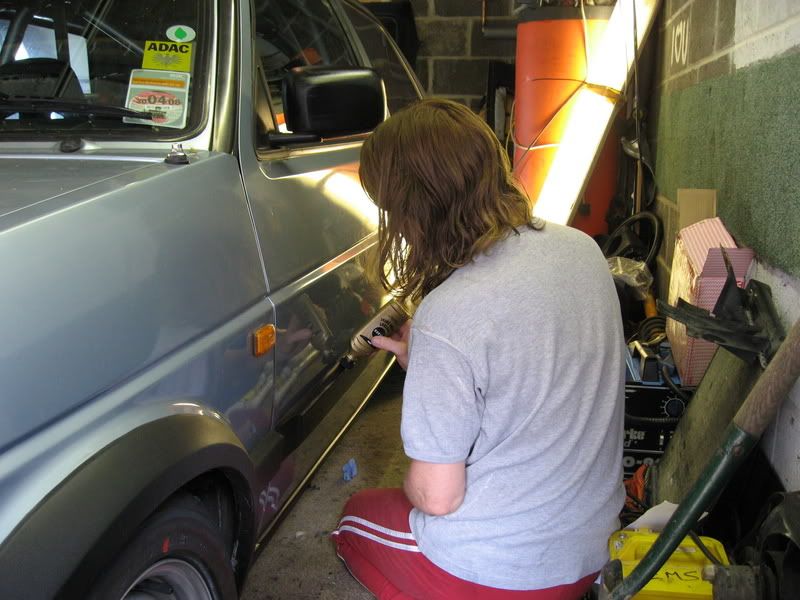
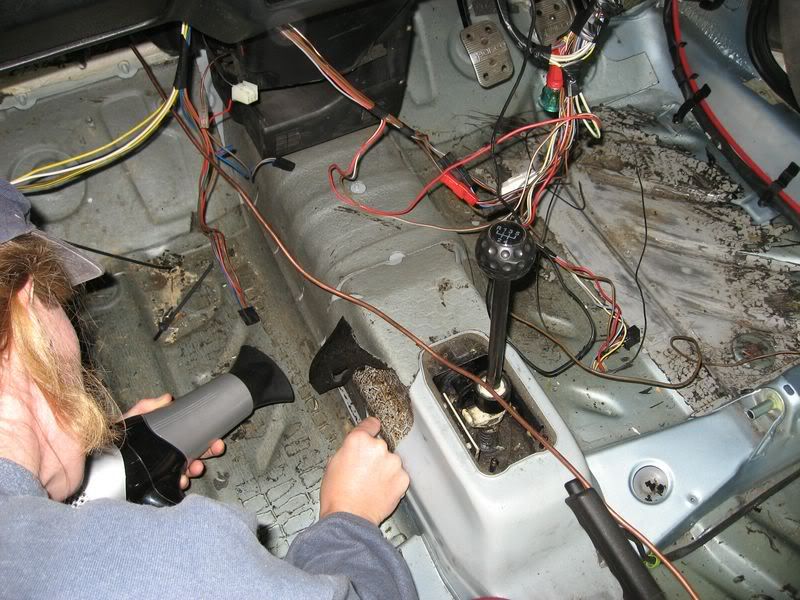
Whislt I was fitting the bushes, Louise said she would remove the soundproofing form the ceiling... Taking care not to use anything that would damage the roof externally, she used a 6" steel rule and hairdryer to remove the insulation
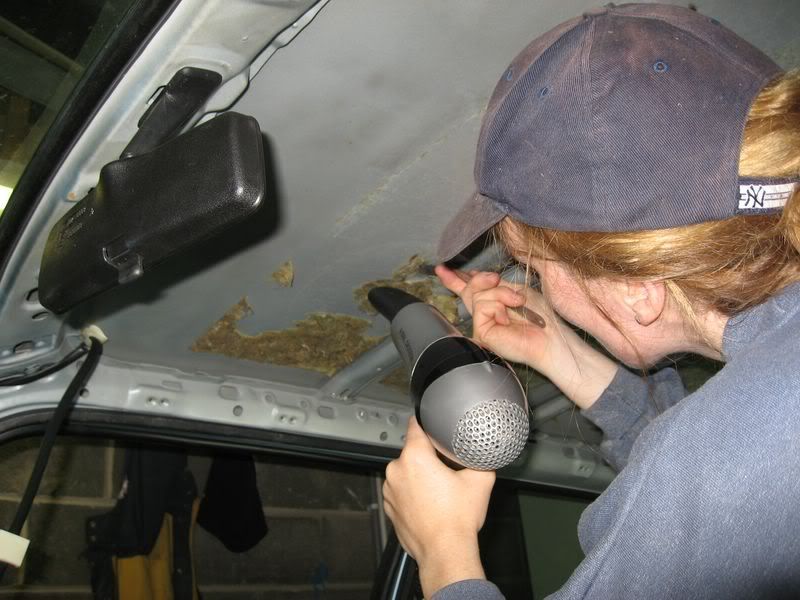
After quite some time, she had finished, its now ready for a quick clean with some white spirit, then I can start on the roll cage :thumb:
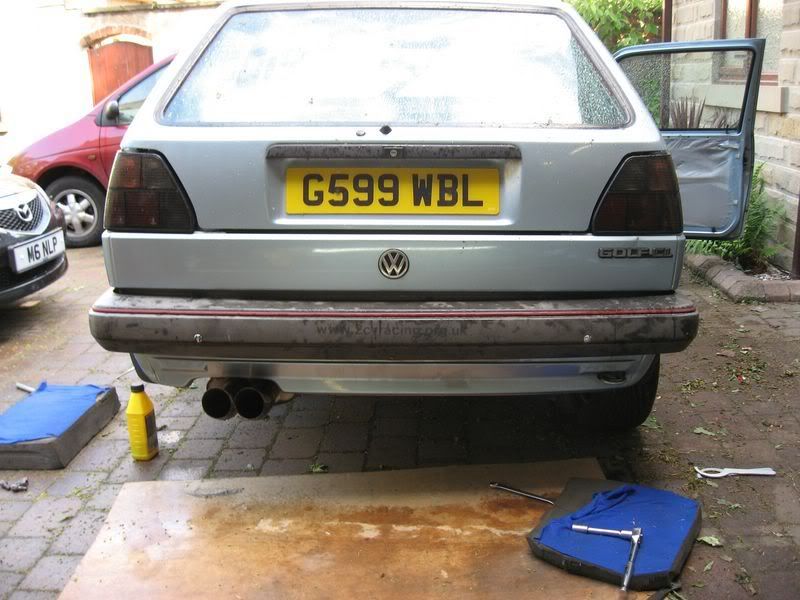
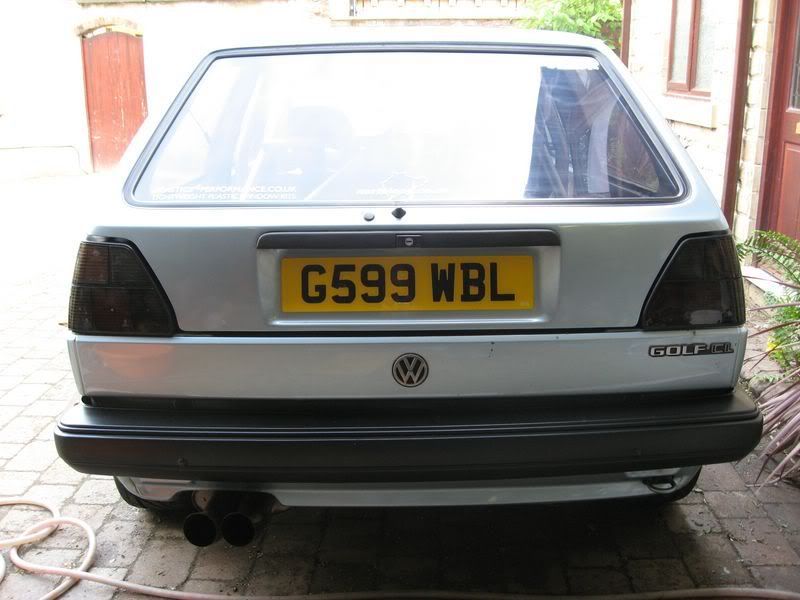
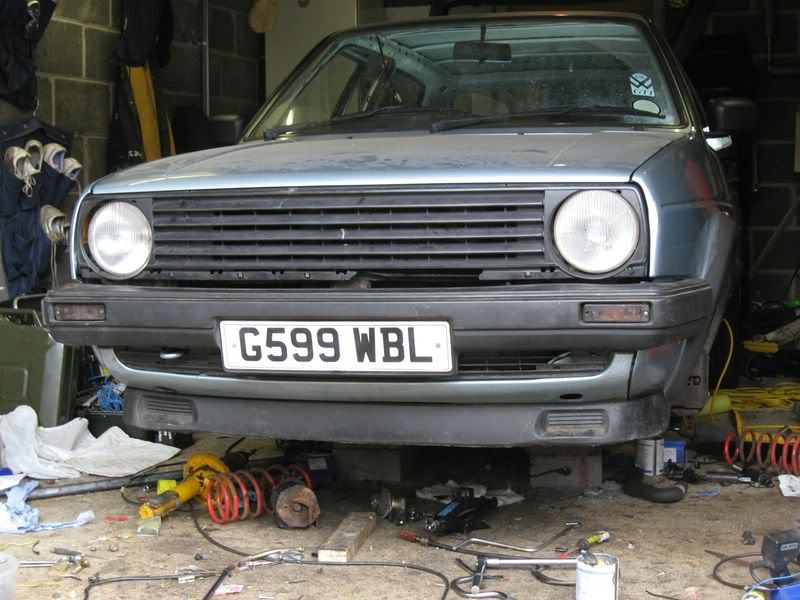
Meanwhile, I refitted the front slam panel, lower valance, bumper, chin spolier and grille :thumb: I need to get hold of the metal panel that sits at the bottom of the grille, and above the bumper, visit to scrap yard required I reckon....
I`ve had to re-solder many of the connectors for the headlamps / indicators as they are slightly different / damaged on the loom. I`ve got the dipped beam and nearside main beam and indicators working. Having a spot of lunch then back on with it this afternoon.
I hope someone finds them useful [:Y:]Dub20vt wrote:good work nige... love your tech tips... always very useful!
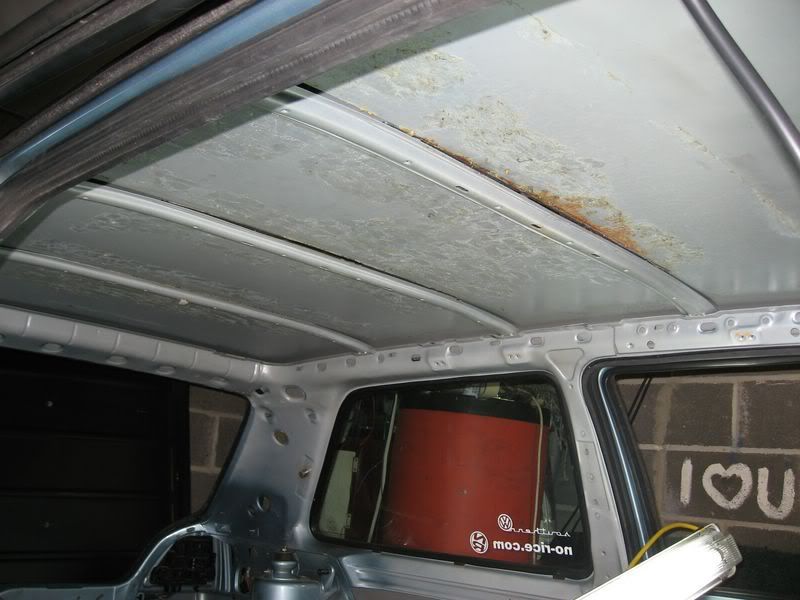
This afternoon, Louise finished her mammoth task of removing the soundproofing, she managed to remove of 2KG worth...Hairdryer and scraper did the trick, slow and steady. It needed to warm up before it would `peel` off
Afterwareds, a scrub with white spirit and job done [:Y:]
I found out why my clutch was `sticking`, I`d forgotten to fit this rubber... [:$] It goes on the release arm and `spaces` the clutch cable so it is always tight, without it, the cable was slack and thats why it wasnt releasing properly, there was no tension on the cable...
Spent the afternoon finishing the electrics, I now have working Headlamps, indicators, windscreen washers and main beam. The horn isnt working, so i`ll look into that.
I mounted the Bias valve in the cabin again, I need to get a brake pipe modified. I made one with Chris, but its 8" too long so I`ll go to the local motor factors and shorten it tomorrow. I can then fill the brake system so I`ll have working brakes. [:Y:]
Went to the local scrapyard, wanted the bit of metal that clips onto the bottom of the front grille, it goes above the bumper and below the grille, but the cars in didnt have it, so my search continues....
A morning of doing lots of little jobs...
Made a bracket to secure the top of the radiator to the slam panel, just a bit of aluminium bent and drilled
As the radiator is different, I needed a new hose from the top of the radiator to the expansion tank (6mm ID x 1m longand