
Firstly the car is an MY94 wrx sti impreza one of the limited version 1 sti homoglation models i think, number 59/200.
The car was taken off road last year when the head gaskets decided to let go, it was parked up in my drive an left while i saved some money and decided what i wanted to do with the car.
I decided i wanted the car to be a very very handy track tool as well as a road car, I set myself a goal of 500bhp and 500lbsft torque with a sorted chassis and suspension set up.
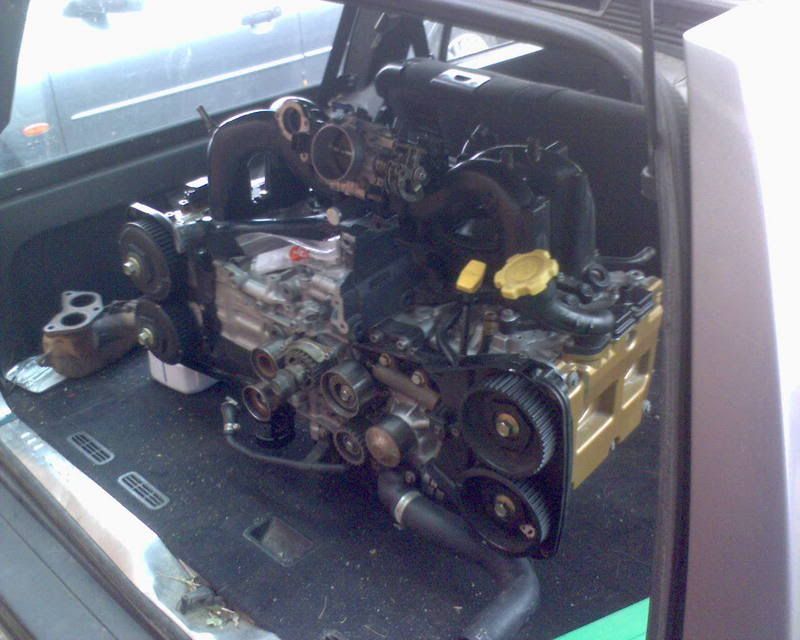
ENGINE
I originally was going to use my block and heads from my car in the rebuild and get the works done to them but after seeing an engine adverstised on a few forums on the net i snapped it up straight away, An engine that with a bit better cams and supporting mods should easily be capable of reaching my bhp and torque goals, spec of engine as follows.
2.0 block relinered to 2.2 by SMG
Lateral Wiseco custom pistons with uprated pins
ZEN H-Beam forged rods
ACL duraglide bearings
New EJ20 crank
Cometic Head Gaskets
ARP 12mm head studs
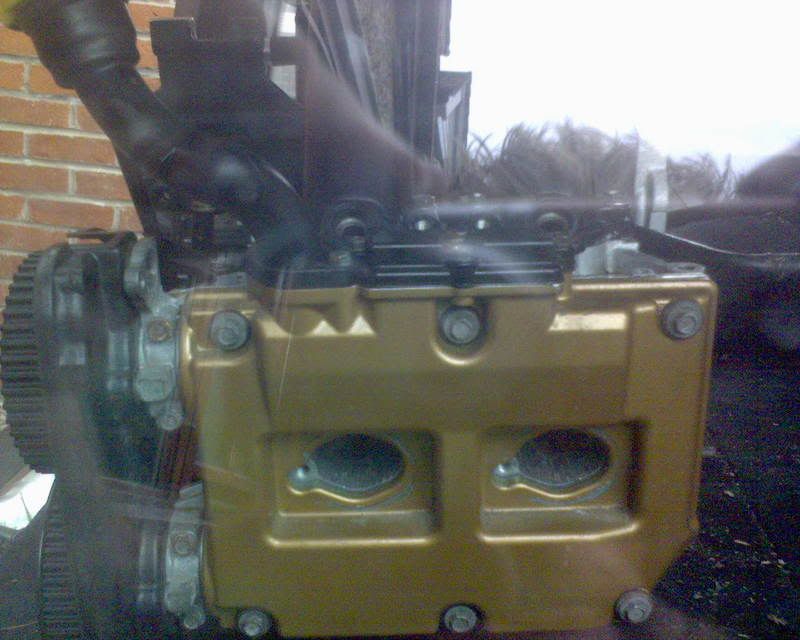
Fully Ported V4 heads including clave throats and inlet guides
All valve seats recut with 3 angle seats etc
Standard UK camshafts
Shimmed Oil pump rebuilt and inspected
6>6.5 bar on cruise
4.5 bar oil pressure at idle with Millers 10w60
Reversed inlet manifold.
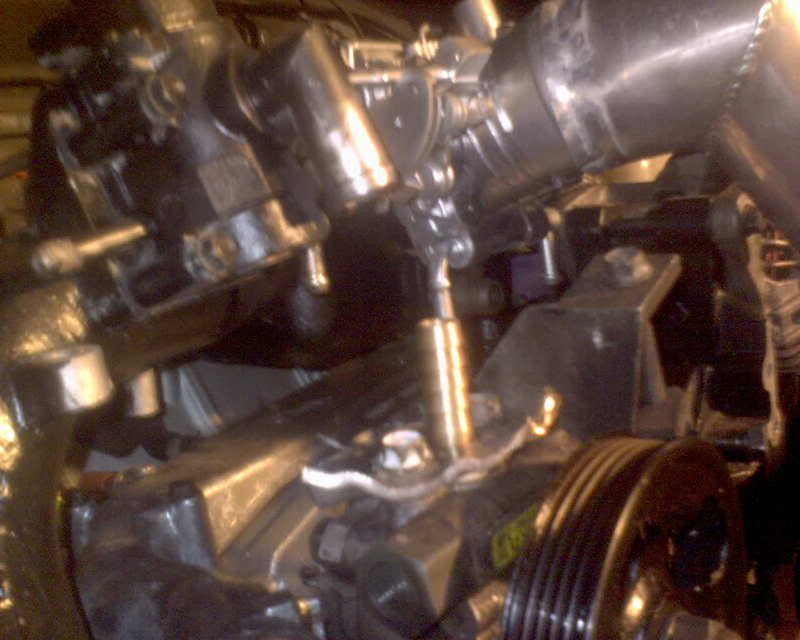
A few pics of the engine.
To date iv just got to fit the flywheel and clutch assembly and the engine is ready to drop in.
Im going to be running it for the time being with my original tdo518g turbo and 440cc injectors using an apexi avcr and apexi safc 2 untill such a time that i can afford the bigger injectors (740cc) the turbo (garret gt35r) and ecu (motech, gems, autronic maybe).
Im now working on a parrelell fuel rail set up so the larger injectors will be ready to fit and run when needed.
I also have a 180deg rotated manifold setup so the pipe work runing from the fmic is reduced in lenght hopefully significantly reducing lag, iv had to make up a remote power steering resovoir set up as the ICV on the reversed manifold fouled the resovoir.
Hopefully the engine should be in the car at the weekend so will get a few pics up of it fitted.
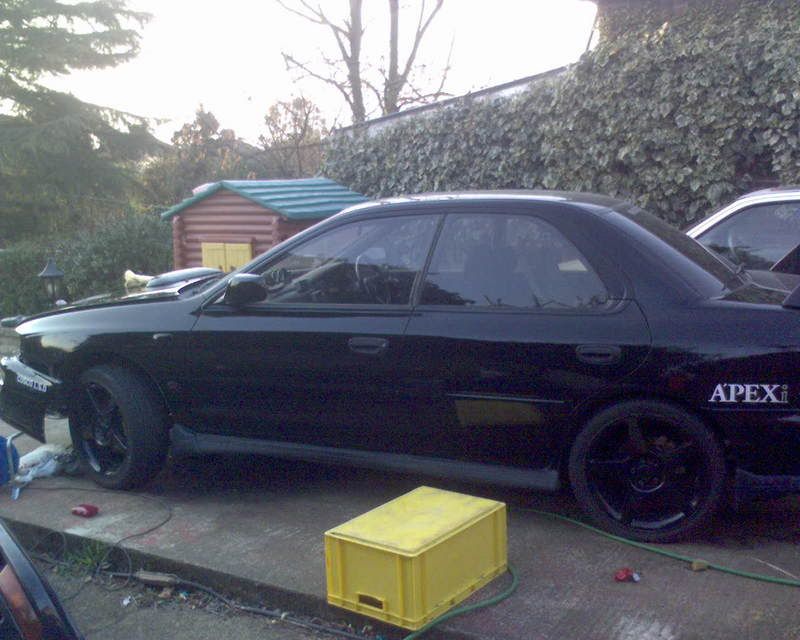
BODYWORK.
I have decided to revert the car back to its originall mica black paintwork by removing all graphics ( i had the cusco advan graphics).
I wanted the car to look sleek and stealthy all black with its black 17" mim ultralite mag alloy wheels, At present i am painstakingly trying to restore the shine back to the paintwork lol.
Iv got a facelift front bumper on the car which has been hugely hacked about to fit my huge fmic lol, splitter to come just unsure what type as of yet.
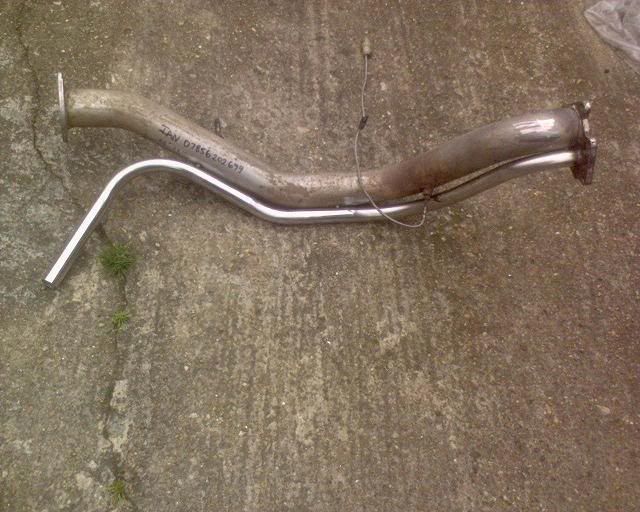
I have also rather a unique extenall wastegate mod setup. The story goes a bit like this.
After hearing several R 32 gtr`s with the externall wastegate and screamer pipe set up i fell in love with the whole screamer pipe sound and decided i had to have it.
I started of looking into new turbo`s and externall wastegates i found it was going to cost big big bucks as a whole new turbo was needed plus uppipe the wastegate ect ect so i began looking into getting it with what i had, Iv got an HKS closed neck down pipe on the car so i came up with the idea of drilling a 32mm hole in the down pipe flange over where the wastgate is on the turbo, i then welded a 3mm steel curved plate onto the down pipe flange to seperate the main exuast outlet and the wastegate outlet when the dp was bolted to the turbo, took a lot of fileing down to get a nice fit an ensure it was a good seel.
When all the drilling and fileing was complete i made a piece of stainless pipe bent up and welded into the 32mm hole so when the wastegate opened the gasses would be vented to atmosphere.
A pic of the downpipe flange and the welded in splitter.

One of the complete dowpipe with the sreamer pipe.
A quick vid clip of the mod in action a bit hard to hear as filmed with camera phone, this is before the head gaskets went and car was taken of the road.
http://s10.photobucket.com/albums/a117/ ... =worbs.flv
nearly all graphics removed and this side mopped, polished and waxed, pheeeeew lol. Was going to keep the small white apexi and cusco lsd stickers but have now decided to remove them.
The bonnet, check out the reflection of the sky in it, thats 4 bloody hours work that is lol.

I also have moved the original top mount I/C spray to the front bumper to spray onto the fmic.
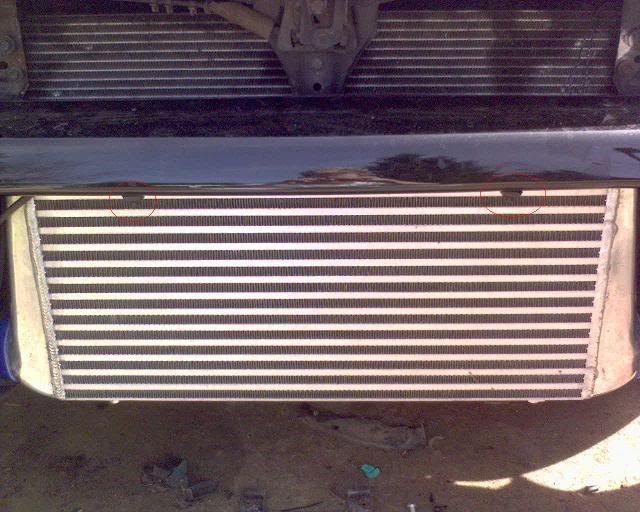
A couple of the FMIC fitting.


And the FMIC fitted.
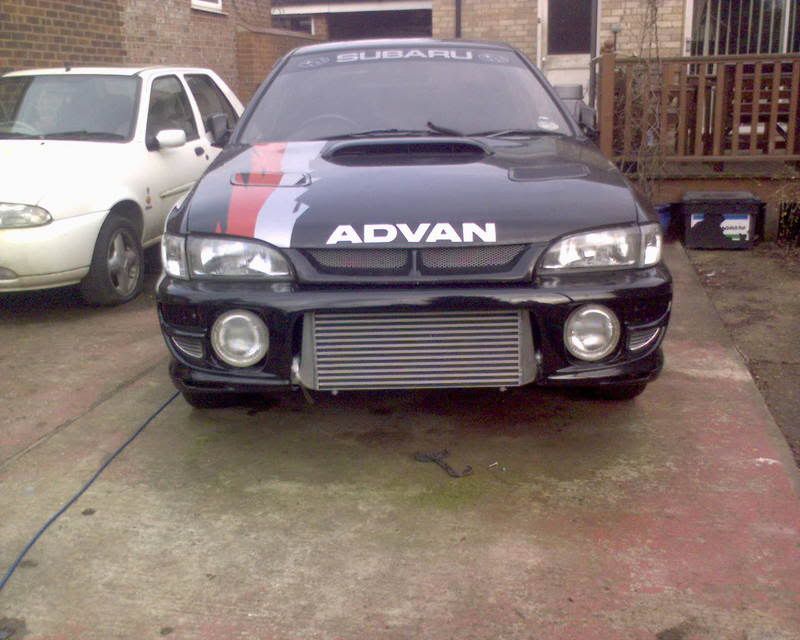
And a finall pic of the look i want get back to the car.

I hope you have all enjoyed my work in progress so far and i will keep you all informed with updates as and when they occur.
Ian 8)


 .
.

