
1966 Volvo Amazon - Crazy hot rod and track car
going lower
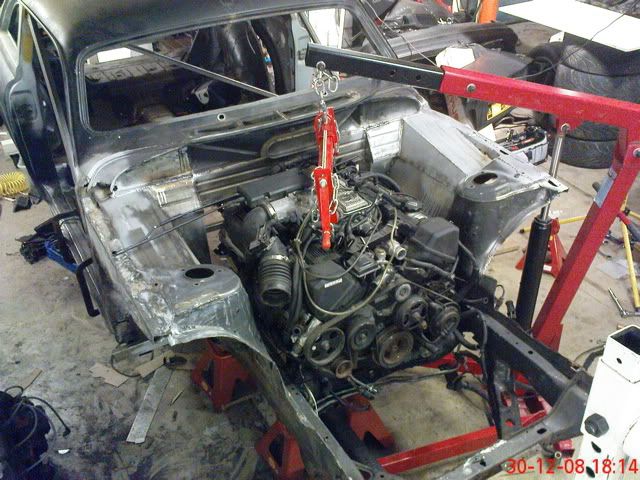
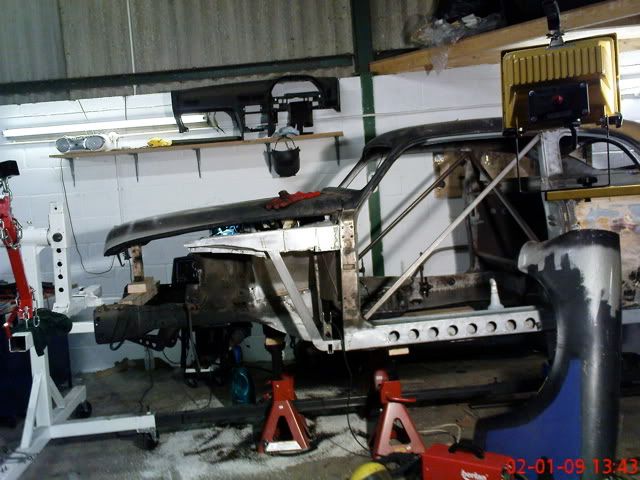
Today was spent in the BigPower workshop flitting between the project and Stus M3. (basically keeping an eye on the big fella and operating the scary tools for him, whilst he kept watch of my silly ideas straying towards his car) On the Amazon, after a lot of playing about the engine is now sitting almost 20mm lower, and is back as far as I intended, but will require a relocated oil filter and a slightly modified sump. Nothing to difficult to deal with. It is certainly mid engine now, as the front cylinders are behind the suspension turrets.

Comparing that to an s13 1uz swap, which shares the same front subframe as this project:

and here is an AE86 conversion:
The only issue, I now have a gap of almost half a meter between the engine and the radiator! (Thank You Stu for the rad)
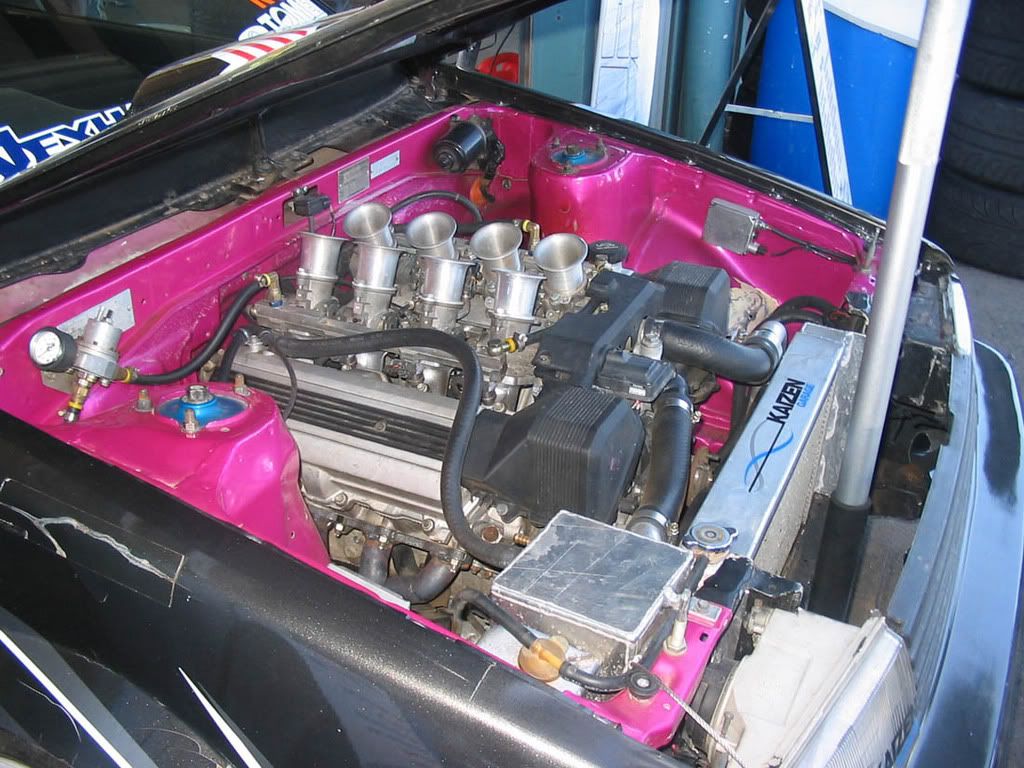
I couldnt resist offering up the bonnet too to remind me how cool this thing was, and check the clearance. Clearance was fine - plenty room for my new turbo location idea too, and a load of height to play with ITBs and trumpets fr that option too !
.
There was quite a lot of work to get all that done, but the results are the exciting bit.
Comparing that to an s13 1uz swap, which shares the same front subframe as this project:
and here is an AE86 conversion:
The only issue, I now have a gap of almost half a meter between the engine and the radiator! (Thank You Stu for the rad)
I couldnt resist offering up the bonnet too to remind me how cool this thing was, and check the clearance. Clearance was fine - plenty room for my new turbo location idea too, and a load of height to play with ITBs and trumpets fr that option too !
.
There was quite a lot of work to get all that done, but the results are the exciting bit.


Man, you make me laugh Rob 
'Operating the scary tools......'?? Like the welder? You burnt several holes in my roof so I have good reason to be scared!
I am paranoid about hurting myself with tools as I usually do. It is an ignorant man that does not know pain
____________________________________
The Volvo is one of those cars that will be so well known on the forums when it's done. A crazy idea coupled with proper engineering knowledge and Robs obsession to get it 'right' will ensure its magazine coverage up and down the country.
We had a little conversation about power to weight ratios yesterday. Rob was pissed off as the Amazon will be around 1100kgs and without forced induction he'll only have around 330bhp. 300bhp per tonne And this loony wants two turbos on there :lol:
See you down there for round two soon :thumb:
'Operating the scary tools......'?? Like the welder? You burnt several holes in my roof so I have good reason to be scared!
I am paranoid about hurting myself with tools as I usually do. It is an ignorant man that does not know pain
____________________________________
The Volvo is one of those cars that will be so well known on the forums when it's done. A crazy idea coupled with proper engineering knowledge and Robs obsession to get it 'right' will ensure its magazine coverage up and down the country.
We had a little conversation about power to weight ratios yesterday. Rob was pissed off as the Amazon will be around 1100kgs and without forced induction he'll only have around 330bhp. 300bhp per tonne
See you down there for round two soon :thumb:
http://www.auto-genie.co.uk
07733 527430
stuart@auto-genie.co.uk
Valeting, detailing and undersealing
07733 527430
stuart@auto-genie.co.uk
Valeting, detailing and undersealing

First of all, thank you for all the nice comments about the project. Until Stu's post above i hadn't considered ever even showing the car when complete, and have only shown th build here in the members section of BigPower. This has been a completely selfish build, purely an outlet for me to learn more and built a car I want in my collection. However thinking about the reaction discussing it gets and walking around the autosport how did get me thinking, and maybe a more public appearance of the car, once it starts to look like one again, will help with the drive and motivation to get it running sooner. How exactly that is going to go forward I don't know yet but it has got the ball rolling in my head at least, so watch this space for more news. and now back to the more interesting bit - the build.
With the extra drive from the autosport show on friday, before we even got back to Norfolk a gearbox was bought off ebay. Now i just have to get to manchester to pick the damn thing up! On saturday morning the motivation was still there but it was -4 outside so i didnt get to the workshop until 2pm, finally giving up hope that it was going to warm up. I quickly set on the engine, which I needed to strip down a little to design the new intake, exhaust maifolds and remote oil lines. So intake off:
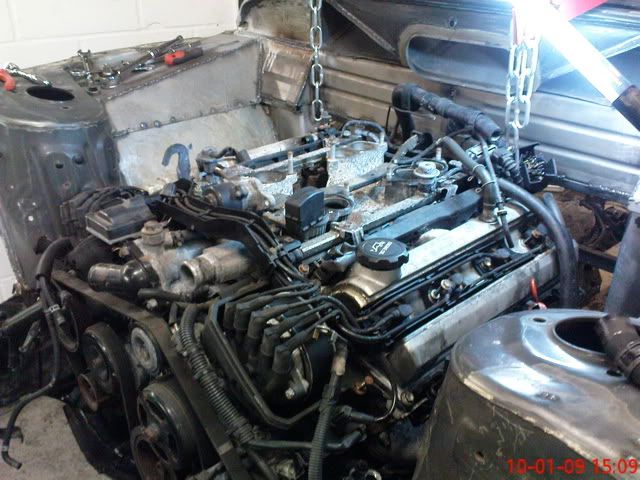
The standard toyota runners are 45m diameter exactly, the same as the throttle plates on an R32 GTR, and conveniently I had already ordered 4 of them ( 8 throttles in total) last week, after a few calcs on what would be suitable for this size engine. They will need some work, but it was good to know that toyota agreed.
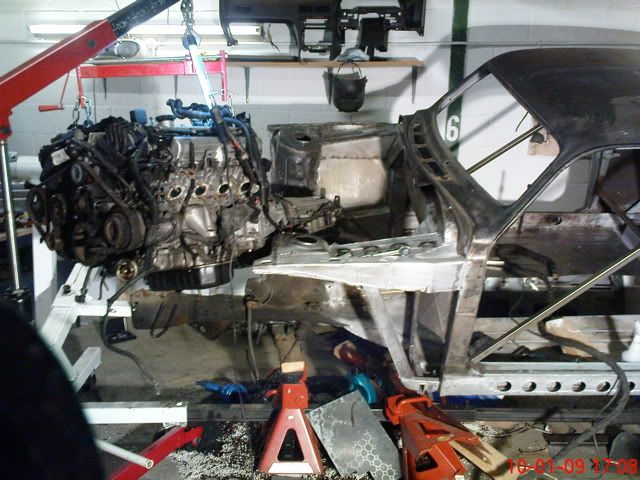
The next bits were going to be much easier with the engine out. easily done.
The exhaust manifolds were off before it was ever fully out of the car. Thanks to Toyota using the right type of nuts, they came right off, and the manifolds were of a really good design to with separate flanges and expansion chambers in the tubes. Almost a shame i will be re-designing them and making my own, but mine will be for a very different purpose to Toyota intended. The only irritation was on each side, 1 stud was behind a runner and rather difficult to get to even with the engine out, and the dipstick had to come out too on the LHS as it ran through the manifold. I will certainly try to design my own ones with proper tool access for each of the studs.

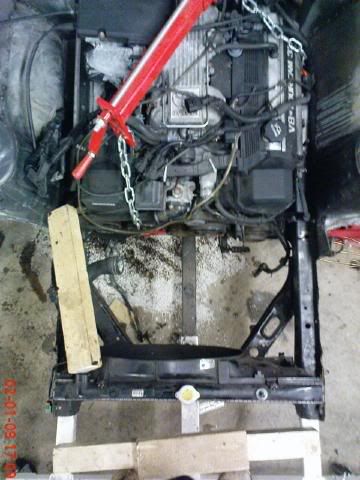
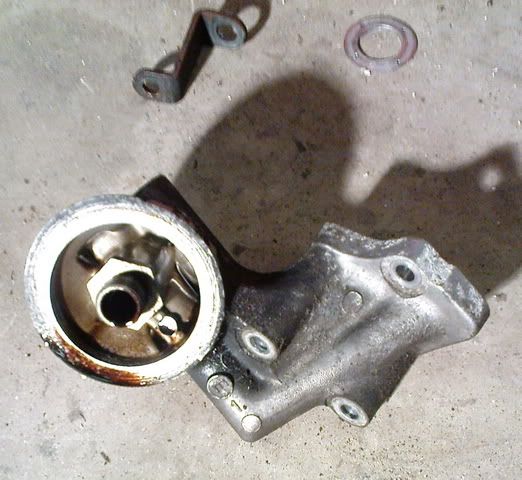
The oil filter location clashed with the subframe. However it was a bolt on housing, so i figured rather than an adapter for another separate housing; the best, simplest and lightest solution would be to machine a new housing take off system straight on the block. It will take a little more work but be so much better. there is nothing on the market so no excuses for not making 1 perfect for me, and if there is anyone else tuning a 1UZ out there, then maybe i will get a few made and sell the others. So here is the part:
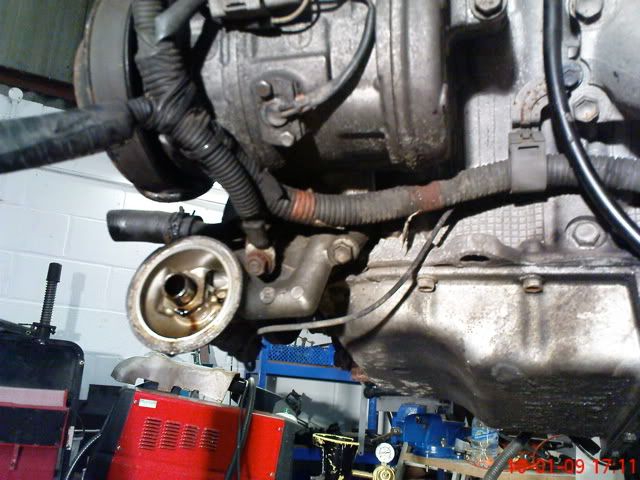
And now removed, with all the dimensions taken to get my new part designed on CAD.
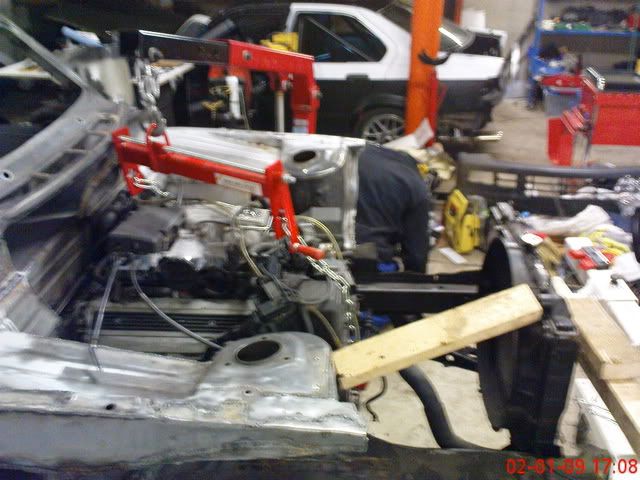
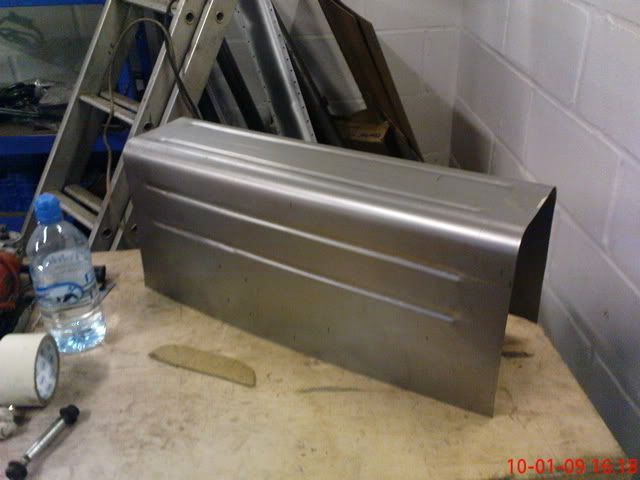
It was all going well so far, so with Stu appearing in the cold, and spending as much time swearing at his BMW as i did attacking the overbuild Totyoa intake manifold I roped him into helping opperate the bead roller ( a two man job) and fabricating half of the new prop tunnel that was needed. It is always satisfying to take a piece of sheet metal and a few hours later have a functional part in your hands. Here was todays efforts. A simple piece, but I liked it.
It didn't get joined into the car yet, as it would be nice to have the new gearbox first to get the location spot on. I want the tunnel as low and narrow as it can be to maximise the space in the car. A 4" roof chop has already taken a good chunk out. So, time to get the block ready for its new gearbox, even if it is several hundred miles away still.

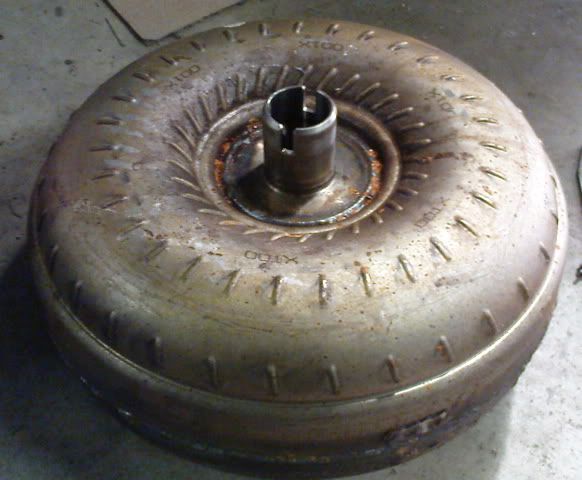
And silly torque converter off. No need for this lump. I don't know what I will do with it. Either sell it off or weigh it in eventually.
And the important part saved - the bell housing which I will probably be reusing, with an adapter to the new box.
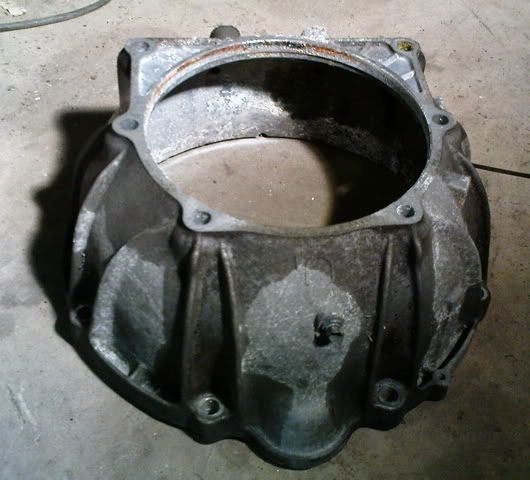
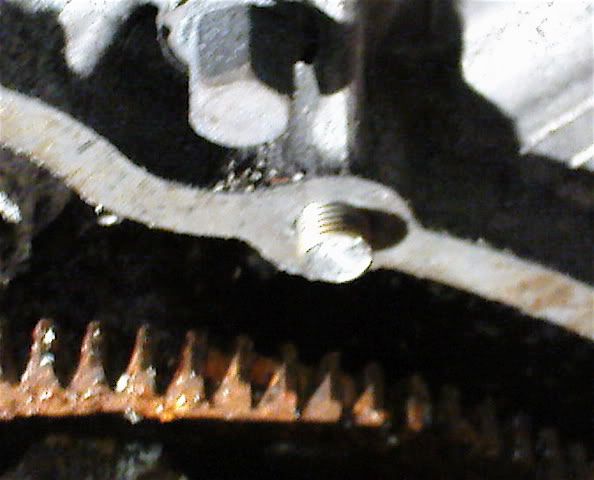
Unfortunately this was not the smoothest job. I am not sure it it was the sub zero temperatures that late in the day, or just sods law, but despite a complete lack of corrosion on the bolts, proper grade bolts being used by Toyota, and everything being soaked in penetrating oil for at least half an hour... 1 sodding gearbox bolt sheared off in the block part way through coming out. A perfect example of a torque sheer on a galled steel to aluminium joint. It is an M12 x1.25 Fine pitch thread too, so not one I can just get a nut form B&Q on a sunday for to weld to. It wont be an easy fix, and will slow me down for a day, but I am determined the damn thing is coming out next time in the workshop.
And that was about the end of the project for the weekend. Sundays motivation was further put off by the cold, and staying up to 5am researching and designing more silly plans for this car. I did visit Machine mart though for a discount day, and despite my recent desire for a lathe, my self control (and hands on knowledge of real lathes that i could never afford, telling me that the machine mart ones are barely good enough for cutting stock!) meant I only walked out with a Makita 15" metal cut off saw, dial gauge, magnetic base, more welding clamps, and some bulbs for those 500W site lights that have been keeping us alive in the workshop since winter kicked in properly. I should have got the misses to hide my credit card again!
With the extra drive from the autosport show on friday, before we even got back to Norfolk a gearbox was bought off ebay. Now i just have to get to manchester to pick the damn thing up! On saturday morning the motivation was still there but it was -4 outside so i didnt get to the workshop until 2pm, finally giving up hope that it was going to warm up. I quickly set on the engine, which I needed to strip down a little to design the new intake, exhaust maifolds and remote oil lines. So intake off:
The standard toyota runners are 45m diameter exactly, the same as the throttle plates on an R32 GTR, and conveniently I had already ordered 4 of them ( 8 throttles in total) last week, after a few calcs on what would be suitable for this size engine. They will need some work, but it was good to know that toyota agreed.
The next bits were going to be much easier with the engine out. easily done.
The exhaust manifolds were off before it was ever fully out of the car. Thanks to Toyota using the right type of nuts, they came right off, and the manifolds were of a really good design to with separate flanges and expansion chambers in the tubes. Almost a shame i will be re-designing them and making my own, but mine will be for a very different purpose to Toyota intended. The only irritation was on each side, 1 stud was behind a runner and rather difficult to get to even with the engine out, and the dipstick had to come out too on the LHS as it ran through the manifold. I will certainly try to design my own ones with proper tool access for each of the studs.
The oil filter location clashed with the subframe. However it was a bolt on housing, so i figured rather than an adapter for another separate housing; the best, simplest and lightest solution would be to machine a new housing take off system straight on the block. It will take a little more work but be so much better. there is nothing on the market so no excuses for not making 1 perfect for me, and if there is anyone else tuning a 1UZ out there, then maybe i will get a few made and sell the others. So here is the part:
And now removed, with all the dimensions taken to get my new part designed on CAD.
It was all going well so far, so with Stu appearing in the cold, and spending as much time swearing at his BMW as i did attacking the overbuild Totyoa intake manifold I roped him into helping opperate the bead roller ( a two man job) and fabricating half of the new prop tunnel that was needed. It is always satisfying to take a piece of sheet metal and a few hours later have a functional part in your hands. Here was todays efforts. A simple piece, but I liked it.
It didn't get joined into the car yet, as it would be nice to have the new gearbox first to get the location spot on. I want the tunnel as low and narrow as it can be to maximise the space in the car. A 4" roof chop has already taken a good chunk out. So, time to get the block ready for its new gearbox, even if it is several hundred miles away still.
And silly torque converter off. No need for this lump. I don't know what I will do with it. Either sell it off or weigh it in eventually.
And the important part saved - the bell housing which I will probably be reusing, with an adapter to the new box.
Unfortunately this was not the smoothest job. I am not sure it it was the sub zero temperatures that late in the day, or just sods law, but despite a complete lack of corrosion on the bolts, proper grade bolts being used by Toyota, and everything being soaked in penetrating oil for at least half an hour... 1 sodding gearbox bolt sheared off in the block part way through coming out. A perfect example of a torque sheer on a galled steel to aluminium joint. It is an M12 x1.25 Fine pitch thread too, so not one I can just get a nut form B&Q on a sunday for to weld to. It wont be an easy fix, and will slow me down for a day, but I am determined the damn thing is coming out next time in the workshop.
And that was about the end of the project for the weekend. Sundays motivation was further put off by the cold, and staying up to 5am researching and designing more silly plans for this car. I did visit Machine mart though for a discount day, and despite my recent desire for a lathe, my self control (and hands on knowledge of real lathes that i could never afford, telling me that the machine mart ones are barely good enough for cutting stock!) meant I only walked out with a Makita 15" metal cut off saw, dial gauge, magnetic base, more welding clamps, and some bulbs for those 500W site lights that have been keeping us alive in the workshop since winter kicked in properly. I should have got the misses to hide my credit card again!
Nice update
Thank God for more bulbs, I need them for heat
If you want or need to use a vehicle for the gearbox collection, let me know. Any excuse to roar around in the Jaguar!
Thank God for more bulbs, I need them for heat
If you want or need to use a vehicle for the gearbox collection, let me know. Any excuse to roar around in the Jaguar!
http://www.auto-genie.co.uk
07733 527430
stuart@auto-genie.co.uk
Valeting, detailing and undersealing
07733 527430
stuart@auto-genie.co.uk
Valeting, detailing and undersealing