


Niges MK2 Golf Track car build in 5 weeks.. MASSIVE Thread !
As it was late, I thought it best not to start grinding again 
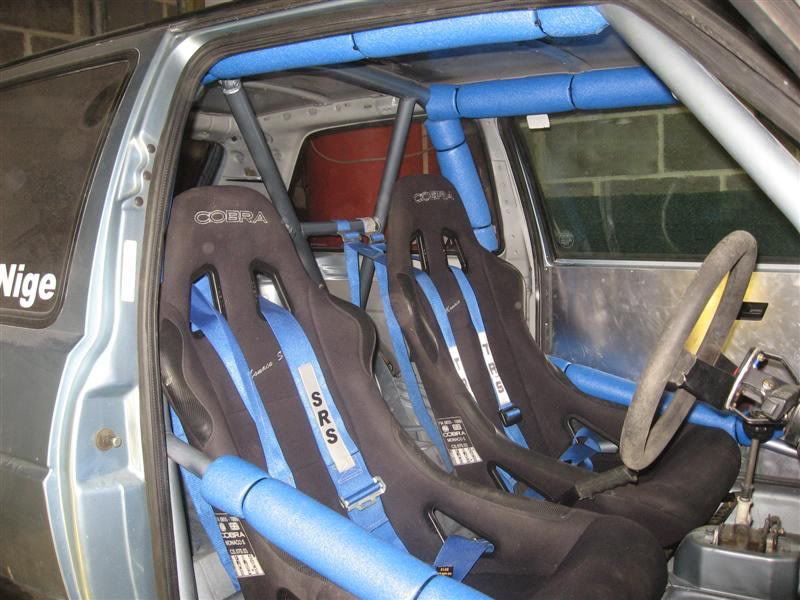
Decided a quick spray of the roll cage was a quiet enough job for 9pm
All sprayed, I can put some lacquer on tomorrow, then refit the seats / harnesses.
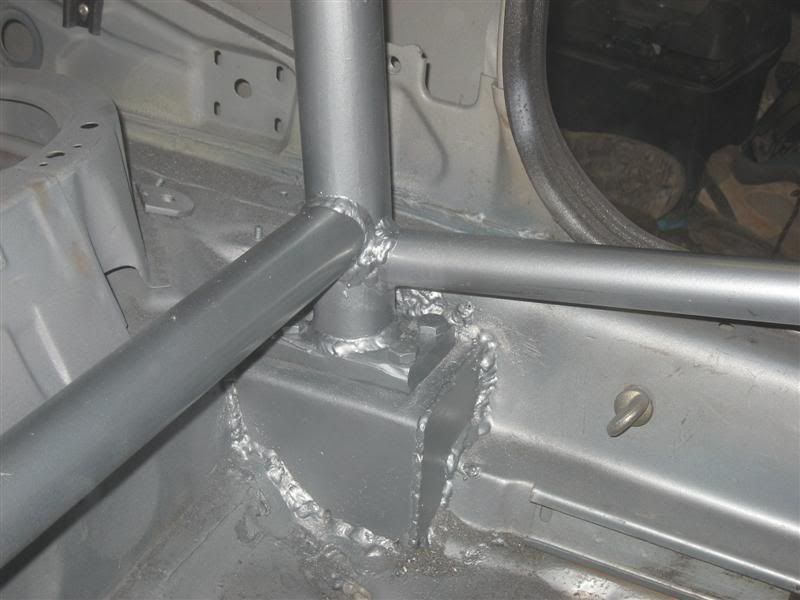
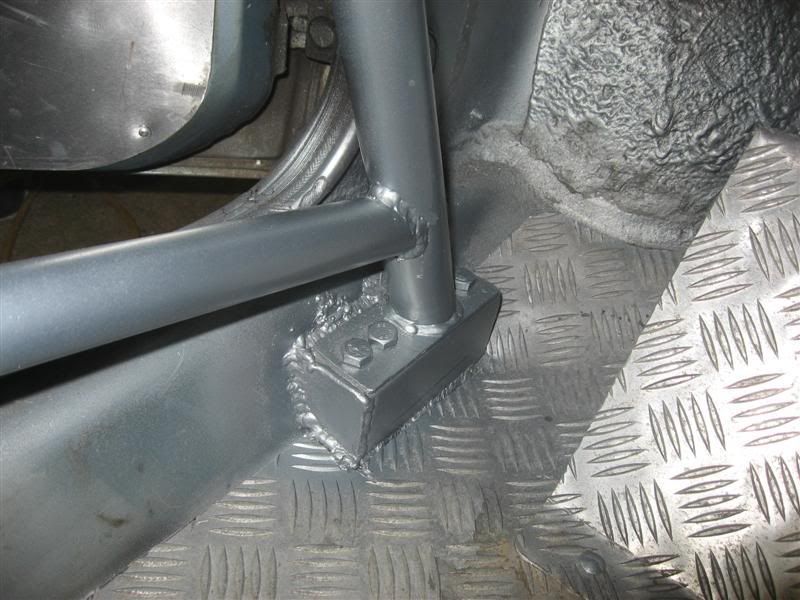
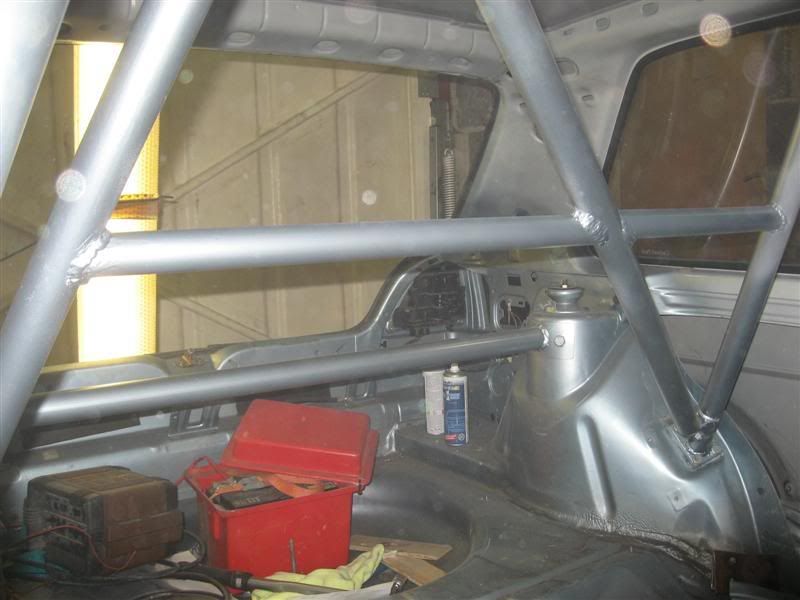
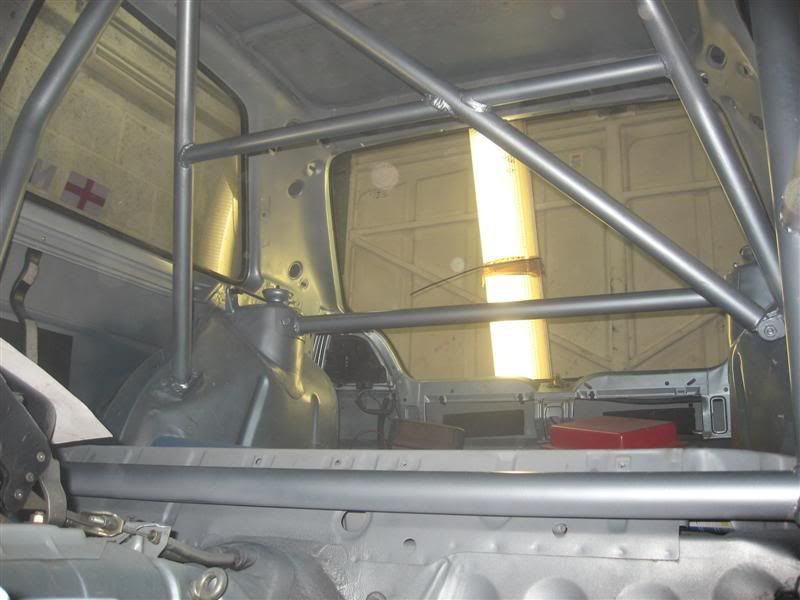

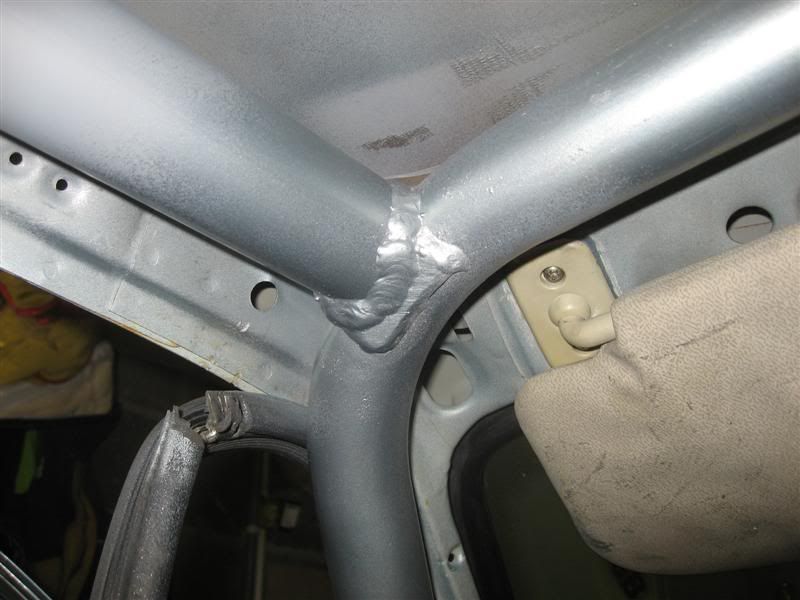
It definately looks better when painted doesnt it :thumb: . Oh, and YES I do know there is a bit of overspray and a couple of spots I missed, I got them after I saw the photos
Decided a quick spray of the roll cage was a quiet enough job for 9pm
All sprayed, I can put some lacquer on tomorrow, then refit the seats / harnesses.
It definately looks better when painted doesnt it :thumb: . Oh, and YES I do know there is a bit of overspray and a couple of spots I missed, I got them after I saw the photos


Nothing major tonight, just little finishing off bits.
Plug welded the nearside arch

Matthew cleaned the inside of the car, brushed it then cleaned with the vacuum cleaner, then wipe down with damp cloth. GOOD LAD
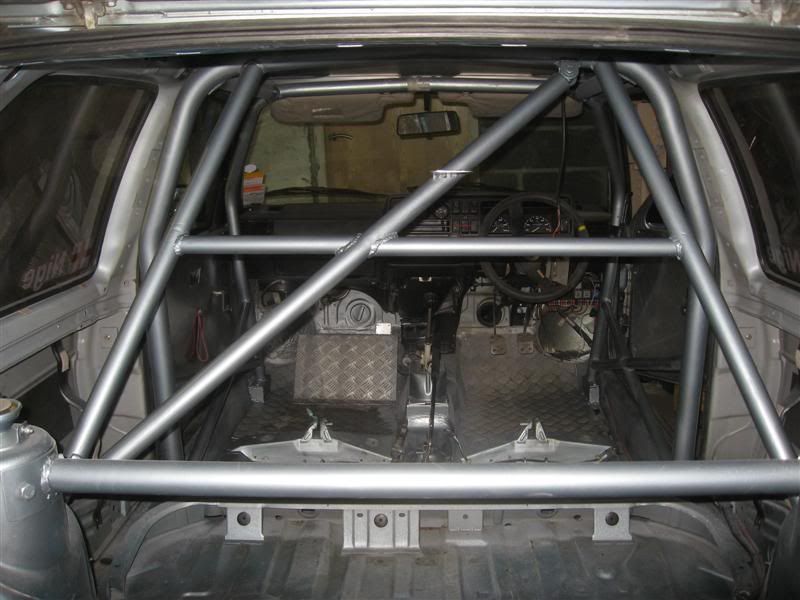
Lacquered the roll cage
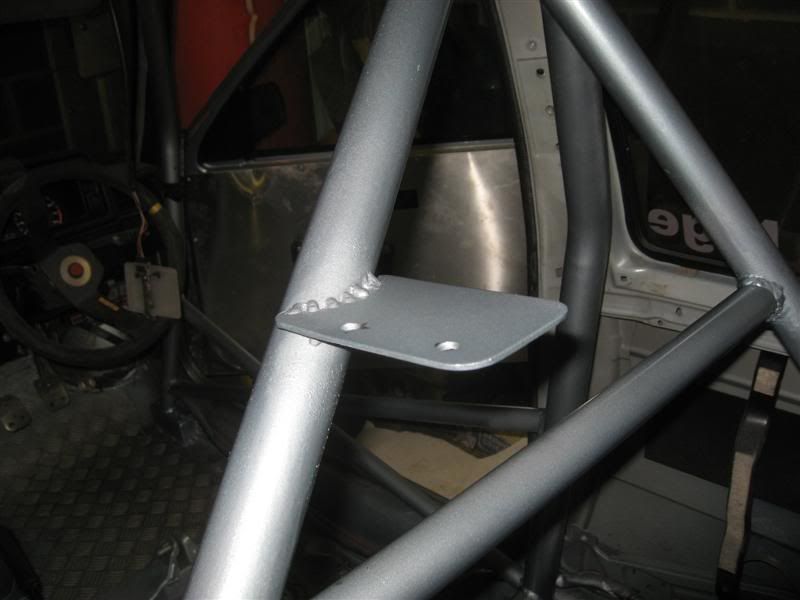
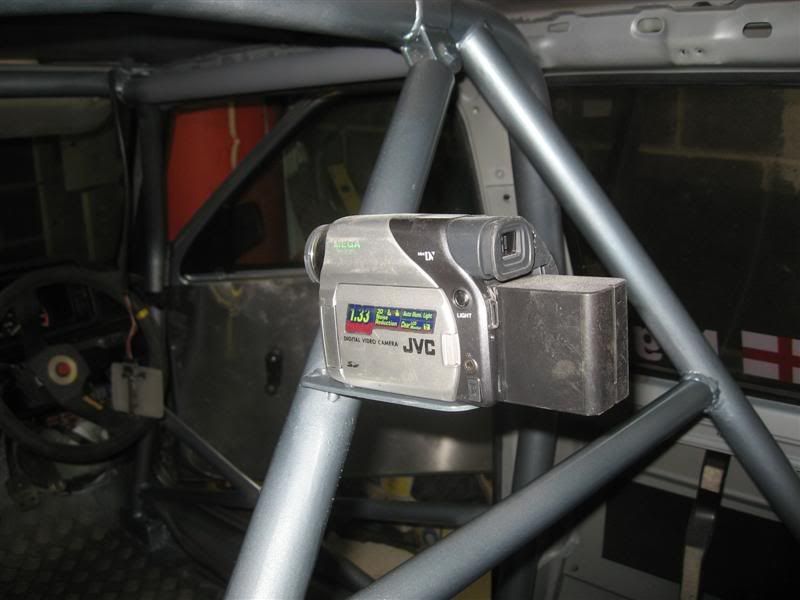
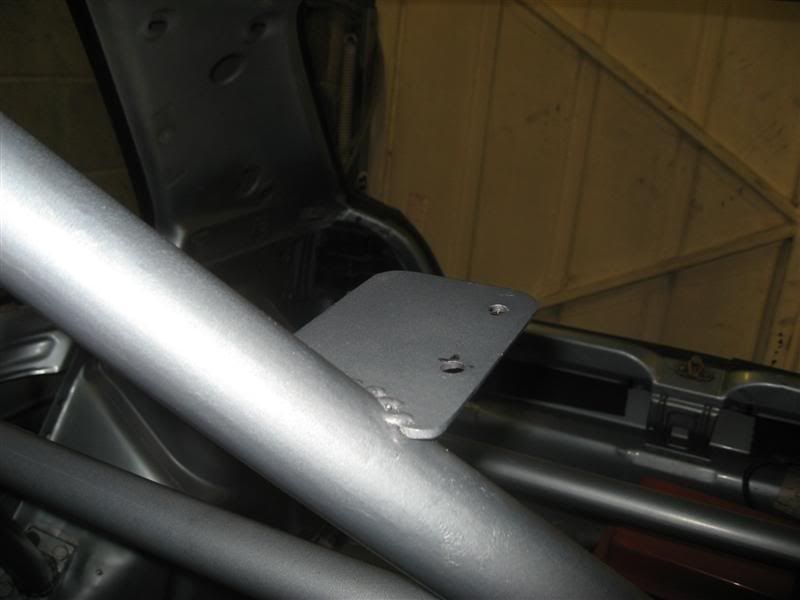
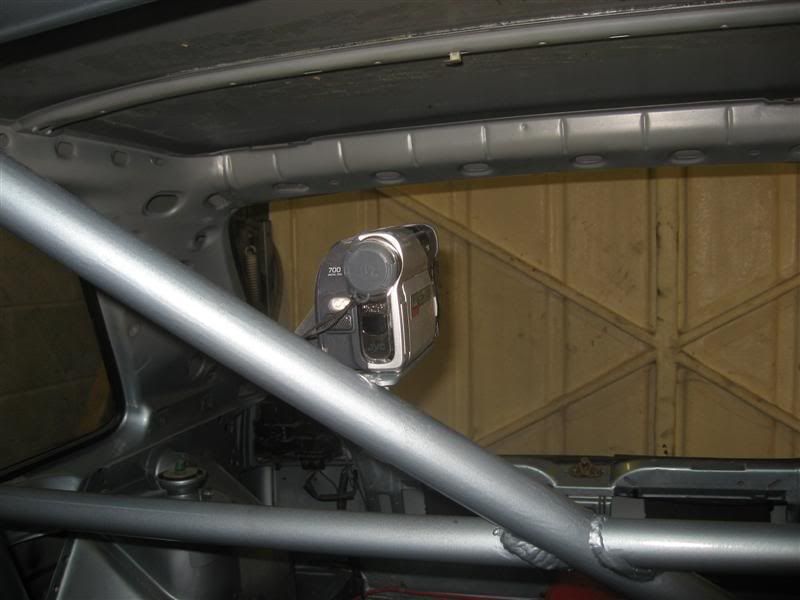
Fabricated a stronger / stiffer camcorder mount and welded it in place. Drilled it so the camera can face forwards or rearwards.
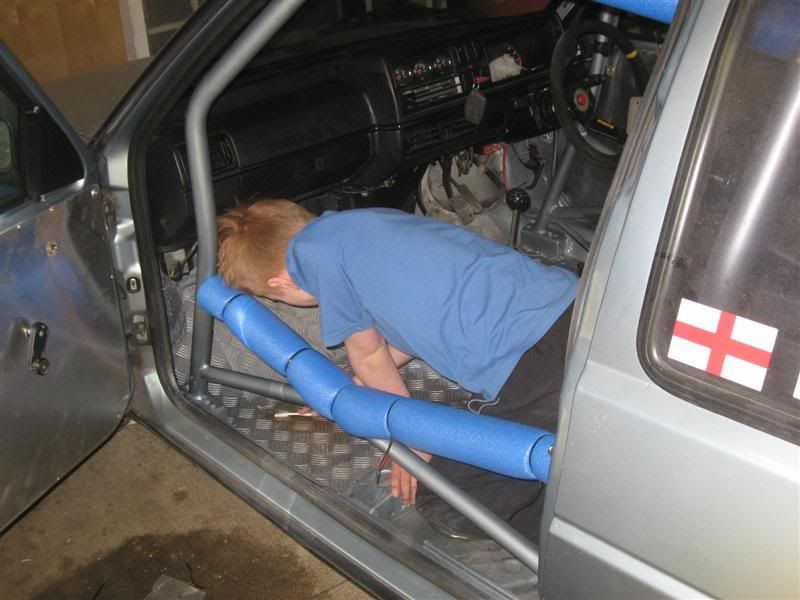
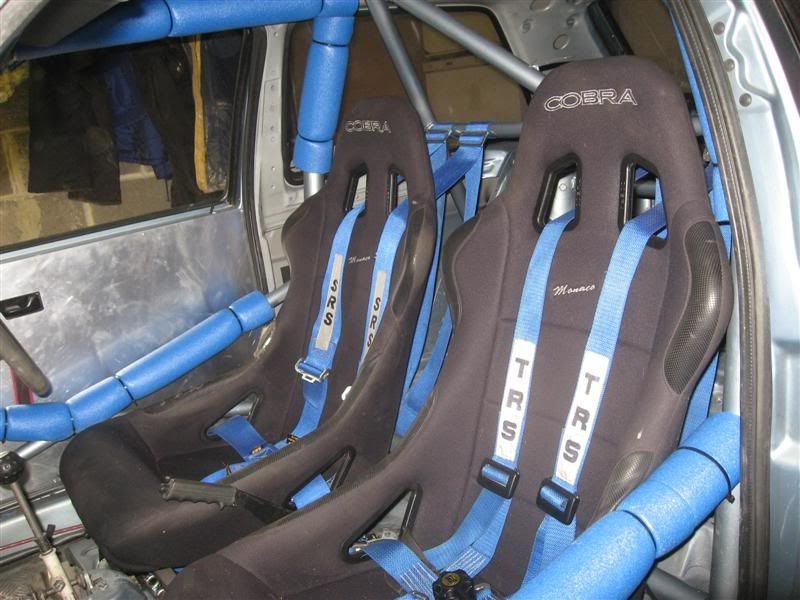
Fitted the roll cage padding, then the drivers seat and new 3" 6point harness

Tomorrow I hope to fit the passenger seat / harness, undertray, trim front offside wheel arch, fit A032 to front, go for a test drive with the new gearbox (I havent driven it since I fitted it yet ) and then I think/hope its ready for Bedford on Friday !
Plug welded the nearside arch
Matthew cleaned the inside of the car, brushed it then cleaned with the vacuum cleaner, then wipe down with damp cloth. GOOD LAD
Lacquered the roll cage
Fabricated a stronger / stiffer camcorder mount and welded it in place. Drilled it so the camera can face forwards or rearwards.
Fitted the roll cage padding, then the drivers seat and new 3" 6point harness
Tomorrow I hope to fit the passenger seat / harness, undertray, trim front offside wheel arch, fit A032 to front, go for a test drive with the new gearbox (I havent driven it since I fitted it yet
) and then I think/hope its ready for Bedford on Friday !
Success, its FINISHED 
Went for a test drive, all OK, 3rd is notchy to engage, but it goes very well. Wheelspin at any speed in 2nd, thats the A032`s at -2 Degrees !!! They dont work.....
What did I do today? well, not a lot really...
Fit the front drivers side wheels after grinding the arch
Refitted the undertray
Refitted passenger seat and 6-point harness
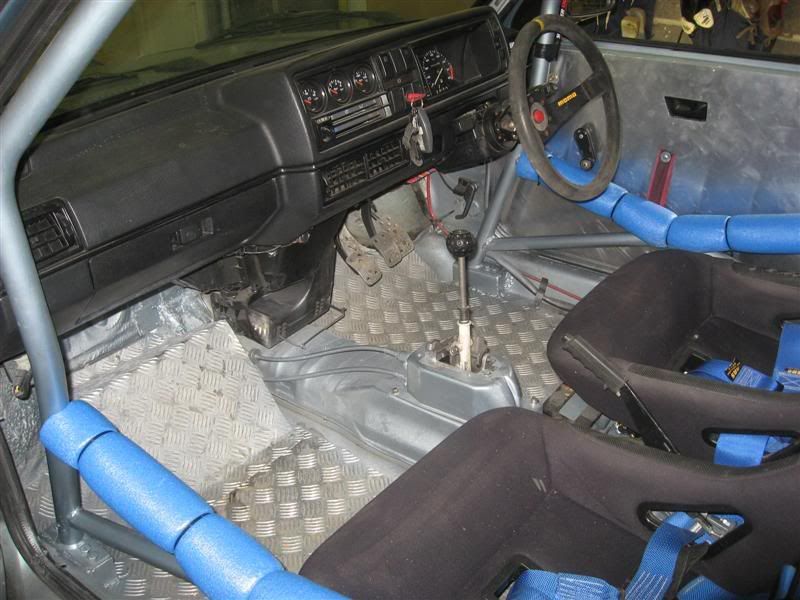
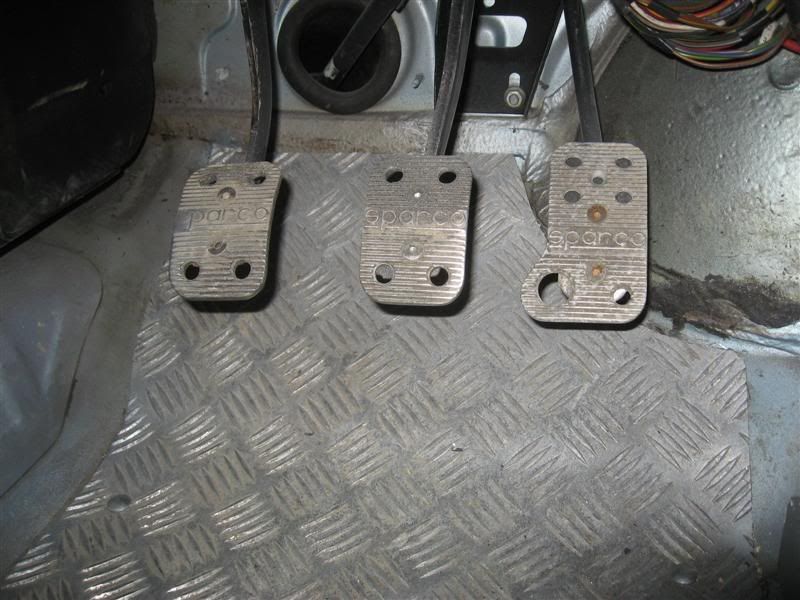
I even refit the accelerator aluminium pedal from the Green golf
Thats it. Bulletcam to fit tomorrow, but apart from packing my tools, spare wheels and loading it for Bedford, thats all.
I`m rather pleased.
Went for a test drive, all OK, 3rd is notchy to engage, but it goes very well. Wheelspin at any speed in 2nd, thats the A032`s at -2 Degrees !!! They dont work.....
What did I do today? well, not a lot really...
Fit the front drivers side wheels after grinding the arch
Refitted the undertray
Refitted passenger seat and 6-point harness
I even refit the accelerator aluminium pedal from the Green golf
Thats it. Bulletcam to fit tomorrow, but apart from packing my tools, spare wheels and loading it for Bedford, thats all.
I`m rather pleased.
Right then, after Bedford I`m thinking I may need to look at this FD issue. 3rd,4th and 5th were very tall.
The car ran faultlessley at Bedford, a 1 hour session without problem, no brake fade or overheating. If it can manage that, it can manage anything.
Well, I say faultlessley, the exhaust split the flexi coupling AGAIN Fortunately steph pointed me in the right direction and I now have a new downpipe and exhaust that i`ll be fitting in the next week or so.
I am sourcing a second interior mirror than I can fix to the roll cage hoop, the standard one is in a terrible position when I`m filming in-car, it is just where you DONT want it to be Its a 5 minute job so I`ll definately do that.
I shall also be changing the front disks/pads. The disks have done Bedford 07, 250 Laps of the ring in 07, Cadwell 07 and Bedford 08. I reckon thats close to 4,000 Miles on track, 3 sets of Yellowstuff, the disks are still fine, but I will be replacing them as they have served me well and there is no point pushing it for the sake of it. The rear disks look unworn
I`d be interested to go in a Golf with stiffer springs on a UK track, mine has soft ones for the ring and I`m curious how much difference I`d notice if I swapped them for stiffer ones for UK tracks, Bedford was probably the one that showed it the most as its so flat, Cadwell seemed fine.
Just things I`m thinking of anyway...
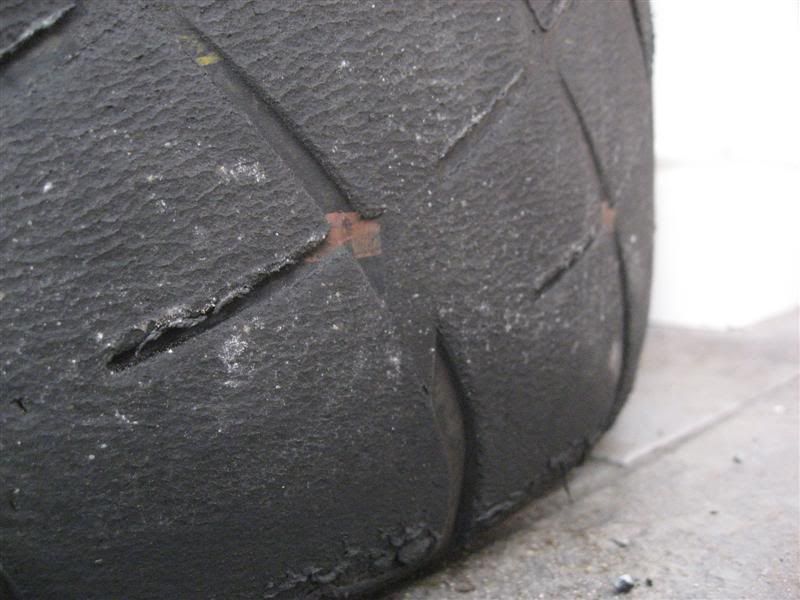
Forgot to add my thought about the 032`s. Honestly, I didnt think they were significantly better than the 888`s. Slightly grippier I`ll admit, but after all starting out the same, the wear in half a day was significant.
These are photos AFTER Bedford.
Nearside (not much wear at Bedford)
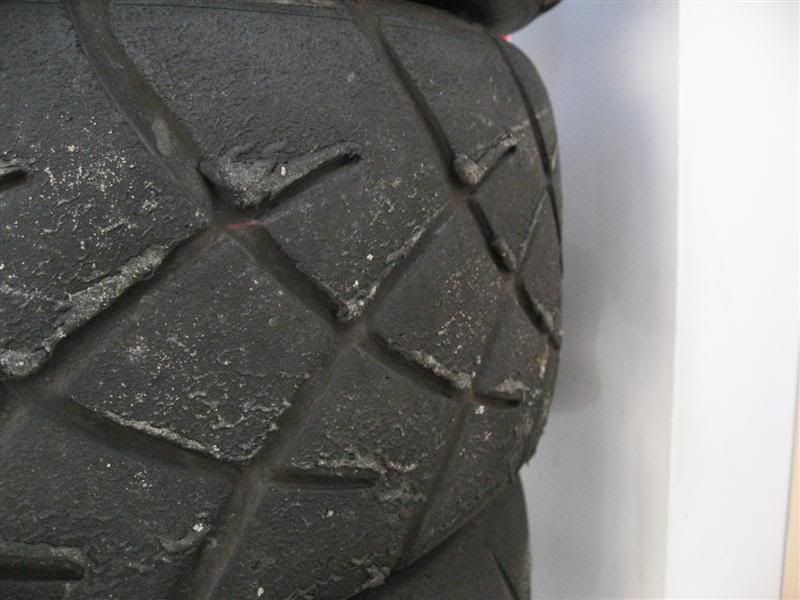
Offside, started out at same tread depth !. Look at the wear after 100 miles on track
I`ve bought a new gearbox and am picking it up on Sunday.
I`ll be fitting it next week and should have much improved ratios. After thinking about the performance at Bedford, speaking to GVK, Ian Howell and Steph, I realised that I`d be dissapointed if I ran that this year. Rather than feeling I`d made a forward step with the cable box, I felt the car was slower at Bedford and that was backup up by video and passenger feelings.
Looks like those driveshaft bolts have to come out just 1 more time
O2A - 3.778=2.118=1.34=0.97=0.80= NEW 4.2 FD Current box 3.684 !
NEW Box Ratios / speed
1st - 30mph
2nd - 53mph
3rd -83mph
4th - 115mph
5th - 140mph
CURRENT Cable box
1st- 33mph
2nd - 60mph
3rd - 89mph
4th - 124mph
5th - 152mph
OLD Rod change box
1st - 38mph
2nd - 62 mph
3rd - 91 mph
4th - 117mph
5th - 145 mph
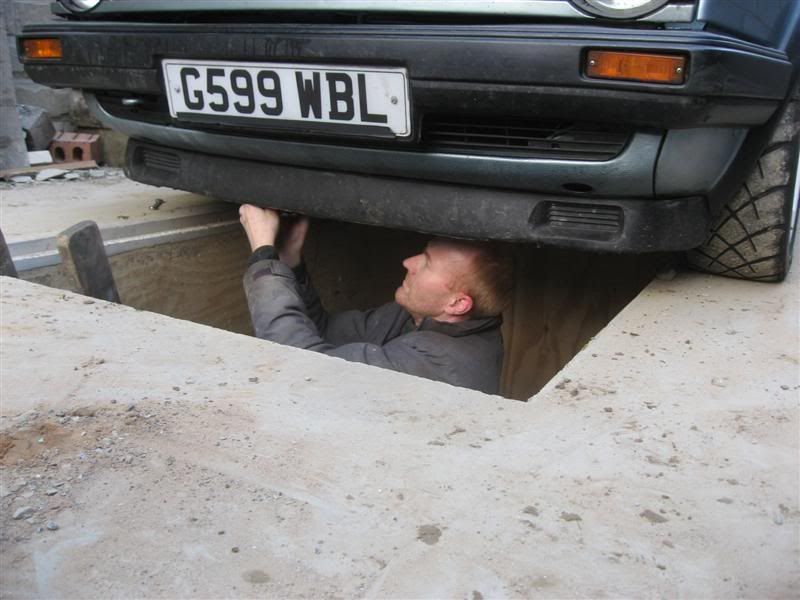
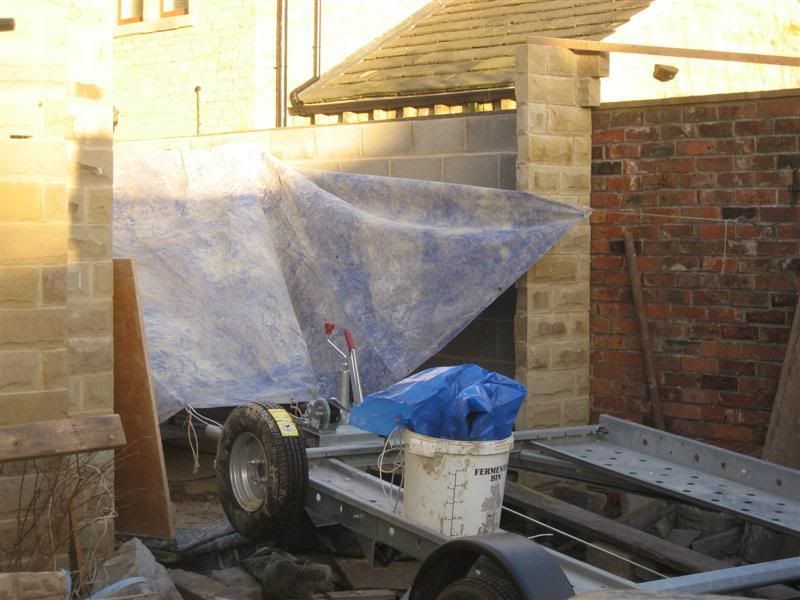
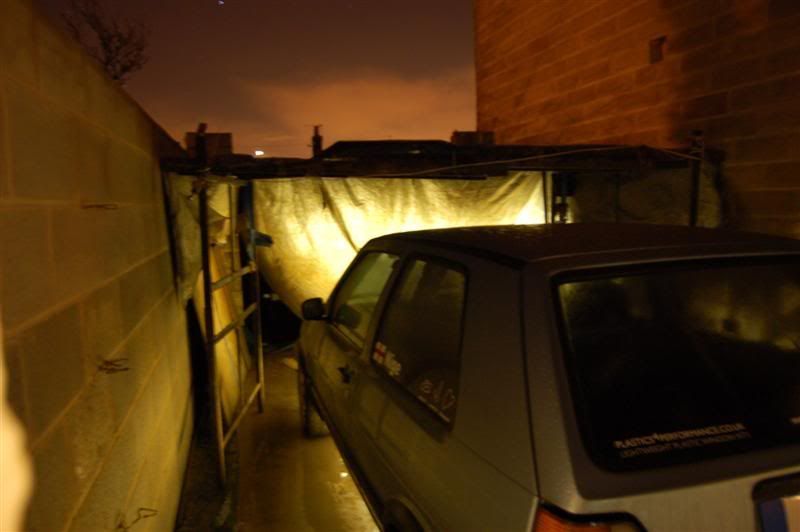
The last few evenings I`ve been swapping over the Gearbox to the new lower ratio one. I decided that I`d do the job over the Pit to make removing the driveshaft bolts etc easier.Unfortunately, as the garage isnt finished, this mean I had to put a tarpaulin over the top and work under that. It was also cold...
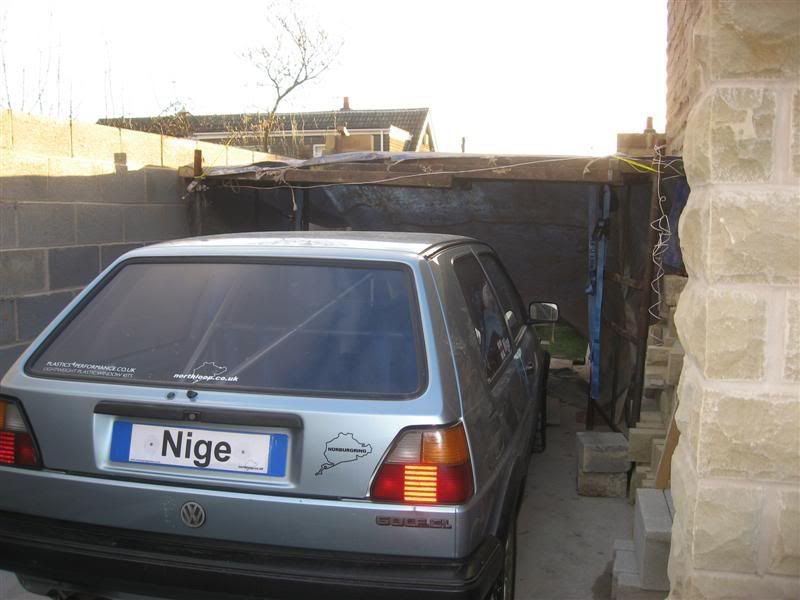
But with some light I could work until 10pm.
Because I`d really struggled before, I decided to out the engine out and swap the gearbox that way, with 2 people, its easy to swap with the engine in place, but to be honest, its not a massive amount of extra work to lift the engine out and swapping the box then become a matter of a few bolts.
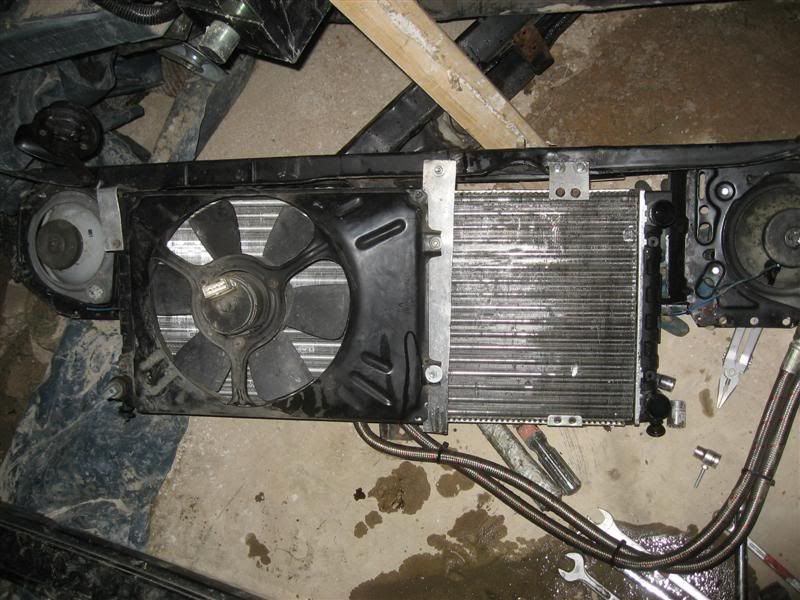
Drained the coolant, then disconnected and lifted out the front panel, leaving radiator / oil cooler attached.
Took the weight of the engine and removed the front crossmember, I also removed the dreaded driveshaft bolts
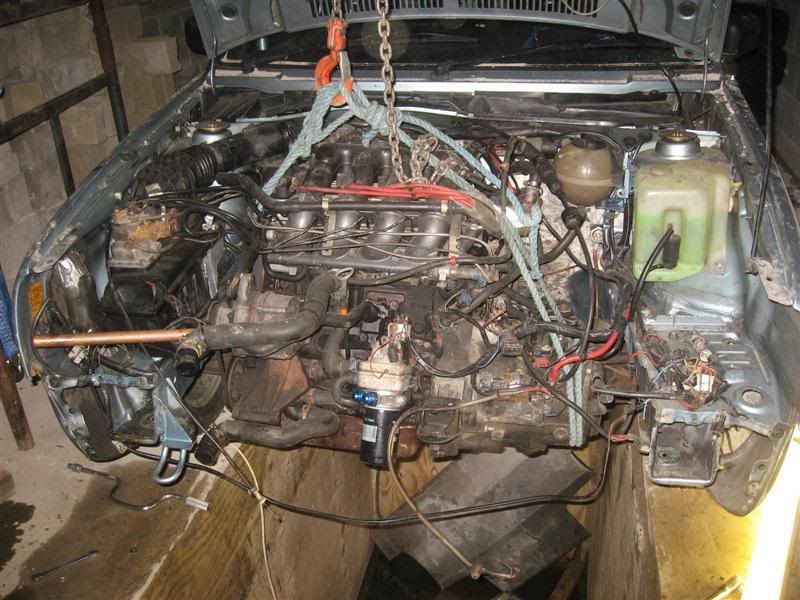
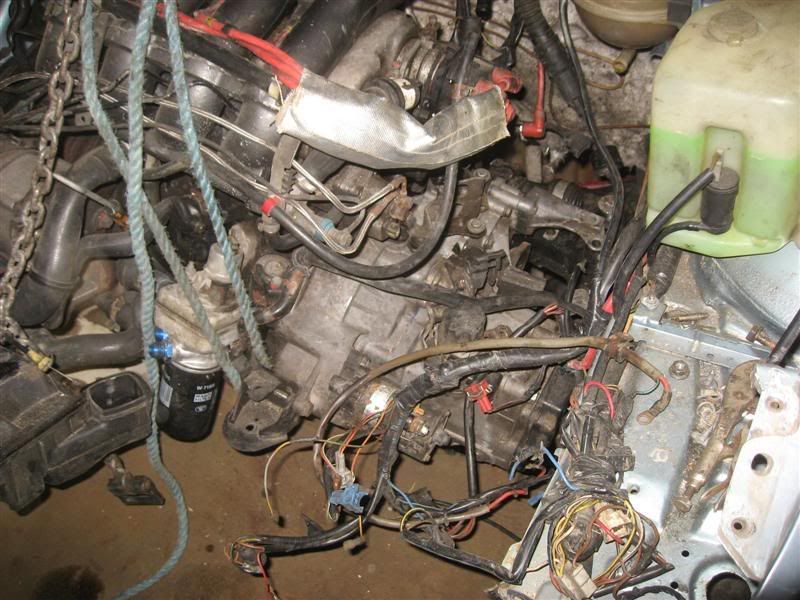
It was then simply a matter of unplugging / disconnecting everything and lifting out the engine. Next was to remove the old gearbox, when was dead easy, it just lifted straight out.
Now I hit a problem. The shifter mechanism on the new box was different to the one I`d just removed, the cables I had wouldnt fit the new tower
On the old box, there is a bit of black plastic where the cable clips to the mechanism
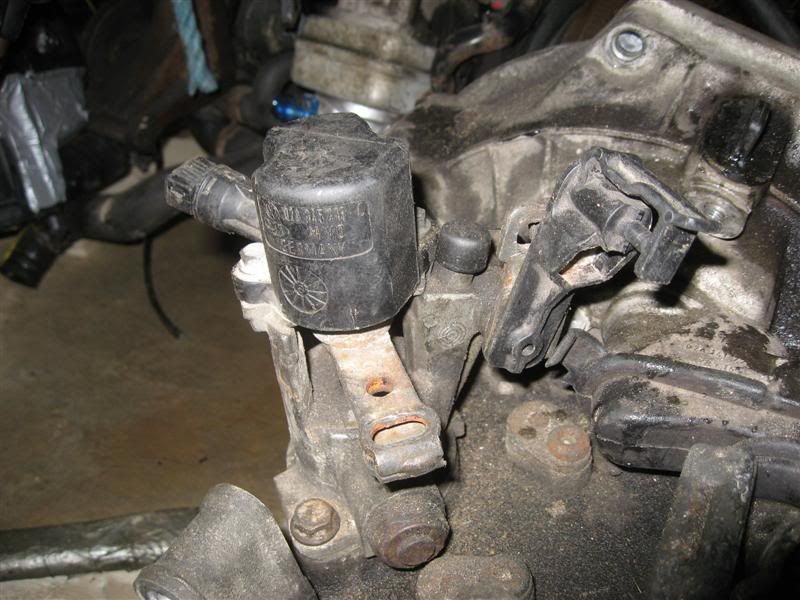
On the new box, there is no such bit of plastic and it wouldnt just swap over (I tried)
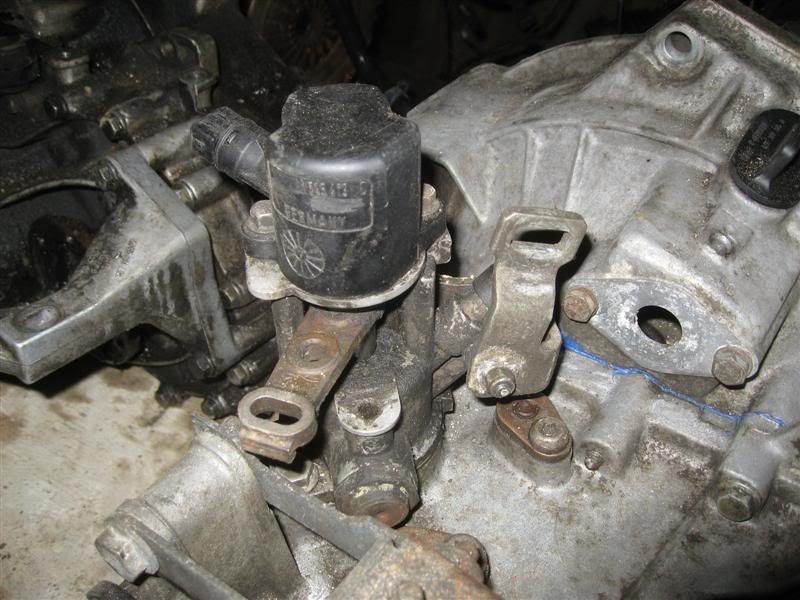
I`ve heard stories of bits dropping into the insides of gearboxes when you remove some parts, so I rang Steph to ask if I would be ok, `aye mate, ney bother, just lift it out, nice and careful, dont bash it..`. So I put the gears into neutral, removed the 2 bolts and lifted out the mechanism
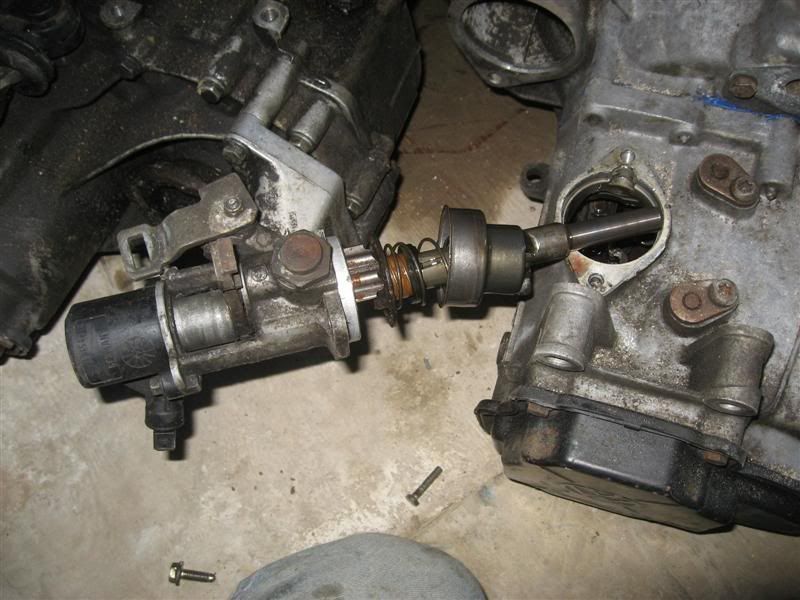
Did the same on the new box, put them side by side and noticed they were different.
Arrgghhh. Rang steph, but his phone died and he was on the train, so rang GVK for advice. I thought I could remove the `cup` from the bottom of the box, but just wanted to check, Gary had never done it, but thought it would be OK.
Tipped the gearbox onto its side and removed the locator from the bottom
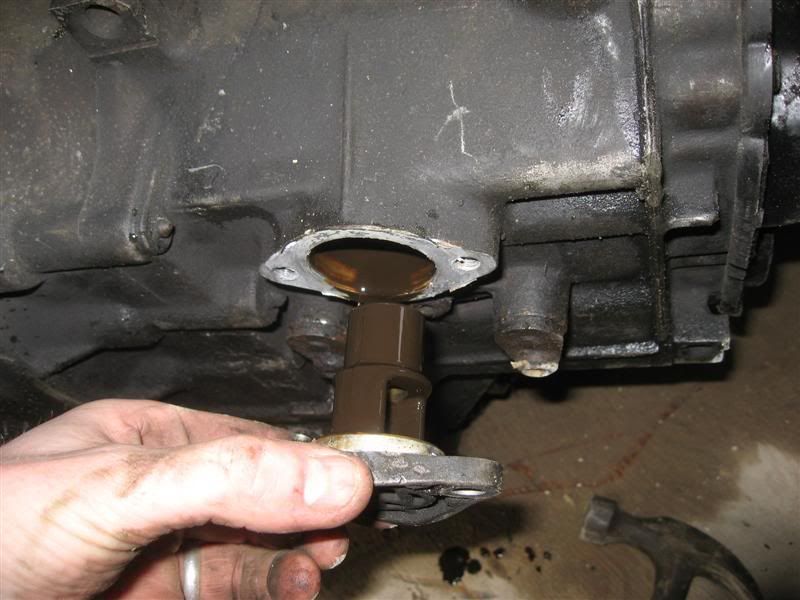
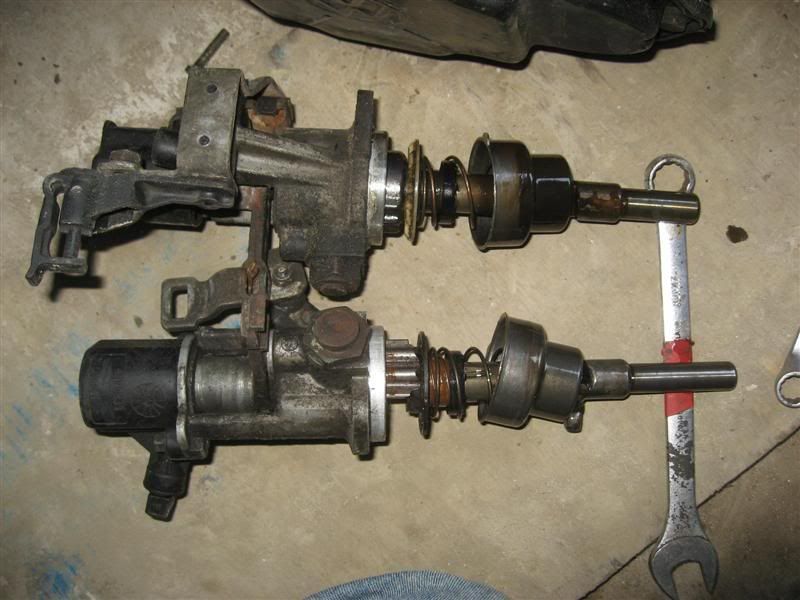
Both shifter mechanisms and locator plates

Then simply apply some instant gasket and refit to the new box
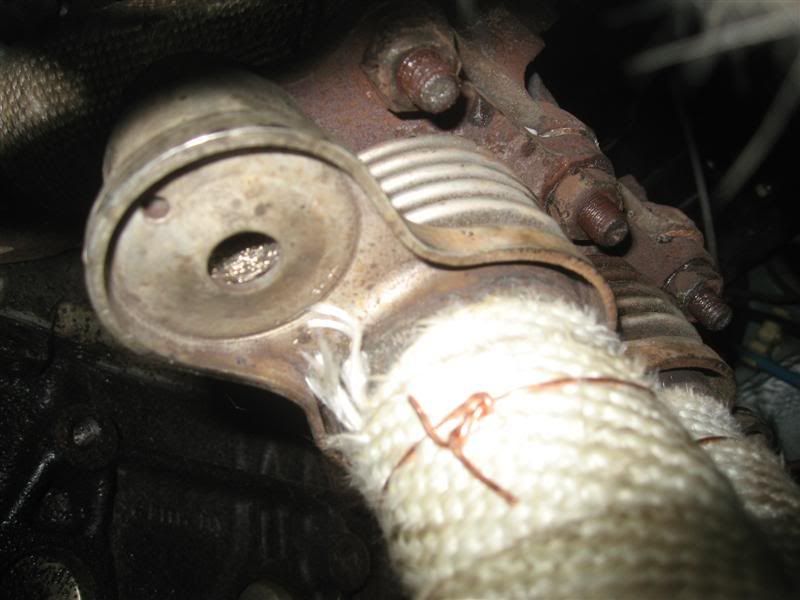
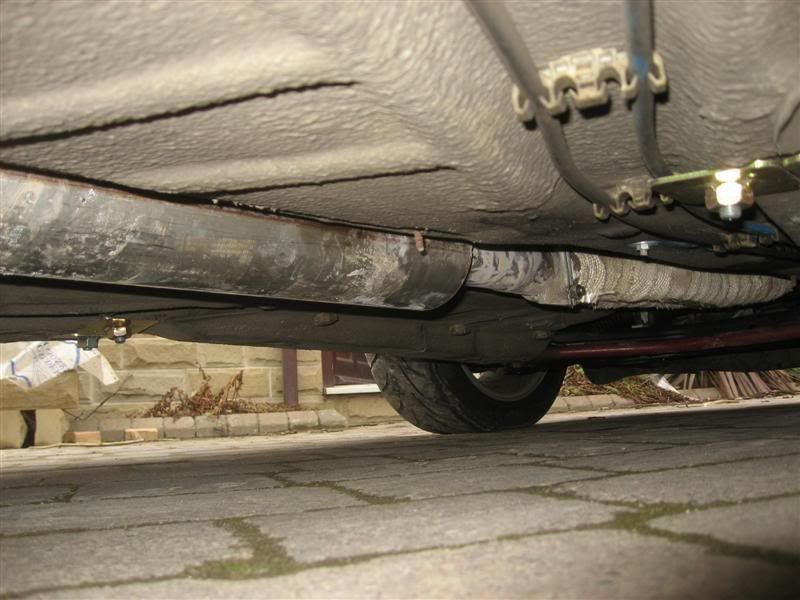
Took the opportunity to wrap and fit the new downpipe steph had kindly supplied.
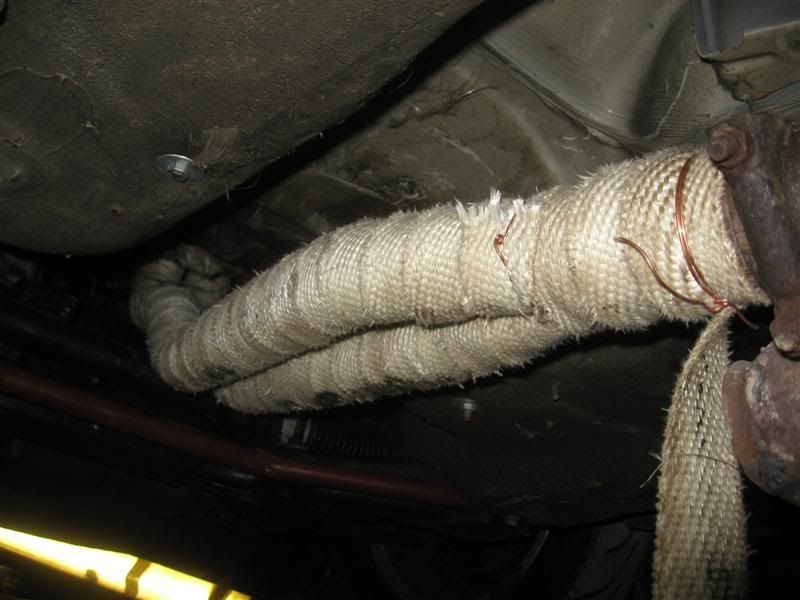
The new downpipe had a built in `flexi` coupling, so hopefully no more cracked downpipes !!
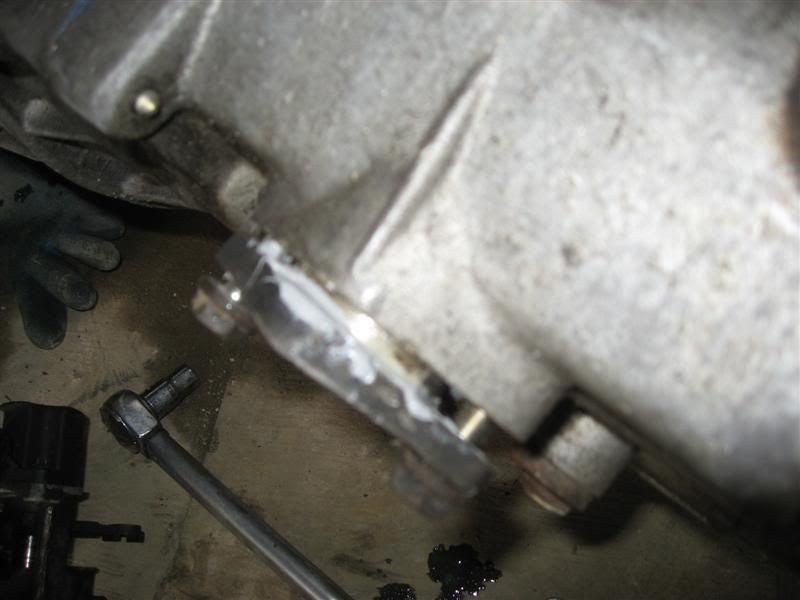
Gearbox slotted into place on the first attempt, took about 20 seconds to slide into place, rather than the 30mins + plus of struggling the last time. Lowered engine into place and secured the gearbox mount and rear engine mount
I`ll just made sure this lines up..... OW, that hurt....
Refitted all the wires and pipes, Louise operated the gears and each one seemed to engage properly, I then refitted the front crossmember and engine mount. Reconnecting all the pipes/wires is much easier without the radiator in the way
Filled with antifreeze, then left it for the night. Started again this morning, just had to fit the new exhaust (I say new, its second hand, but much better condition that my old one). I bit of adjustment and it went into place. I needed to make a new rear mount bracket as the clip on the exhaust was in a different place
The new system sits much nicer into place, its also significantly quieter too
Took the car for a very short test drive, all gears engage and it is definately lower geared now So low that it wheelspins in the dry in 2nd..
I am going to fit new front disks, new Yellowstuff front pads, swap the windscreen, get it MOT`d then its ready for Germany That is unless something breaks at the drivertraining next week, but i`m confident and anyway, thats what shakedowns are for. If I hadnt driven Bedford, I`d never have thought about the gear ratios....
Matthew came home and asked if we could go for a drive, I said I needed to fit the road tyres and changes the breaks. Deciding it would be sensible to do it today rather than next week, we swapped the front disks/pads and 4 wheels in (easily) under 40 minutes.
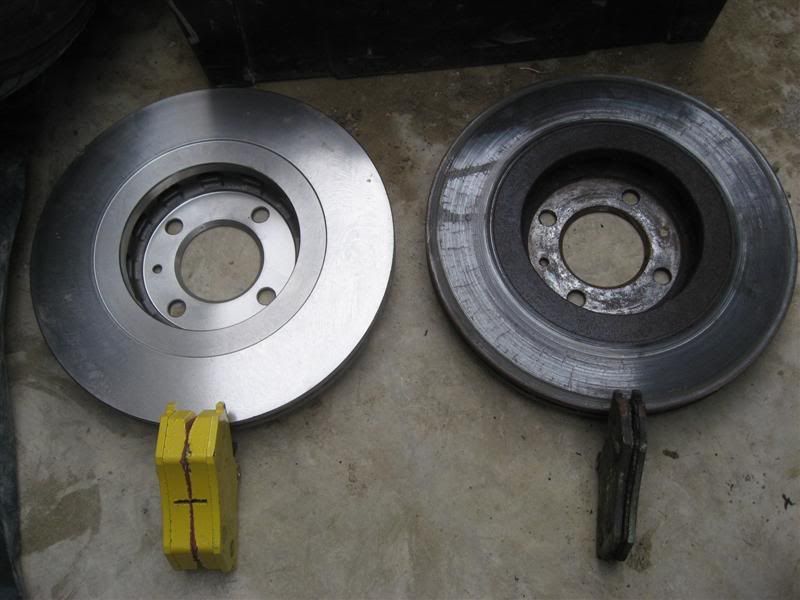
Removed the old disks and pads, you can see the new/old side by side. The old pads were worn out ! The disks will be my spares that I keep in Germany, just in case I crack a new one or something.
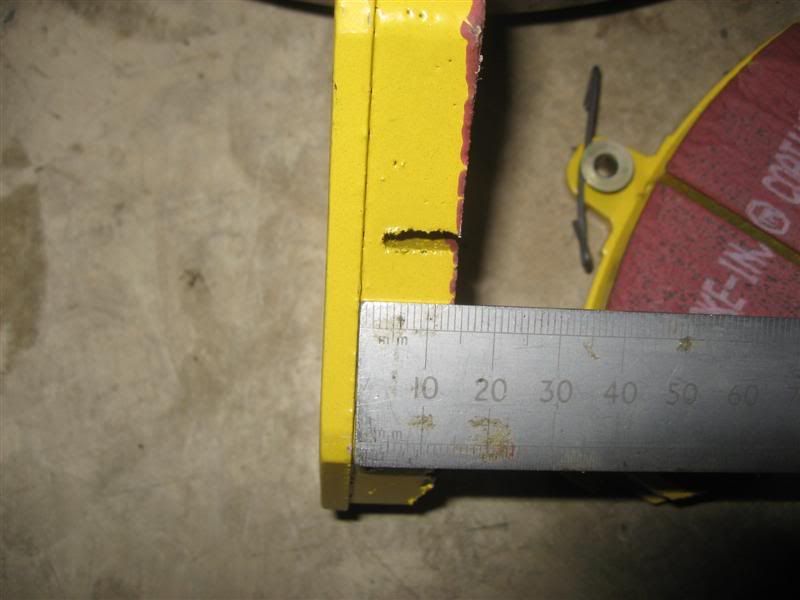
New pads with 14mm of tread. I measured them so I can see how much wear I get between checks.
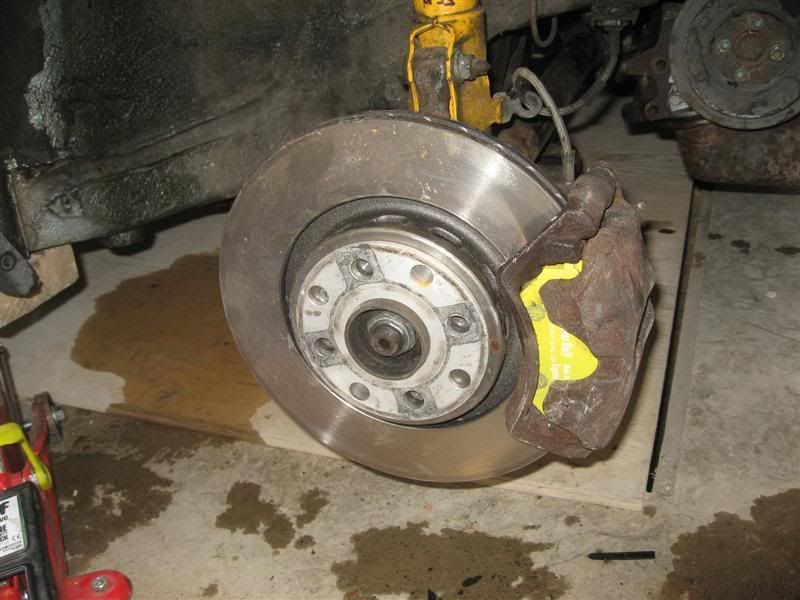
New disk/pad went on without a single issue.
I`d noticed at Bedford that the drivers side outer CV boot was loosing grease, but hadnt split
The metal `clip` that goes round the outside needed tightening a little. Its fine now, I just need to clean off the old grease.
Went for a test drive with Mat, its much better, just what I was expecting. limiter in 3rd is indicated 84, which is 13mph less than the old box, it pulls MUCH better in 3rd now. SUCCESS
The car ran faultlessley at Bedford, a 1 hour session without problem, no brake fade or overheating.
If it can manage that, it can manage anything.Well, I say faultlessley, the exhaust split the flexi coupling AGAIN
Fortunately steph pointed me in the right direction and I now have a new downpipe and exhaust that i`ll be fitting in the next week or so.I am sourcing a second interior mirror than I can fix to the roll cage hoop, the standard one is in a terrible position when I`m filming in-car, it is just where you DONT want it to be
Its a 5 minute job so I`ll definately do that.I shall also be changing the front disks/pads. The disks have done Bedford 07, 250 Laps of the ring in 07, Cadwell 07 and Bedford 08. I reckon thats close to 4,000 Miles on track, 3 sets of Yellowstuff, the disks are still fine, but I will be replacing them as they have served me well and there is no point pushing it for the sake of it. The rear disks look unworn
I`d be interested to go in a Golf with stiffer springs on a UK track, mine has soft ones for the ring and I`m curious how much difference I`d notice if I swapped them for stiffer ones for UK tracks, Bedford was probably the one that showed it the most as its so flat, Cadwell seemed fine.
Just things I`m thinking of anyway...
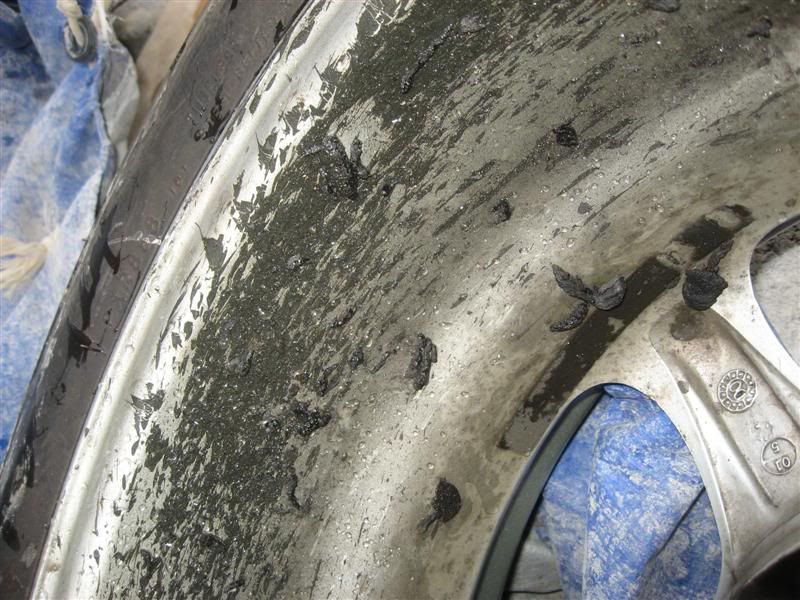
Forgot to add my thought about the 032`s. Honestly, I didnt think they were significantly better than the 888`s. Slightly grippier I`ll admit, but after all starting out the same, the wear in half a day was significant.
These are photos AFTER Bedford.
Nearside (not much wear at Bedford)
Offside, started out at same tread depth !. Look at the wear after 100 miles on track
I`ve bought a new gearbox and am picking it up on Sunday.
I`ll be fitting it next week and should have much improved ratios. After thinking about the performance at Bedford, speaking to GVK, Ian Howell and Steph, I realised that I`d be dissapointed if I ran that this year. Rather than feeling I`d made a forward step with the cable box, I felt the car was slower at Bedford and that was backup up by video and passenger feelings.
Looks like those driveshaft bolts have to come out just 1 more time
O2A - 3.778=2.118=1.34=0.97=0.80= NEW 4.2 FD Current box 3.684 !
NEW Box Ratios / speed
1st - 30mph
2nd - 53mph
3rd -83mph
4th - 115mph
5th - 140mph
CURRENT Cable box
1st- 33mph
2nd - 60mph
3rd - 89mph
4th - 124mph
5th - 152mph
OLD Rod change box
1st - 38mph
2nd - 62 mph
3rd - 91 mph
4th - 117mph
5th - 145 mph
The last few evenings I`ve been swapping over the Gearbox to the new lower ratio one. I decided that I`d do the job over the Pit to make removing the driveshaft bolts etc easier.Unfortunately, as the garage isnt finished, this mean I had to put a tarpaulin over the top and work under that. It was also cold...
But with some light I could work until 10pm.
Because I`d really struggled before, I decided to out the engine out and swap the gearbox that way, with 2 people, its easy to swap with the engine in place, but to be honest, its not a massive amount of extra work to lift the engine out and swapping the box then become a matter of a few bolts.
Drained the coolant, then disconnected and lifted out the front panel, leaving radiator / oil cooler attached.
Took the weight of the engine and removed the front crossmember, I also removed the dreaded driveshaft bolts
It was then simply a matter of unplugging / disconnecting everything and lifting out the engine. Next was to remove the old gearbox, when was dead easy, it just lifted straight out.
Now I hit a problem. The shifter mechanism on the new box was different to the one I`d just removed, the cables I had wouldnt fit the new tower
On the old box, there is a bit of black plastic where the cable clips to the mechanism
On the new box, there is no such bit of plastic and it wouldnt just swap over (I tried)
I`ve heard stories of bits dropping into the insides of gearboxes when you remove some parts, so I rang Steph to ask if I would be ok, `aye mate, ney bother, just lift it out, nice and careful, dont bash it..`. So I put the gears into neutral, removed the 2 bolts and lifted out the mechanism
Did the same on the new box, put them side by side and noticed they were different.
Arrgghhh.
Rang steph, but his phone died and he was on the train, so rang GVK for advice. I thought I could remove the `cup` from the bottom of the box, but just wanted to check, Gary had never done it, but thought it would be OK.Tipped the gearbox onto its side and removed the locator from the bottom
Both shifter mechanisms and locator plates
Then simply apply some instant gasket and refit to the new box
Took the opportunity to wrap and fit the new downpipe steph had kindly supplied.
The new downpipe had a built in `flexi` coupling, so hopefully no more cracked downpipes !!
Gearbox slotted into place on the first attempt, took about 20 seconds to slide into place, rather than the 30mins + plus of struggling the last time. Lowered engine into place and secured the gearbox mount and rear engine mount
I`ll just made sure this lines up..... OW, that hurt....
Refitted all the wires and pipes, Louise operated the gears and each one seemed to engage properly, I then refitted the front crossmember and engine mount. Reconnecting all the pipes/wires is much easier without the radiator in the way
Filled with antifreeze, then left it for the night. Started again this morning, just had to fit the new exhaust (I say new, its second hand, but much better condition that my old one). I bit of adjustment and it went into place. I needed to make a new rear mount bracket as the clip on the exhaust was in a different place
The new system sits much nicer into place, its also significantly quieter too
Took the car for a very short test drive, all gears engage and it is definately lower geared now
So low that it wheelspins in the dry in 2nd..I am going to fit new front disks, new Yellowstuff front pads, swap the windscreen, get it MOT`d then its ready for Germany
That is unless something breaks at the drivertraining next week, but i`m confident and anyway, thats what shakedowns are for. If I hadnt driven Bedford, I`d never have thought about the gear ratios....Matthew came home and asked if we could go for a drive, I said I needed to fit the road tyres and changes the breaks. Deciding it would be sensible to do it today rather than next week, we swapped the front disks/pads and 4 wheels in (easily) under 40 minutes.
Removed the old disks and pads, you can see the new/old side by side. The old pads were worn out ! The disks will be my spares that I keep in Germany, just in case I crack a new one or something.
New pads with 14mm of tread. I measured them so I can see how much wear I get between checks.
New disk/pad went on without a single issue.
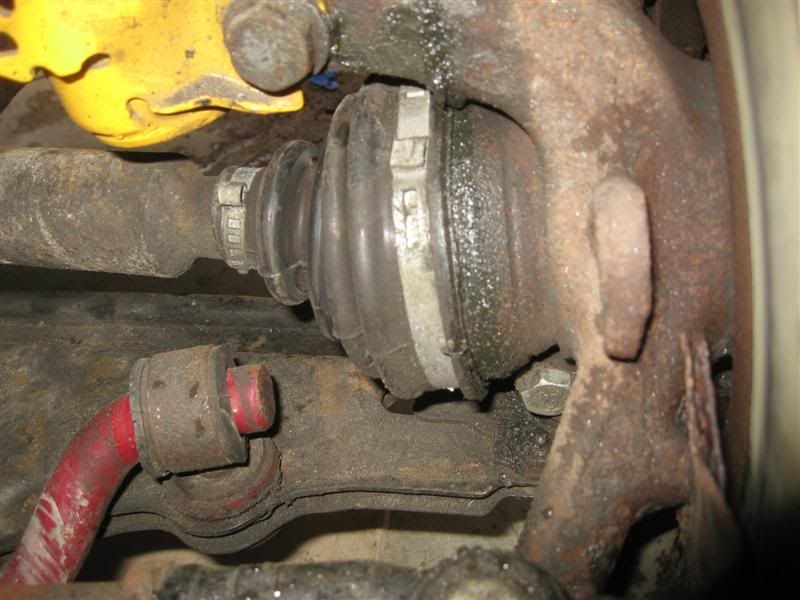
I`d noticed at Bedford that the drivers side outer CV boot was loosing grease, but hadnt split
The metal `clip` that goes round the outside needed tightening a little. Its fine now, I just need to clean off the old grease.
Went for a test drive with Mat, its much better, just what I was expecting. limiter in 3rd is indicated 84, which is 13mph less than the old box, it pulls MUCH better in 3rd now. SUCCESS