Niges MK2 Golf Track car build in 5 weeks.. MASSIVE Thread !

Show us yours....
Post Reply
Nige
Posts: 122
Joined: Fri Sep 01, 2006 6:55 pm
Location: Mirfield, West Yorkshire

Post by Nige »

Thanks for the kind words guys...

Got loads done today, even though I didnt start until late Image

First job was to drill the extra hole in the baseplate for the Cage. I unbolted the existing feet-bolts, used a long bar to move the leg to the side and maganed to get a drill in the drill the plate.
Image

Put the foot back, bolted it up properly and fabricated / welded some closure plates Image
Image

Cut and welded to final part of the X for the door bars. Had to be careful to ensure there was enough clearance so I could still operate the window winder.
Image

Cut off the old plates used for bolting the bar and then cut and profiled the bar that goes over the passengers head, linking the front and rear `hoops`
Image

Repeated the Extra Bolt fitting, closure plate and X bar for the passenger side
Image

Made some closure plates for the rear hoop feet too
Image

Tomorrow I`ll give it all a light rub down with emery paper, then I can paint it. It will look a lot better once thats done Image

Jobs still to do (tomorrow hopefully !):
DONE Fab/fit bar over nearside seat linking front / rear hoops.
DONE Fab/fit remaining parts of door X bars
Clean/spray modified cage
remove dash, fit new speedo cable
whilst dash removed, fit new handbrake light as mine has stopped working
refit bucket seats
fit 2x6-point harnesses
degrease engine
refit undertray.

User avatar
duncan
Posts: 10897
Joined: Thu Jul 27, 2006 3:12 pm
Location: On the podium
Contact:

Post by duncan »

Much better - once that is painted that will look superb.

Nige
Posts: 122
Joined: Fri Sep 01, 2006 6:55 pm
Location: Mirfield, West Yorkshire

Post by Nige »

Yeah, once painted, they look LOADS better.

User avatar
pablo
Posts: 4896
Joined: Thu Nov 09, 2006 10:37 pm

Post by pablo »

Looking good Nige. we'll be looking over your car to get some fabricating tips and picking your brains :grin:
Tntracing
http://www.facebook.com/Tntracing.uk

2015 - MSA Classic & Retro UK Time Attack Champions

Nige
Posts: 122
Joined: Fri Sep 01, 2006 6:55 pm
Location: Mirfield, West Yorkshire

Post by Nige »

Well, didnt quite go as plan today, ended up sidetracked on the exhaust AGAIN ! ImageImagemore on that later in the thread....

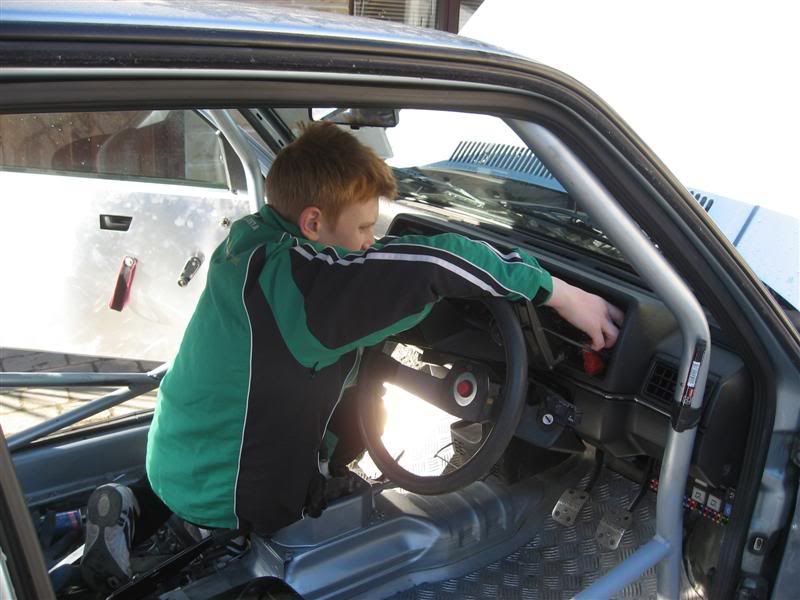
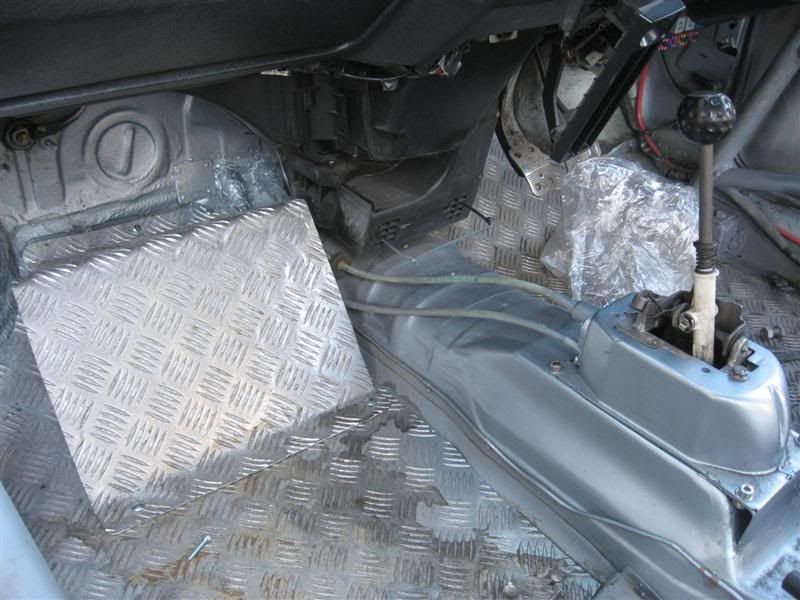
Job No1. Fit new speedo cable. Hmmm, dash removed but it is still fiddly to get my big hands in there. I needed someone with smaller hands, fortunately my ever willing helper Matthew was on hand to do it for me. He helped me ALL day Image
Image

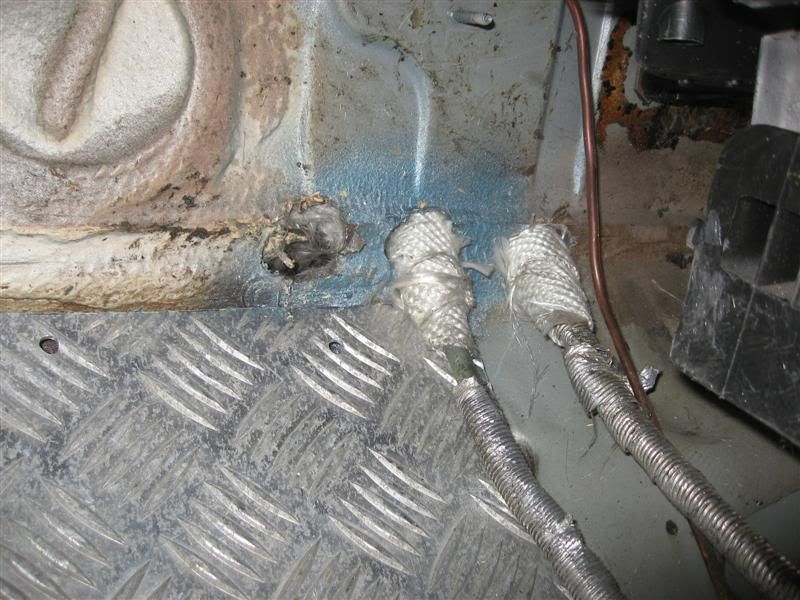
When I`d initially drilled the hole through the bulkhead for the gearchange cables, I`d consciously moved them to the nearside to try and miss the exhaust, I`d overdone it and the left hand cable was too tightly bent, which I think was causing the catching gearchange. I drilled another hole to the right and re-routed both cables. I then wrapped the cables with fibreglass matting to stop them chafing.
Image

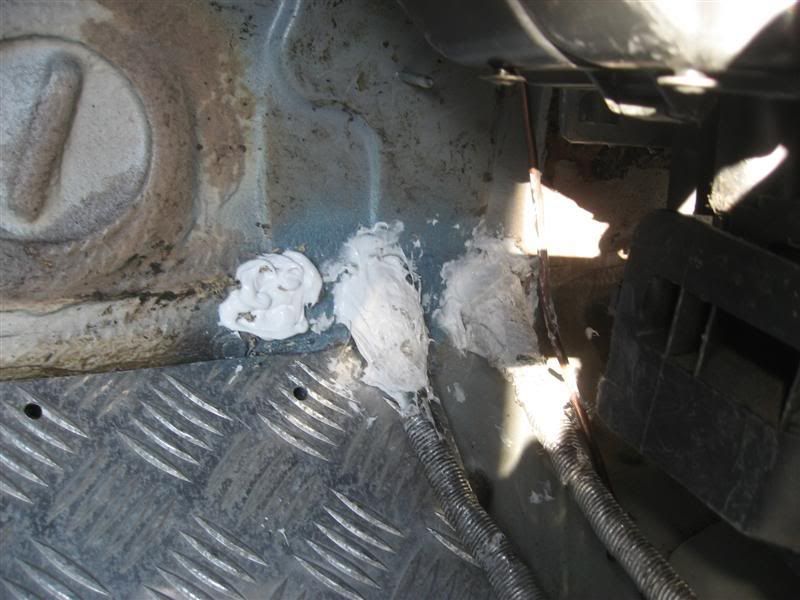
I then applied silicone sealant and kneaded it into the fibreglass to hold it all in place
Image

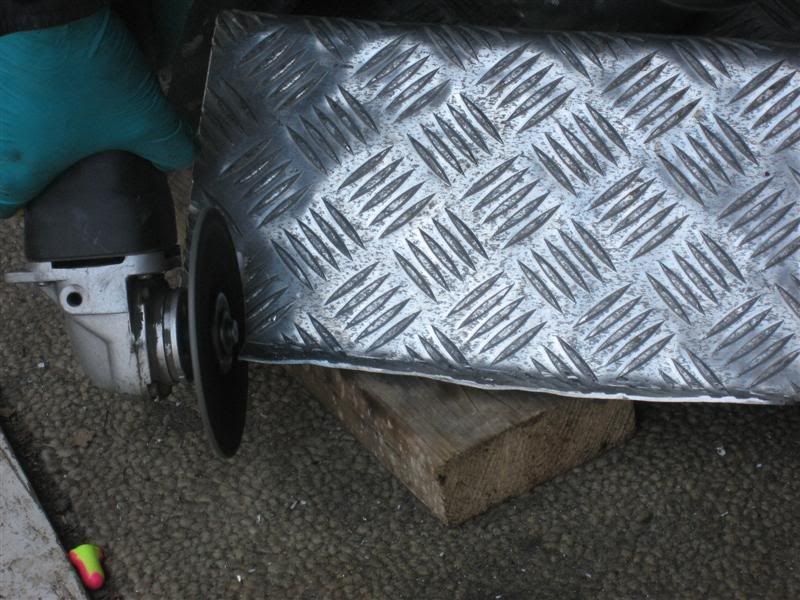
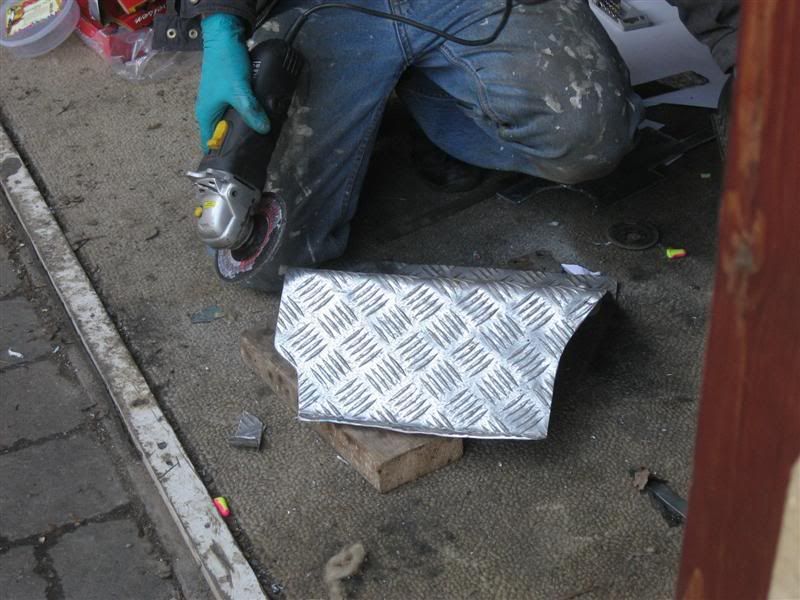
The passenger footbrace was fouling the cables.
Image

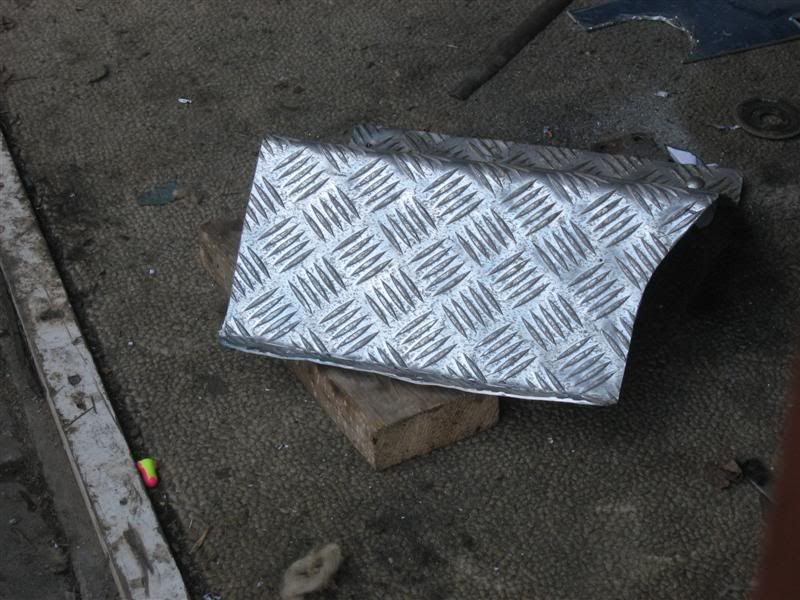
1 angle grinder later.Image
Image
Image

I then made an aluminium blanking plate and riveted it over the now redundant first hole. A quick spray and it looked pretty good.
Image

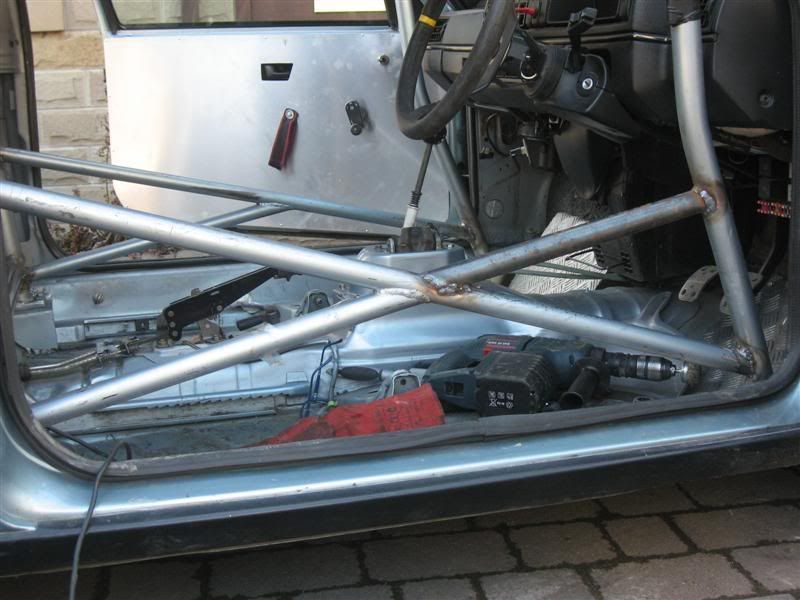
Showing the gearlever and cable routing
Image

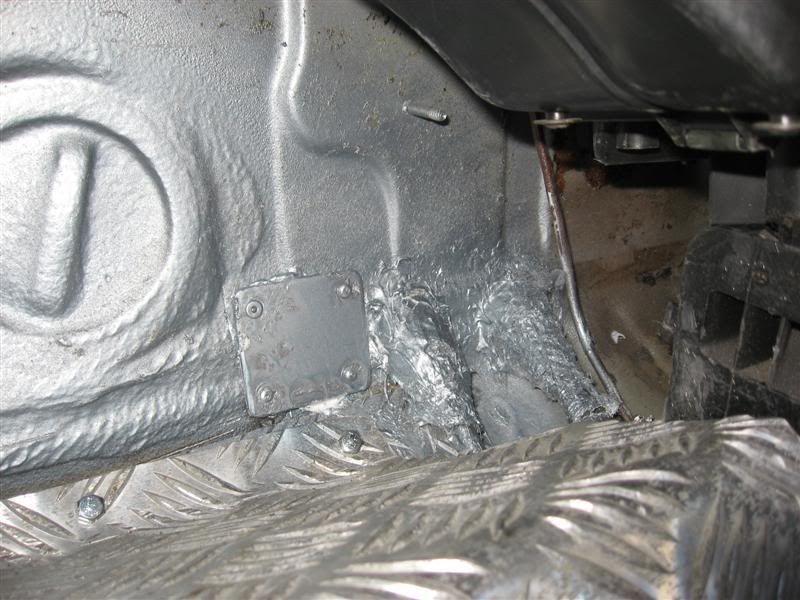
Matthew rebolted it into place, being smaller definately helps
Image

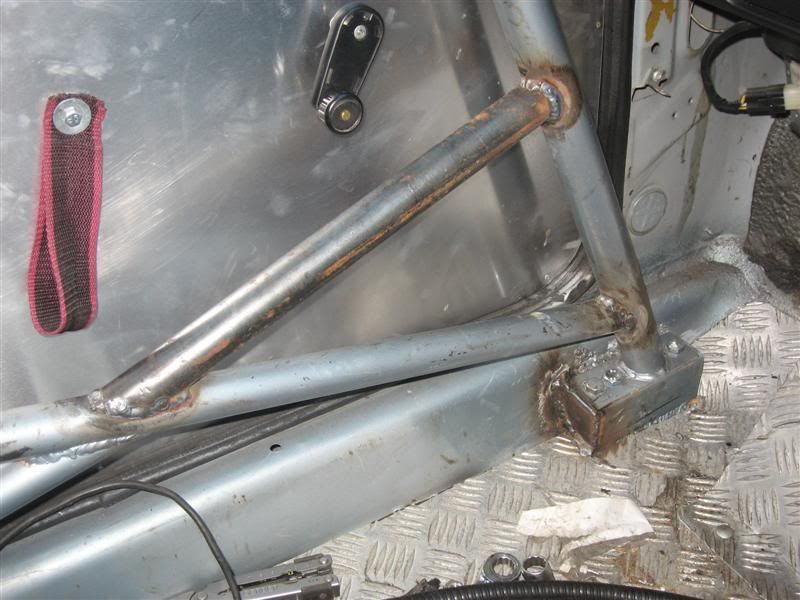
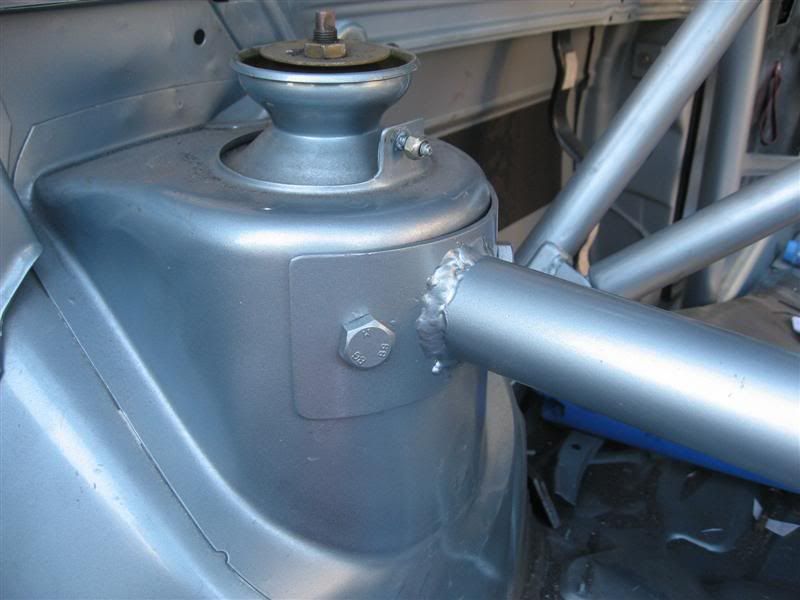
Next job was to fit the rear strut bar.

Drilled the holes in the tower
Image

Bolted it up nice and tight, Matthew being outside and holding the nut in place made a hard job easy.Image
Image

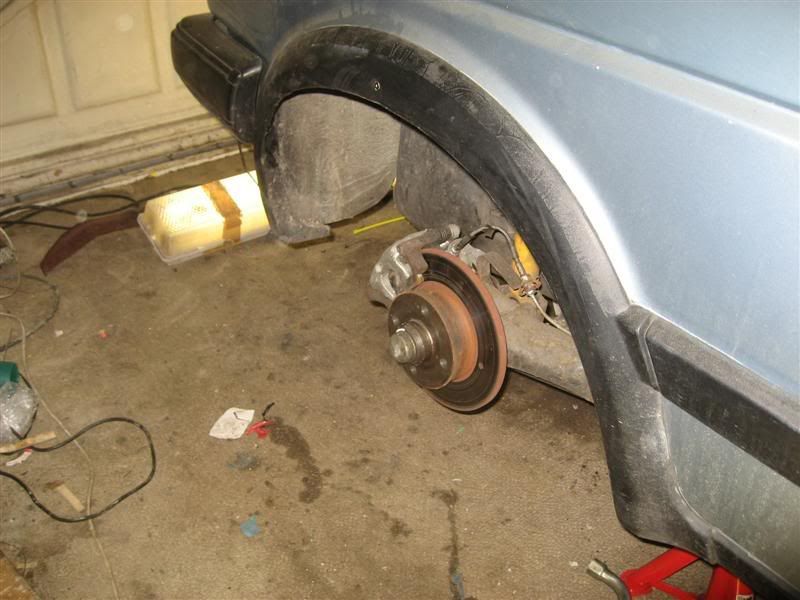
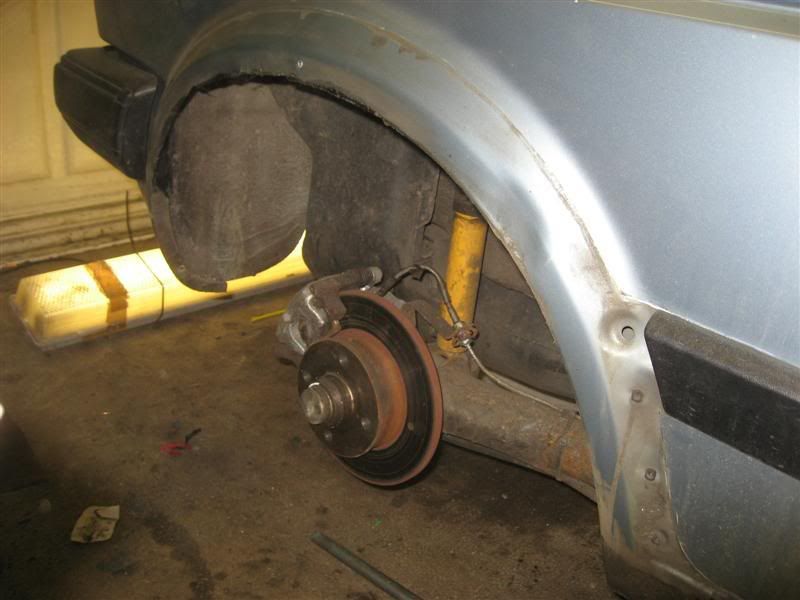
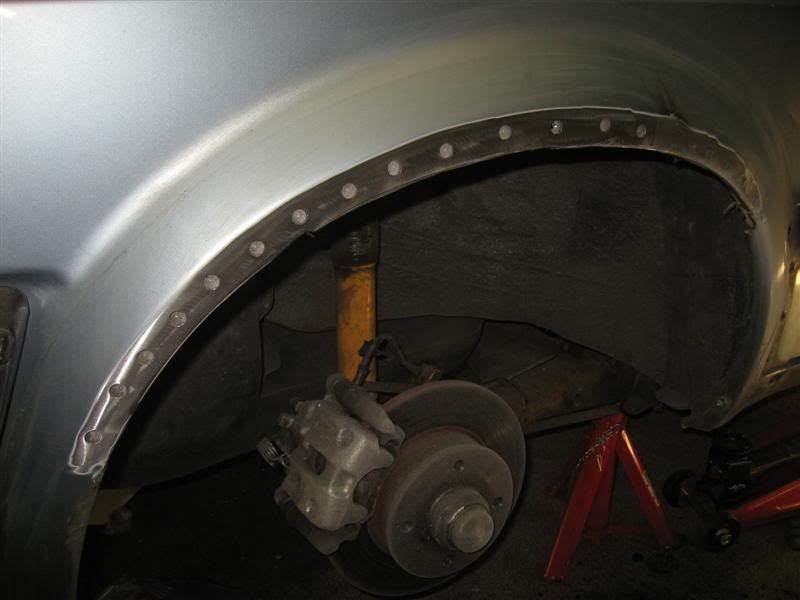
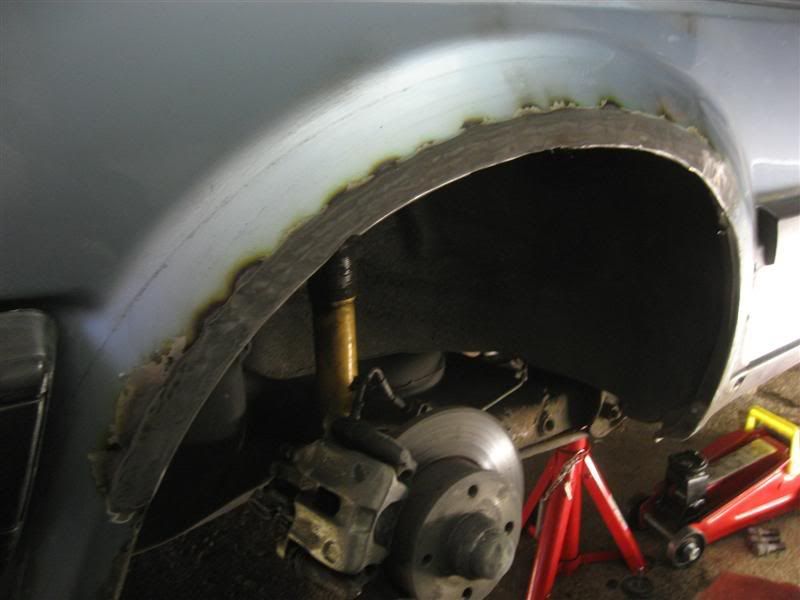
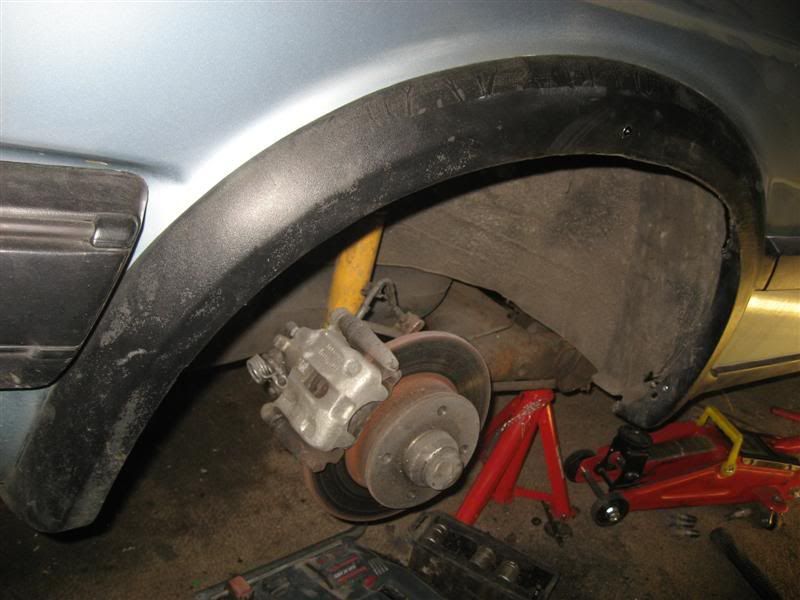
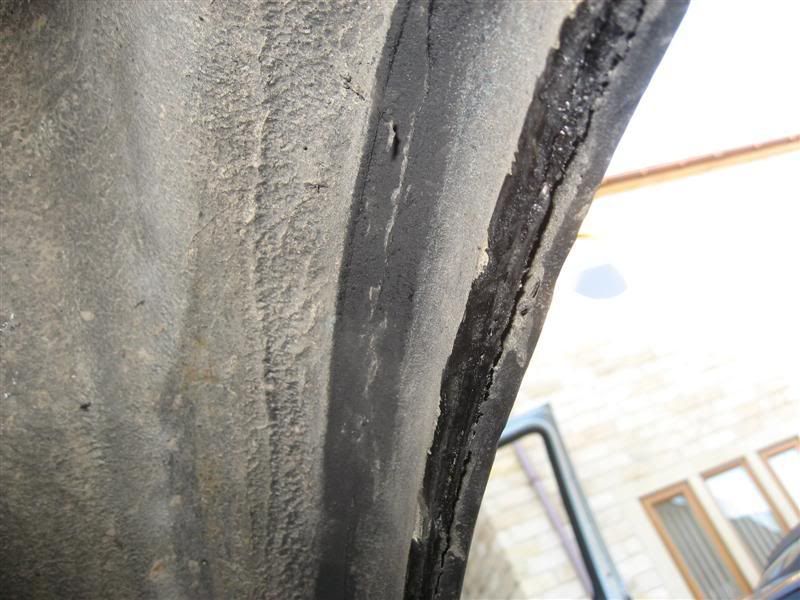
I`d trimmed the wheelarches in Germany last year, but I was still not 100% with them, there was still a `lip` as you can see
Image

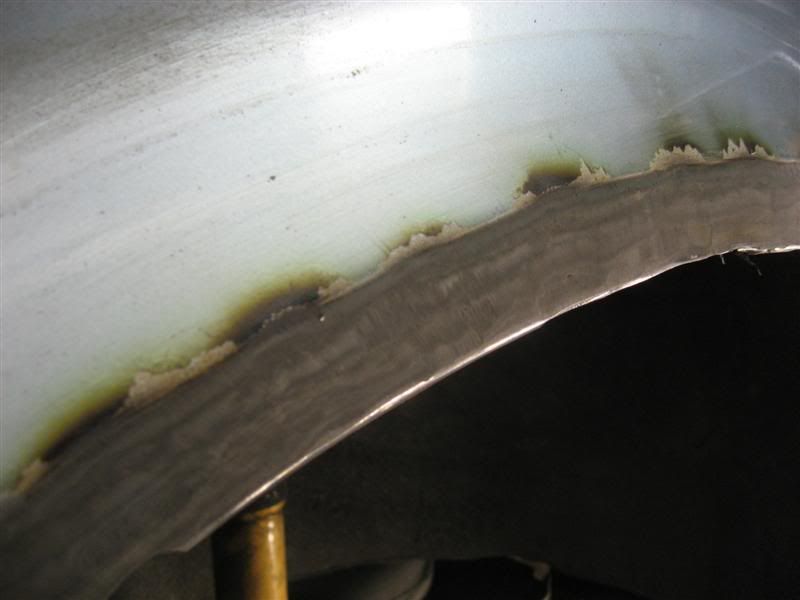
5 minutes and the tool of today (angle grinder) saw this.
Image

A quick spray with some black paint to seal it and stop any rust.
Image

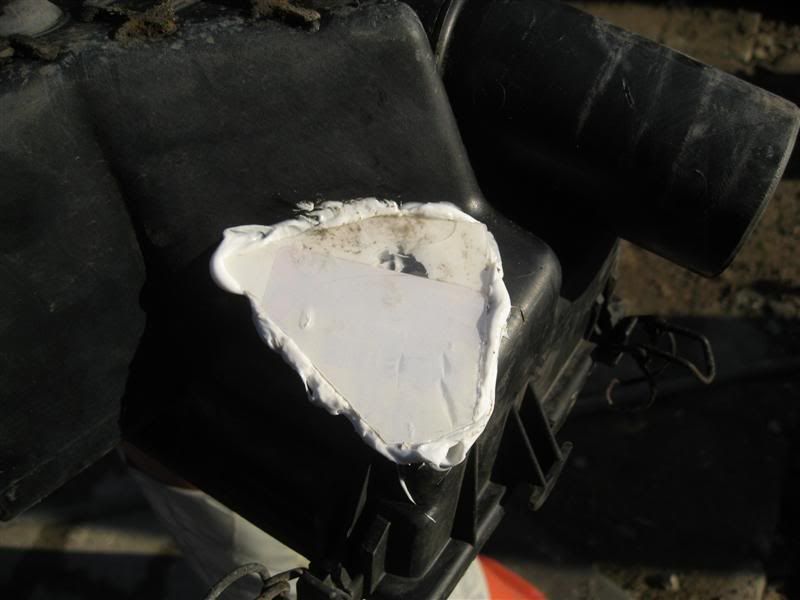
A popular `mod` is to drill the airbox, however, this also increases noise and as I am trying to ensure I dont fall foul of the very strict limits at Bedford next week, I decided to cover some of them up.

Applied silicone around the holes.
Image

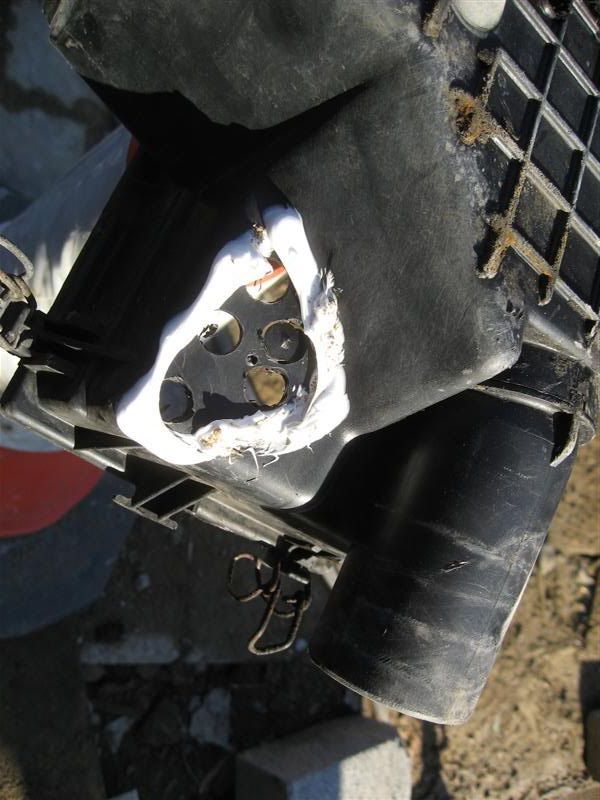
I then cut a piece of plastic to fit and applied it over the holes.
Image

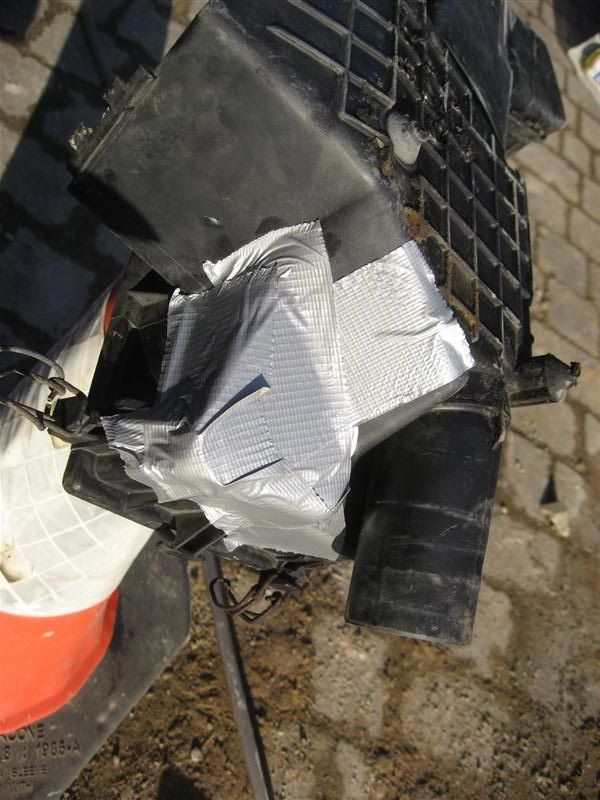
Some gaffer tape held it all in place.
Image

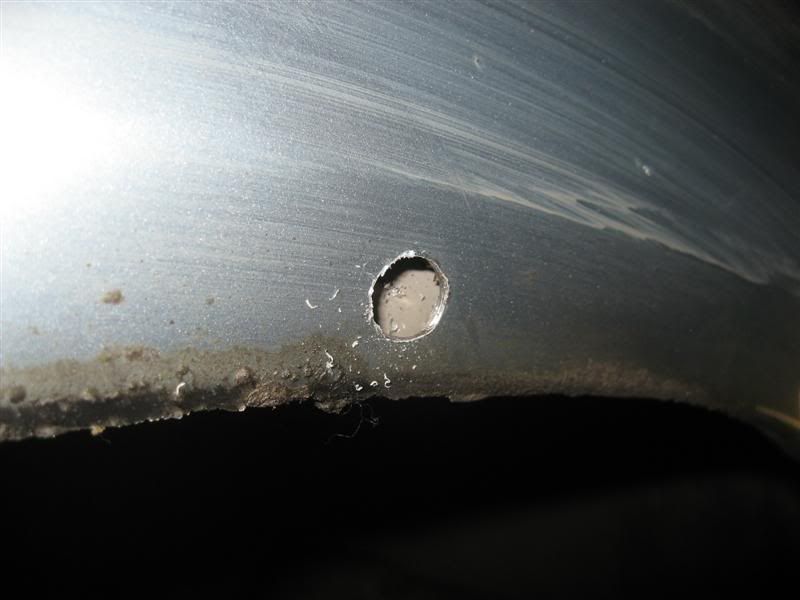
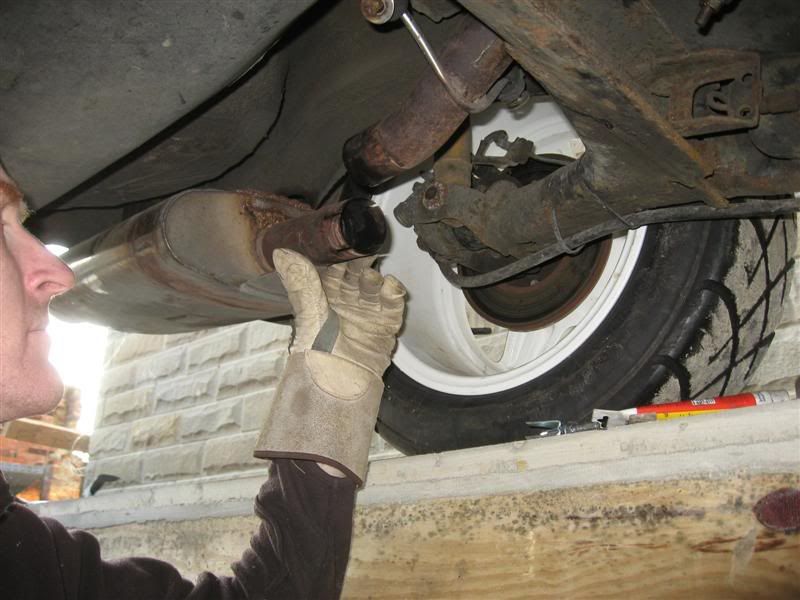
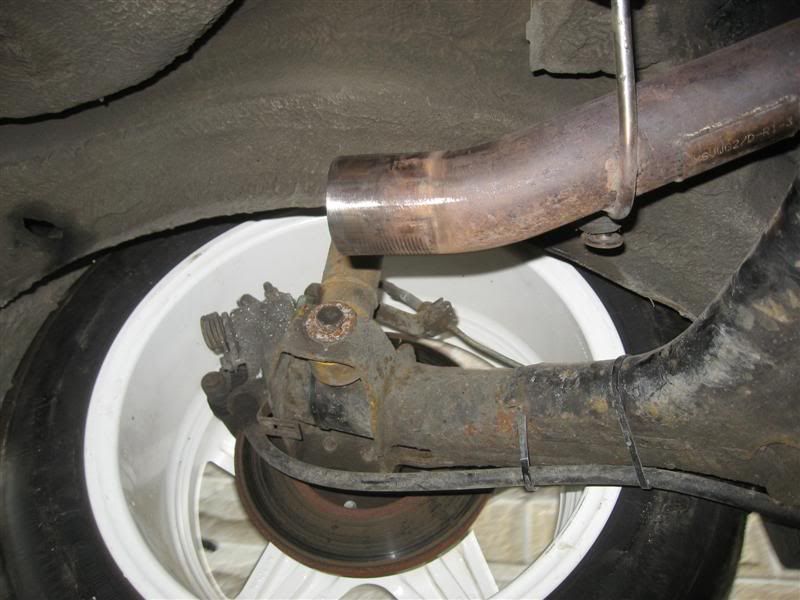
Found another part of the exhaust that was blowing
Image

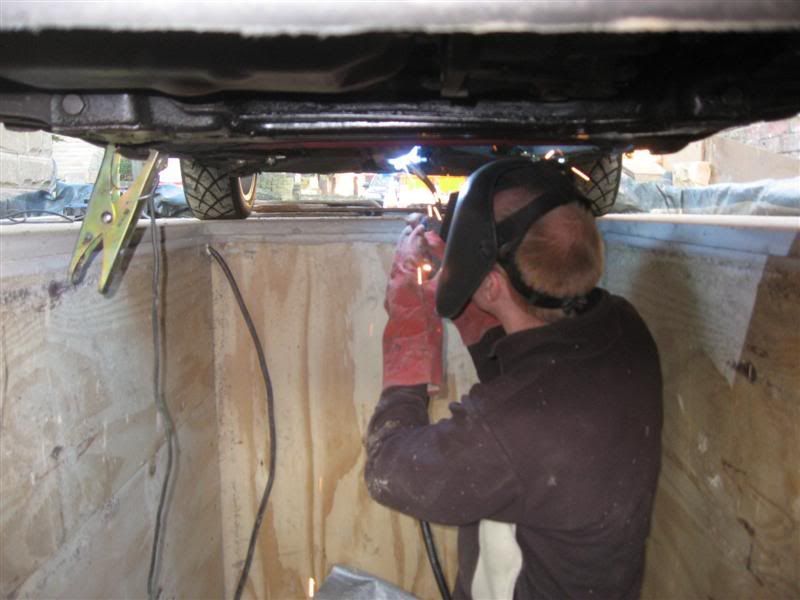
My first job done from the PIT, it made it SO much easier.
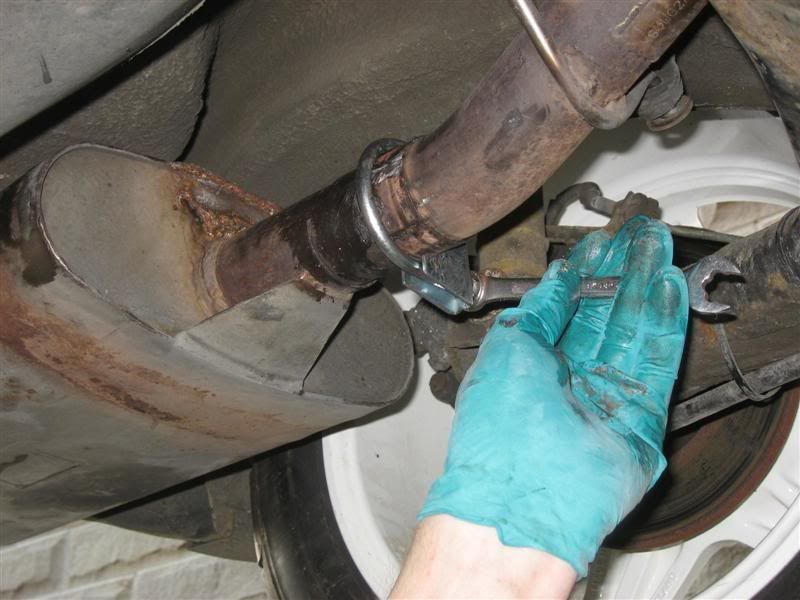
Image

Split the exhaust
Image

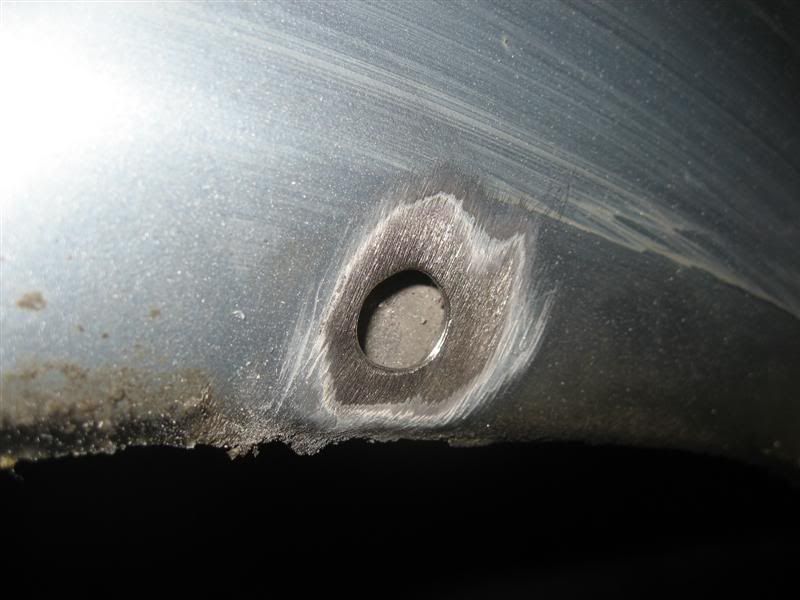
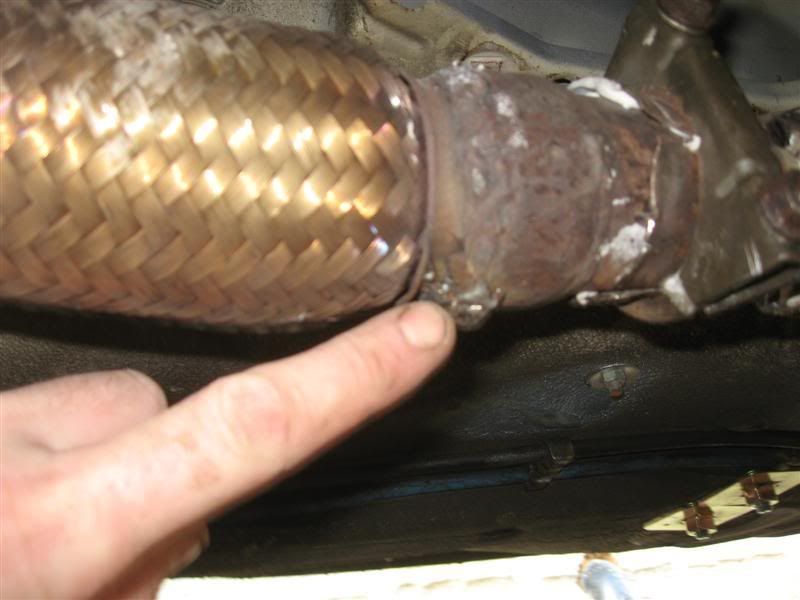
Clean with some sandpaper
Image

Nice and clean Image
Image

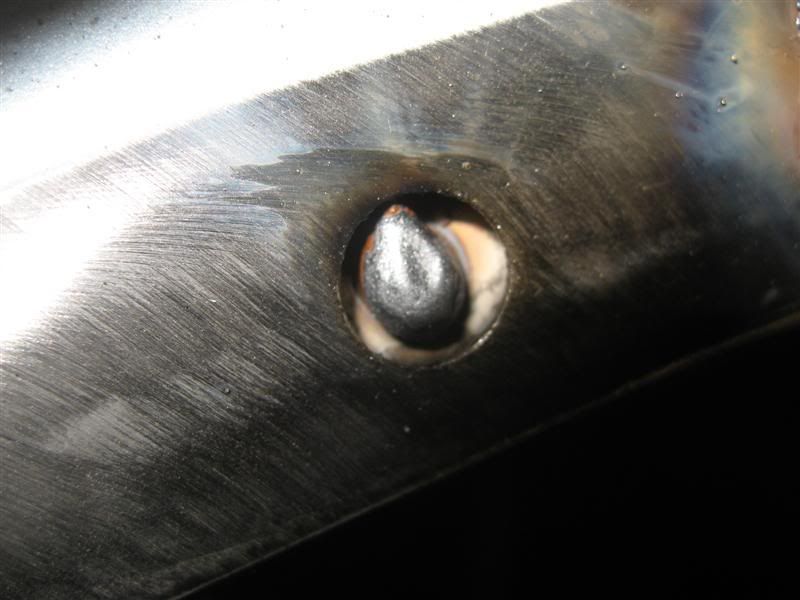
Some exhaust cement, new U clip (coated with copperslip grease)
Image

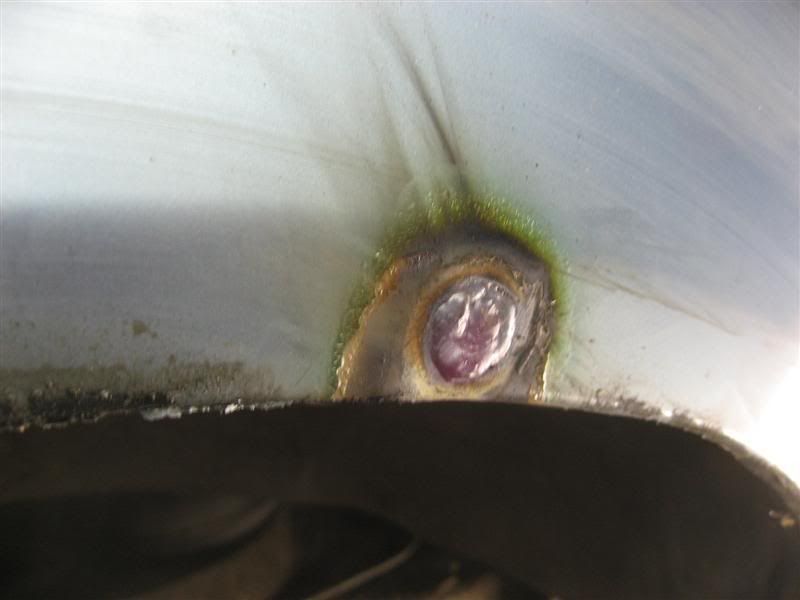
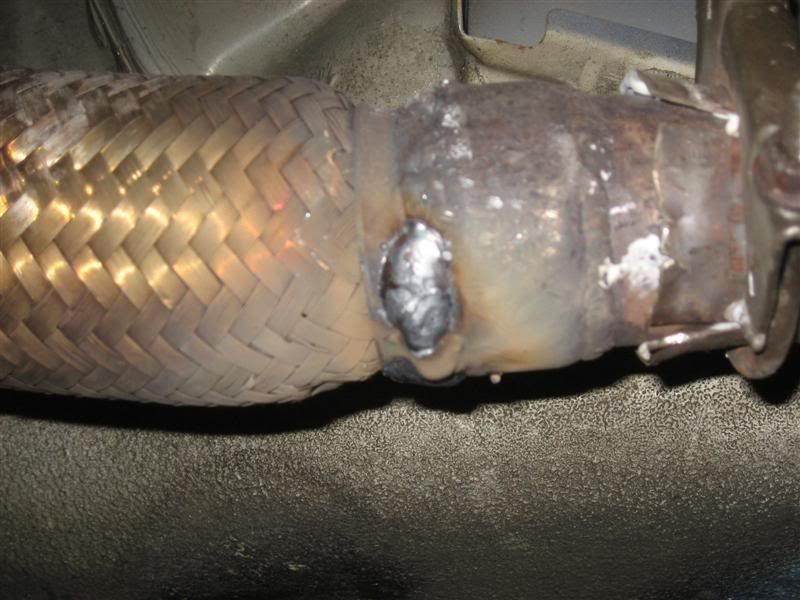
Oh joy of joys. I thought I`d found the leaks, nope the weld was `dripping` moisture when the car was started.
Image

Ground off the old weld
Image

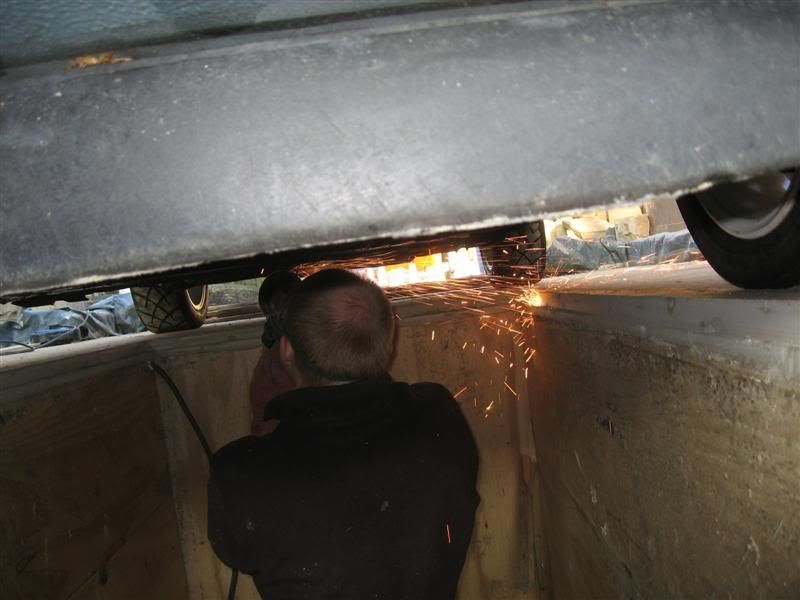
Then rewelded to ensure it was sealed
Image

yaay, sealed.
Image

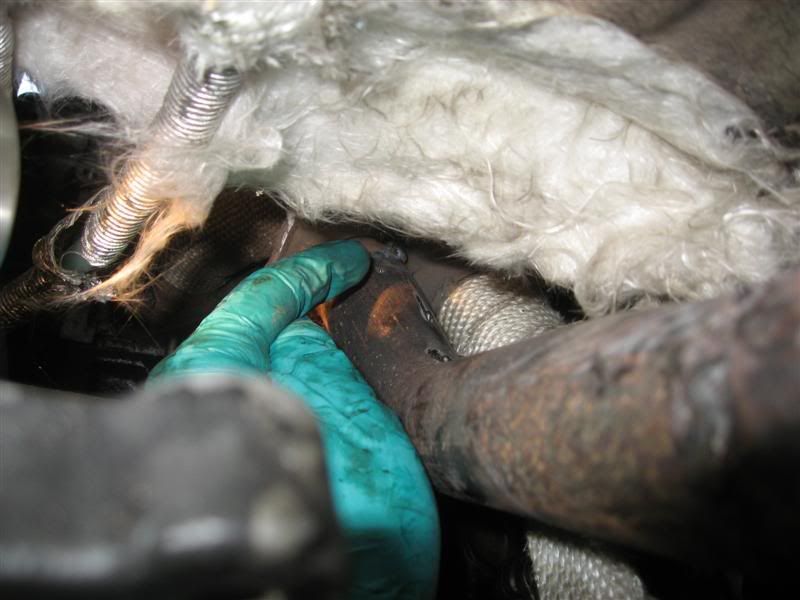
start it up again, hmmm, whats that noise I can hear. Oh its the exhaust blowing AGAIN Image

This time, it was leaking from the downpipe, where it joined the manifold. I managed to get the welding torch up close enough to seal it which was NOT easily accessible. Pit the the rescue ! Fortunately is was only a small crack and I was able to seal it Image
Image
Image

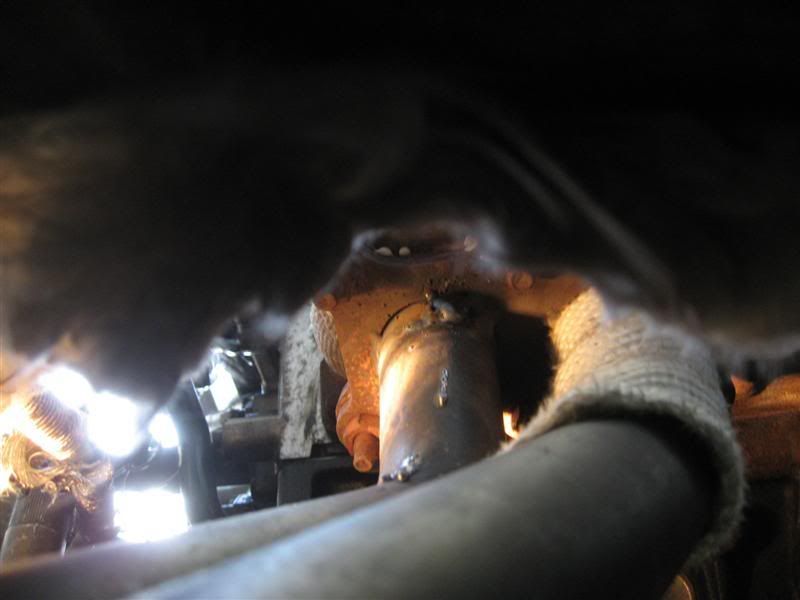
1 SEALED exhaust later, yes thats right, NO LEAKS. ImageImageImage
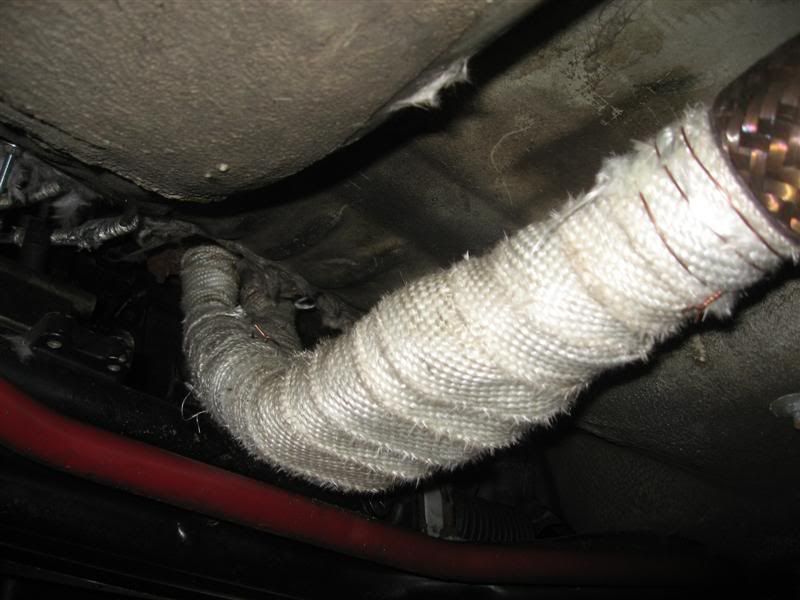
I applied the heatwrap to the downpipe. I doubt I`d be able to do it from axle stands, but the Pit helped.
Image

steveVR6
Posts: 257
Joined: Wed Nov 29, 2006 9:14 pm
Contact:

Post by steveVR6 »

I have the very same problem with the exhaust on my Golf. My next plan is to weld a piece of flexi pipe at the bottom of the manifold. Then if that doesn't work then i'll look to uprate the engine mounts(not cheap :o )

Is Bedford really that strict on noise for you to block the holes on the airbox?

I have a full Ashley system with manifold and modified air intake and was sound tested at Snetterton a couple of weeks ago at 92db.

Great reading the progress with the golf, keep it coming :wink:

Nige
Posts: 122
Joined: Fri Sep 01, 2006 6:55 pm
Location: Mirfield, West Yorkshire

Post by Nige »

steveVR6 wrote:I have the very same problem with the exhaust on my Golf. My next plan is to weld a piece of flexi pipe at the bottom of the manifold.

Is Bedford really that strict on noise for you to block the holes on the airbox?
I have a flexi piece already, I`m certain it works too, I think I cracked the manifold (again) when I was removing the system last week, it was very stiff and my manhandling probably caused the crack.

Bedford are incredibly strict, 87.5dB drive by, ONE fail and thats it, day over and you go home, NO second chances. Thats why I took the extra precaution of covering the airbox extra holes, it simply isnt worth the risk IMO. I`ll take them off afterwards, ready for the Ring, but for Bedford, I`d rather be safe than sorry.

IWANT1
Posts: 2832
Joined: Fri Jul 28, 2006 9:26 pm
Location: cambridgeish

Post by IWANT1 »

Great step by step project :wink:

A little tip bin the exhaust paste its crap stuff, use silicone you may think its crazy but try it next time you will be surprised how well it works been using it on exhausts for years :thumb:
Image
" Uh Betty you should of seen this car in Ely today!! it had stickers and stripes
all over it, and when it started up, the noise!!!, I could feel my teeth rattling!!!"

User avatar
duncan
Posts: 10897
Joined: Thu Jul 27, 2006 3:12 pm
Location: On the podium
Contact:

Post by duncan »

87.5db is whisper quiet :o

Good progress Nigel

wouldnt gaffer tape have done the job on the air box on its own?

Nige
Posts: 122
Joined: Fri Sep 01, 2006 6:55 pm
Location: Mirfield, West Yorkshire

Post by Nige »

After being told that trimming the wheelarches was a bad idea, I took steps to remedy it this evening with some `plug welding` Image

Take one rear wheel arch
Image

Remove the cover
Image

Drill hole in OUTER skin only.
Image

remove paint around hole
Image

Start welding from the CENTRE of the hole Image
Image

Ending up with a plug weld, securing the inner arch to the outer.
Image

Repeat by drilling lots more holes
Image

Plug weld those holes
Image

Check good penetration by the welds ALMOST burning through the inner panel
Image

Grind of the `proud` part of the welds
Image

Smooth the arch
Image

At this point, you would fill and smooth the arch, then spray as normal. As this is a track car, I didnt fill it, just primer and topcoat.

Liberally coat the inside and edge with underseal
Image

Reapply the arch
Image

One weakened arch restrengthened in an hour Image
I`ll be doing the other side tomorrow evening.

Post Reply